
Setting up visual filters (color swatches) on collection pages using metaobjects
While the ability to configure custom filters through the Search & Discovery app on Shopify is not a new concept, the recent announcement from Shopify brings an exciting update (released in November 2023, announced in Shopify winter editions 2024)!
Now, in addition to setting up product metafields for custom filtering on collection pages, merchants can leverage metaobjects and the Search & Discovery app to establish visual filters, aptly named “color swatches”. These swatch filters come in various forms, ranging from classic color swatches to image files, or even only plain text.
In this article, we’ll delve into the detailed process of implementing visual filters(=color swatches)using metaobjects and the Search & Discovery app for an enhanced filtering experience.
Create a metaobject definition
To begin, configure a metaobject definition that serves as the foundational “template” for storing metaobject entries. If you haven’t established a metaobject definition yet, we recommend referring to our previous article on leveraging metaobjects for your Shopify store: How to leverage metaobjects for your Shopify store?.
The metaobject definition tailored for filter swatches must meet specific criteria to ensure seamless functionality.
It should include at least one text field (such as single-line text, decimal, integer, etc.), serving as the color label (e.g., yellow), and at least one color field or file field with images (our example uses a color field). This field will represent either the color itself or a custom color image, particularly useful when incorporating prints.
Here’s a step-by-step guide to configuring the metaobject definition for filter swatches:
- Navigate to “Settings” -> “Custom data” in your Shopify admin.
- Scroll down to “Metaobjects” and click “Add definition”, or access Metaobjects directly through “Content”.
- Click “Add definition”.
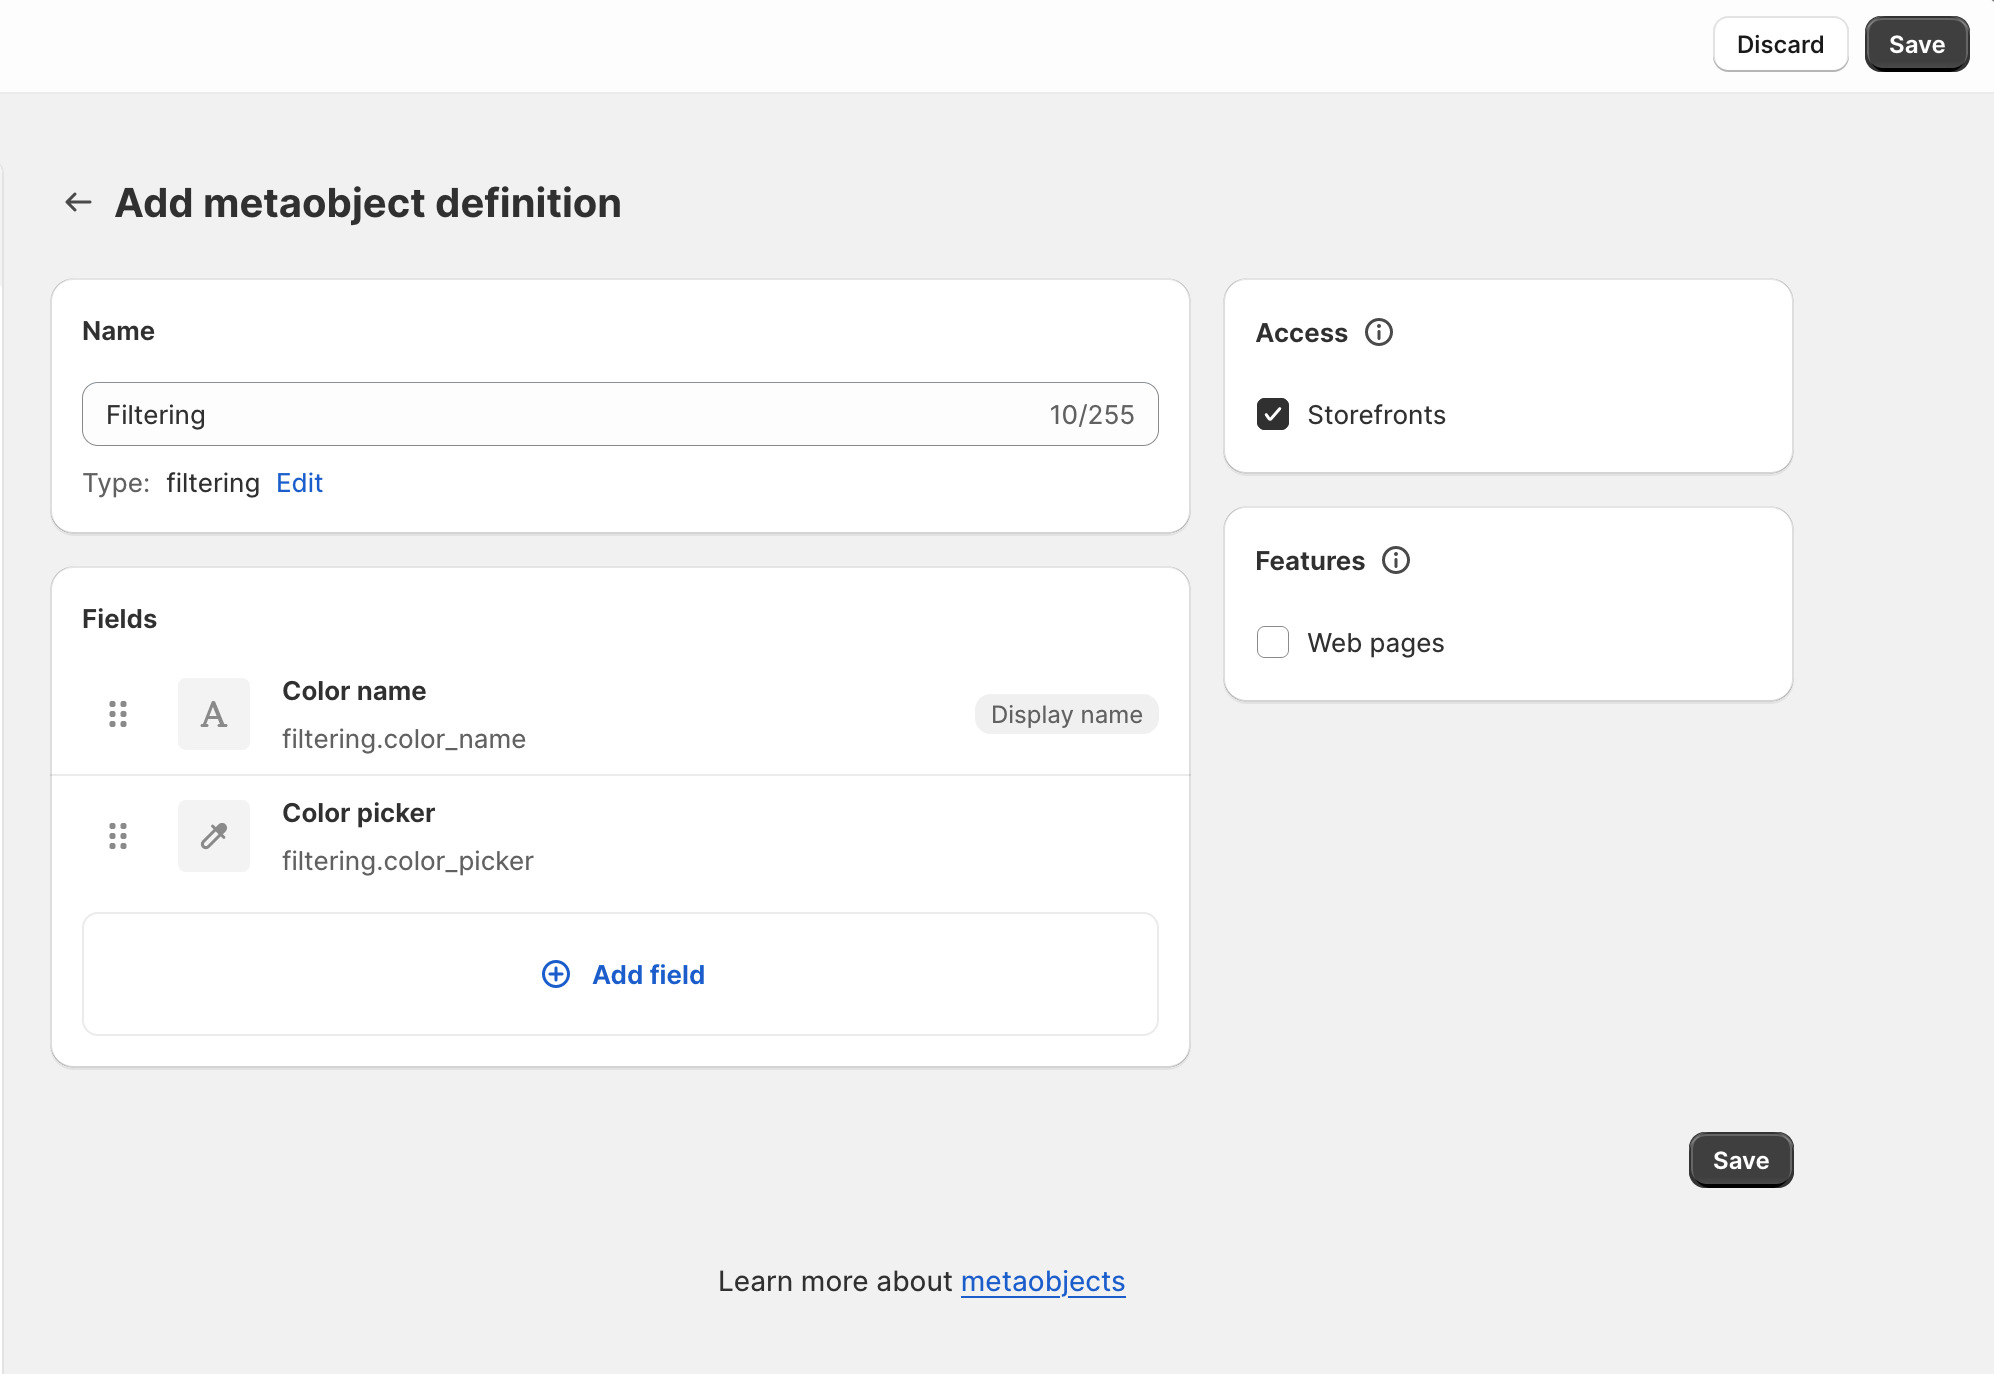
- Configure the metaobject definition by adding the name and fields. In this example we used this setting:
- Metaobject definition name: Filtering (Color filter or whatever you wish)
- Fields:
- Label (single line text)
- Color (color type)
- Ensure you check off “Storefronts” in the Access section.
- Save the definition.
Populate your metaobject definition with entries
To implement the visual filters for your products, we need to add the necessary metaobject entries, representing the colors that will later be assigned to your products.
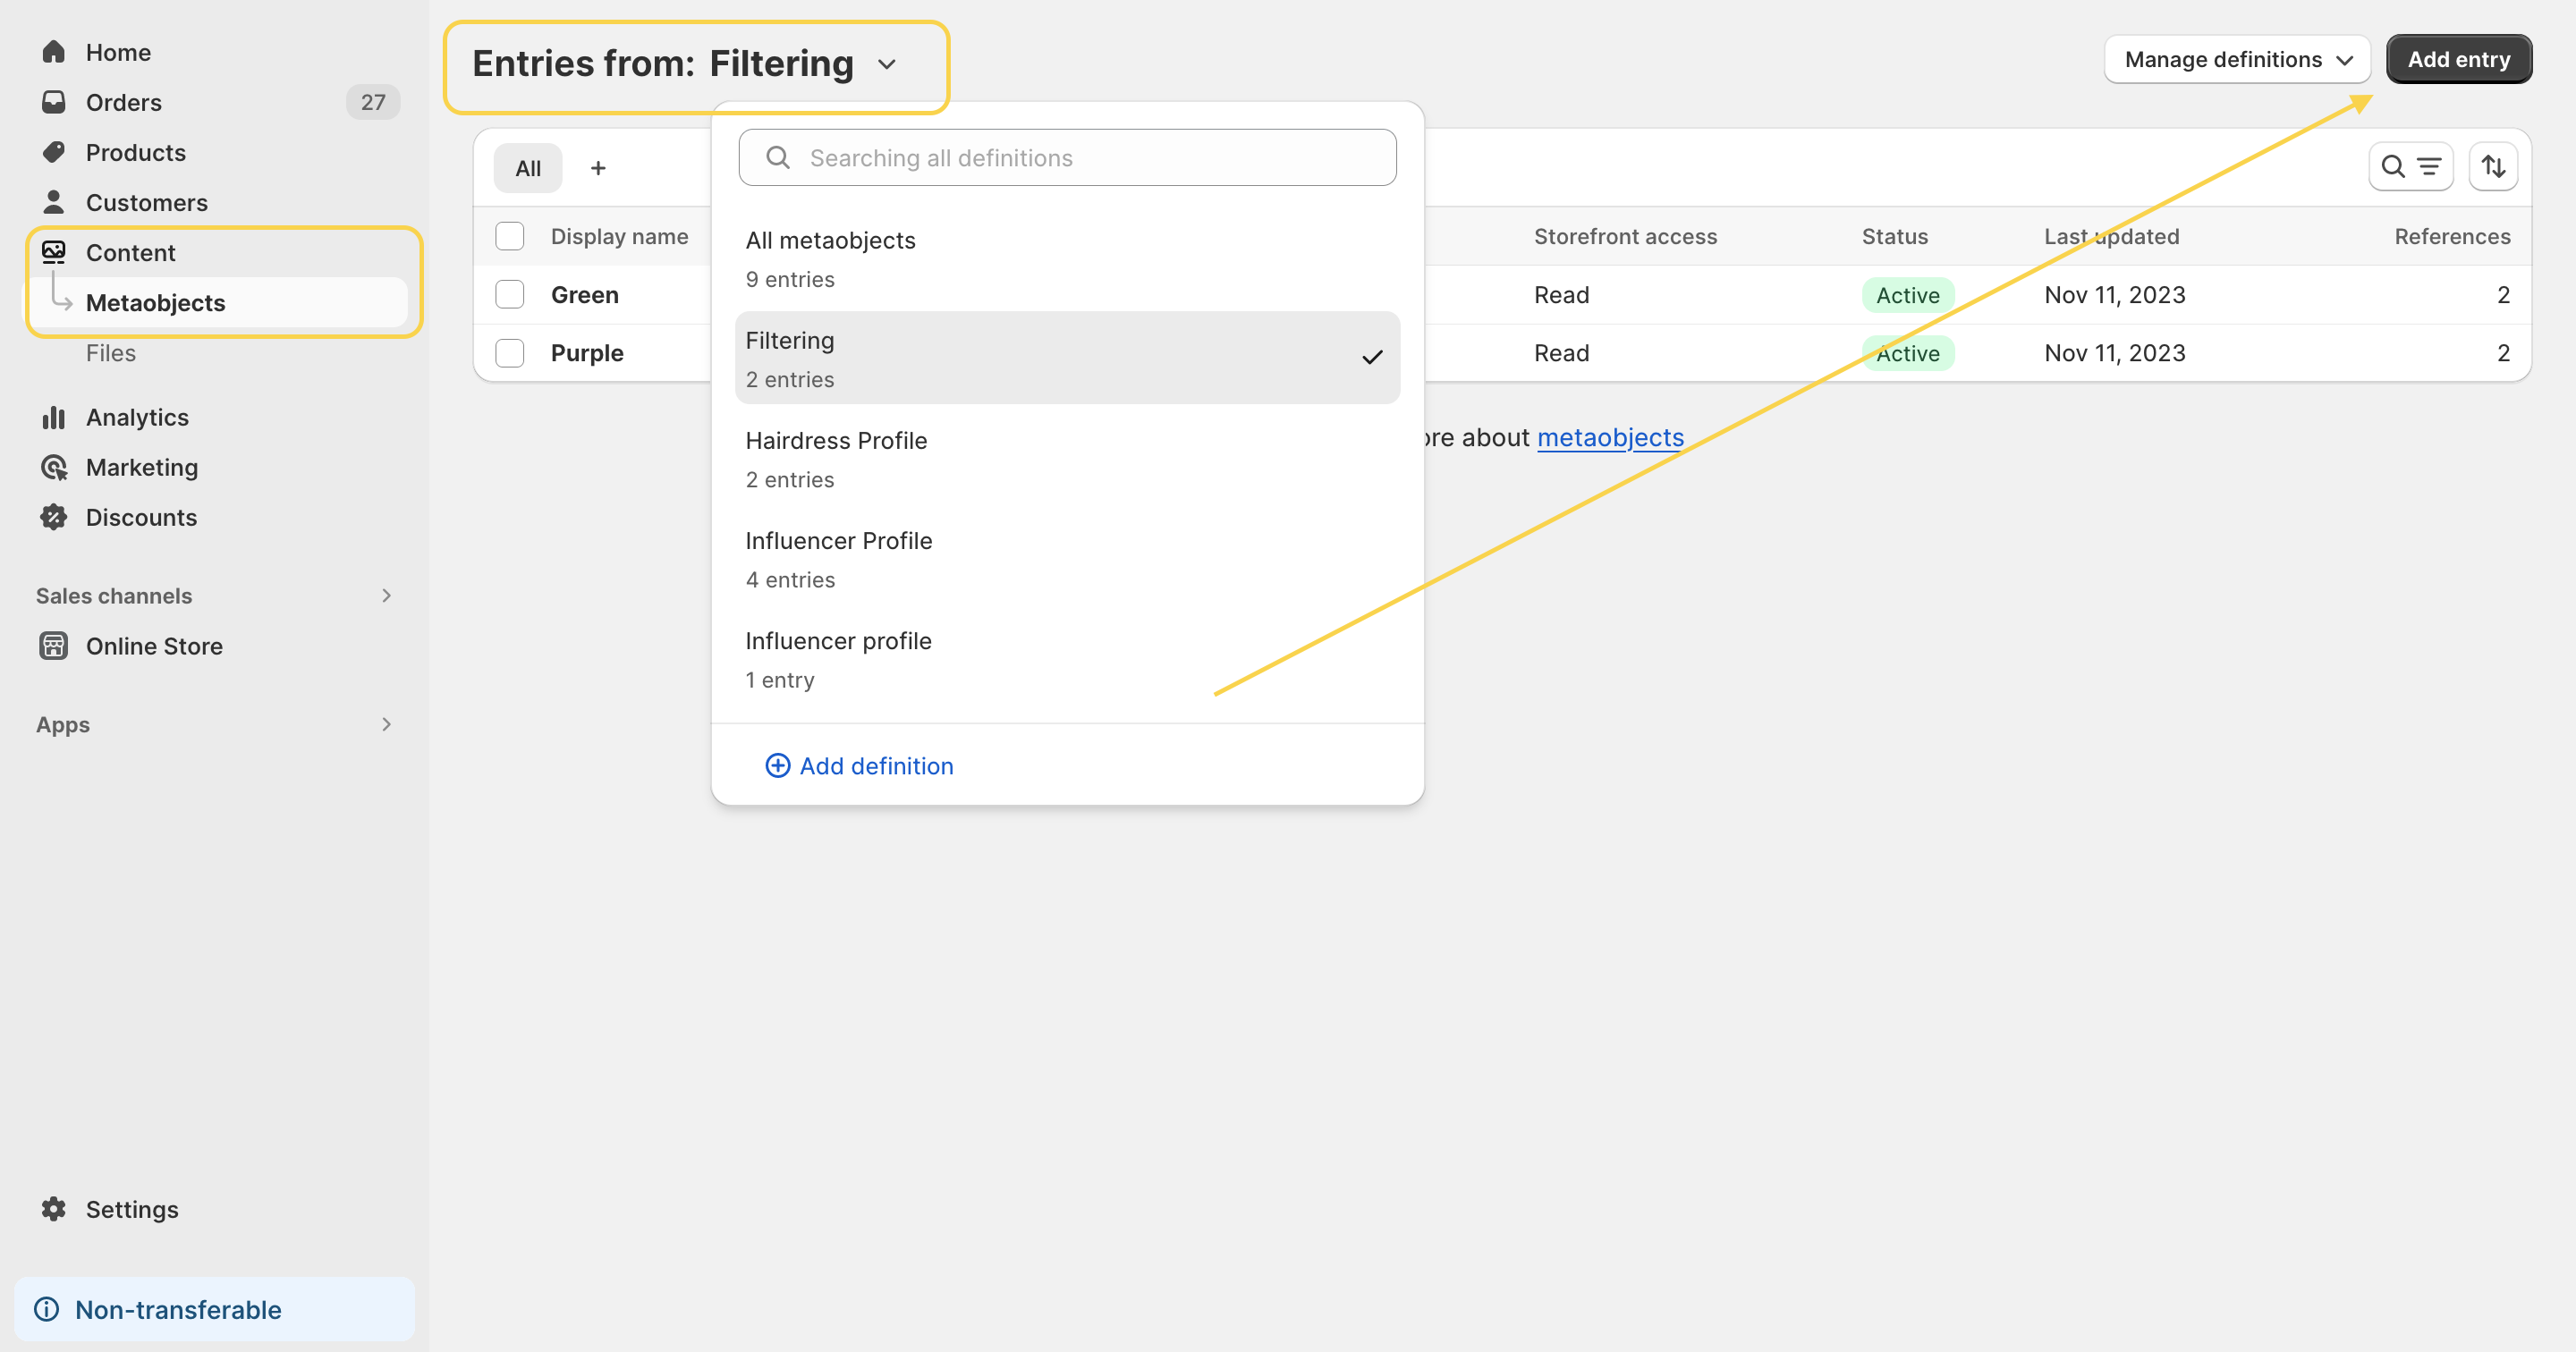
- Access your Shopify admin and navigate to “Content” -> “Metaobjects”.
- In the upper dropdown menu, select your designated metaobject definition, and click the black “Add entry” button.
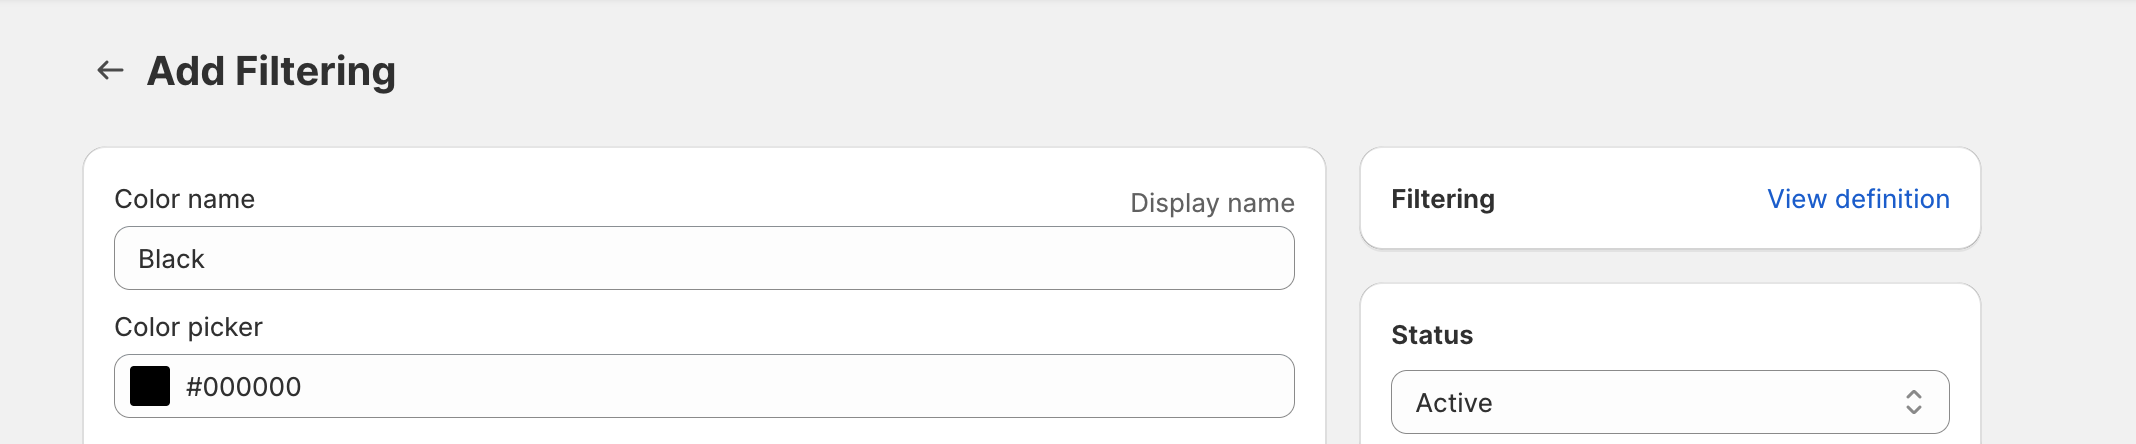
- Input the relevant information for each color you wish to assign to your products. This data will serve as the basis for the filtering options on your collection page.
- Repeat these steps for each color you want to include in your visual filters.
Configuring filters in the Search & Discovery App
Now, it’s time to seamlessly integrate visual filtering into your store using the Search & Discovery app.
- If you haven’t done already, install theSearch & Discovery app from the Shopify app store.
- Open the app and navigate to the “Filters” section.
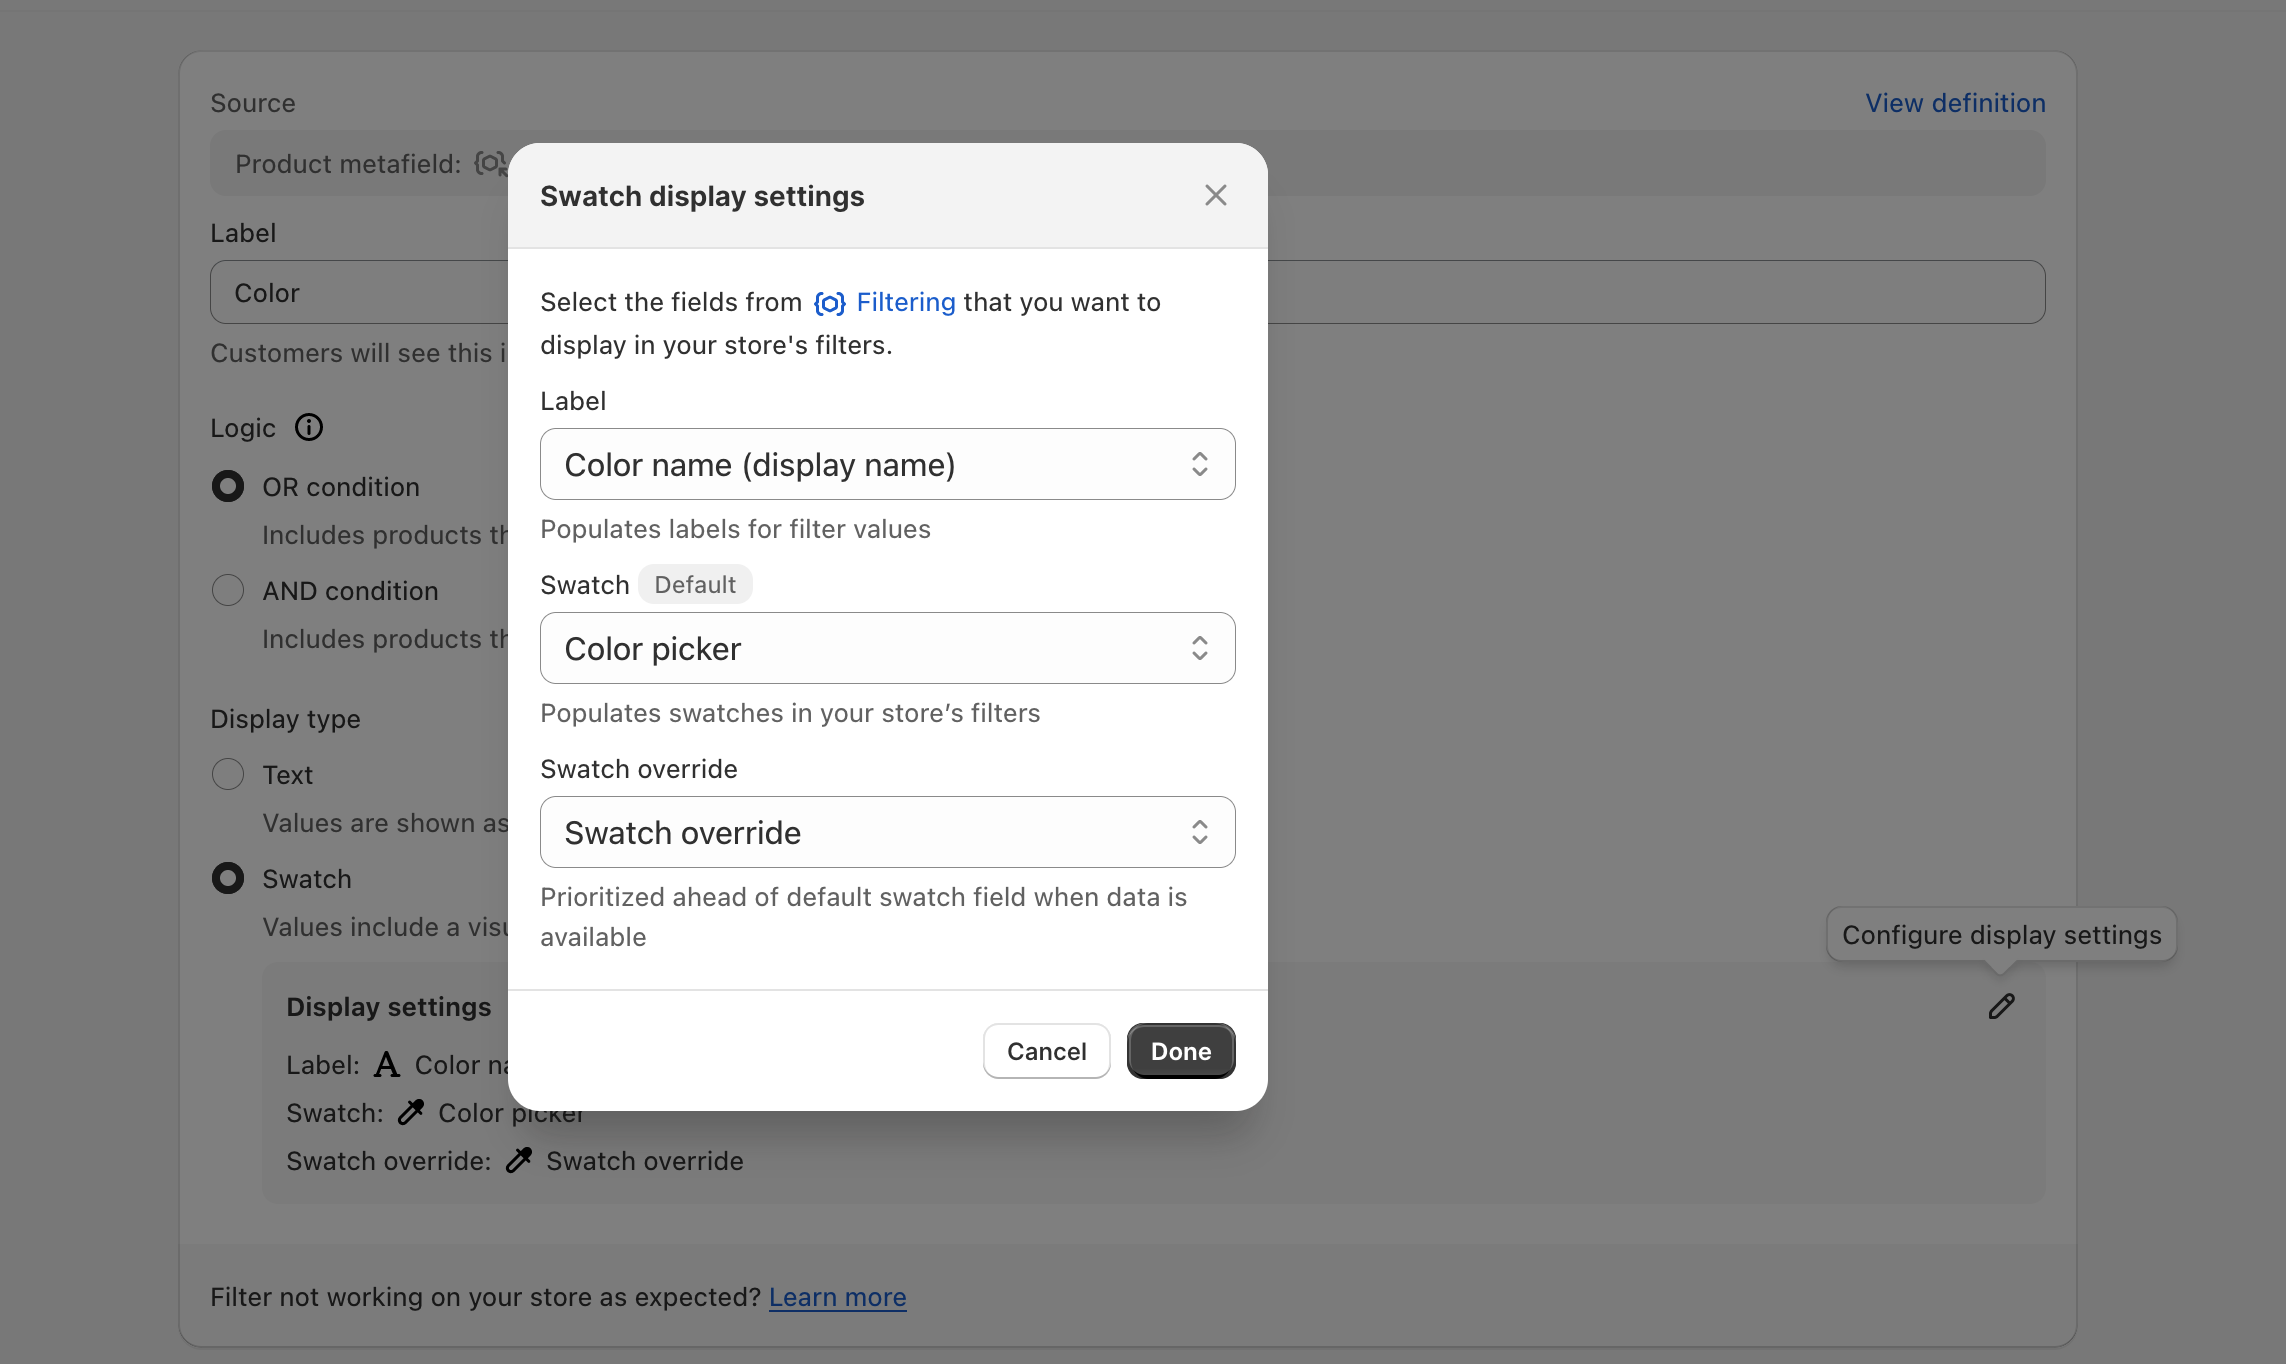
- Name your filter (e.g., Color) and configure the logic (AND/OR) based on your specific requirements.
- Under the display type, ensure you select “Swatch” and adjust the following settings:
- Label – Color name (display name)
- Swatch – Color picker
- Swatch override – Swatch override (this is added by your theme automatically; you may not see this option)
- Save the filter.
Activate color swatches in your theme
To bring your visual filters to life, it’s essential to enable color swatches in your theme settings. Follow these steps to seamlessly integrate color swatches into your Shopify theme section:
- Navigate to your Shopify admin -> Online store -> Click on “Customize” next to the theme you want to configure color swatches for.
- Depending on your theme, locate the option to enable color swatches on collection pages. This setting may be found within your general theme settings.
- For most themes where this feature has been tested, you’ll need to populate the “Swatch color list” with all the HEX codes associated with your color entries. Refer to the provided screenshot for guidance.
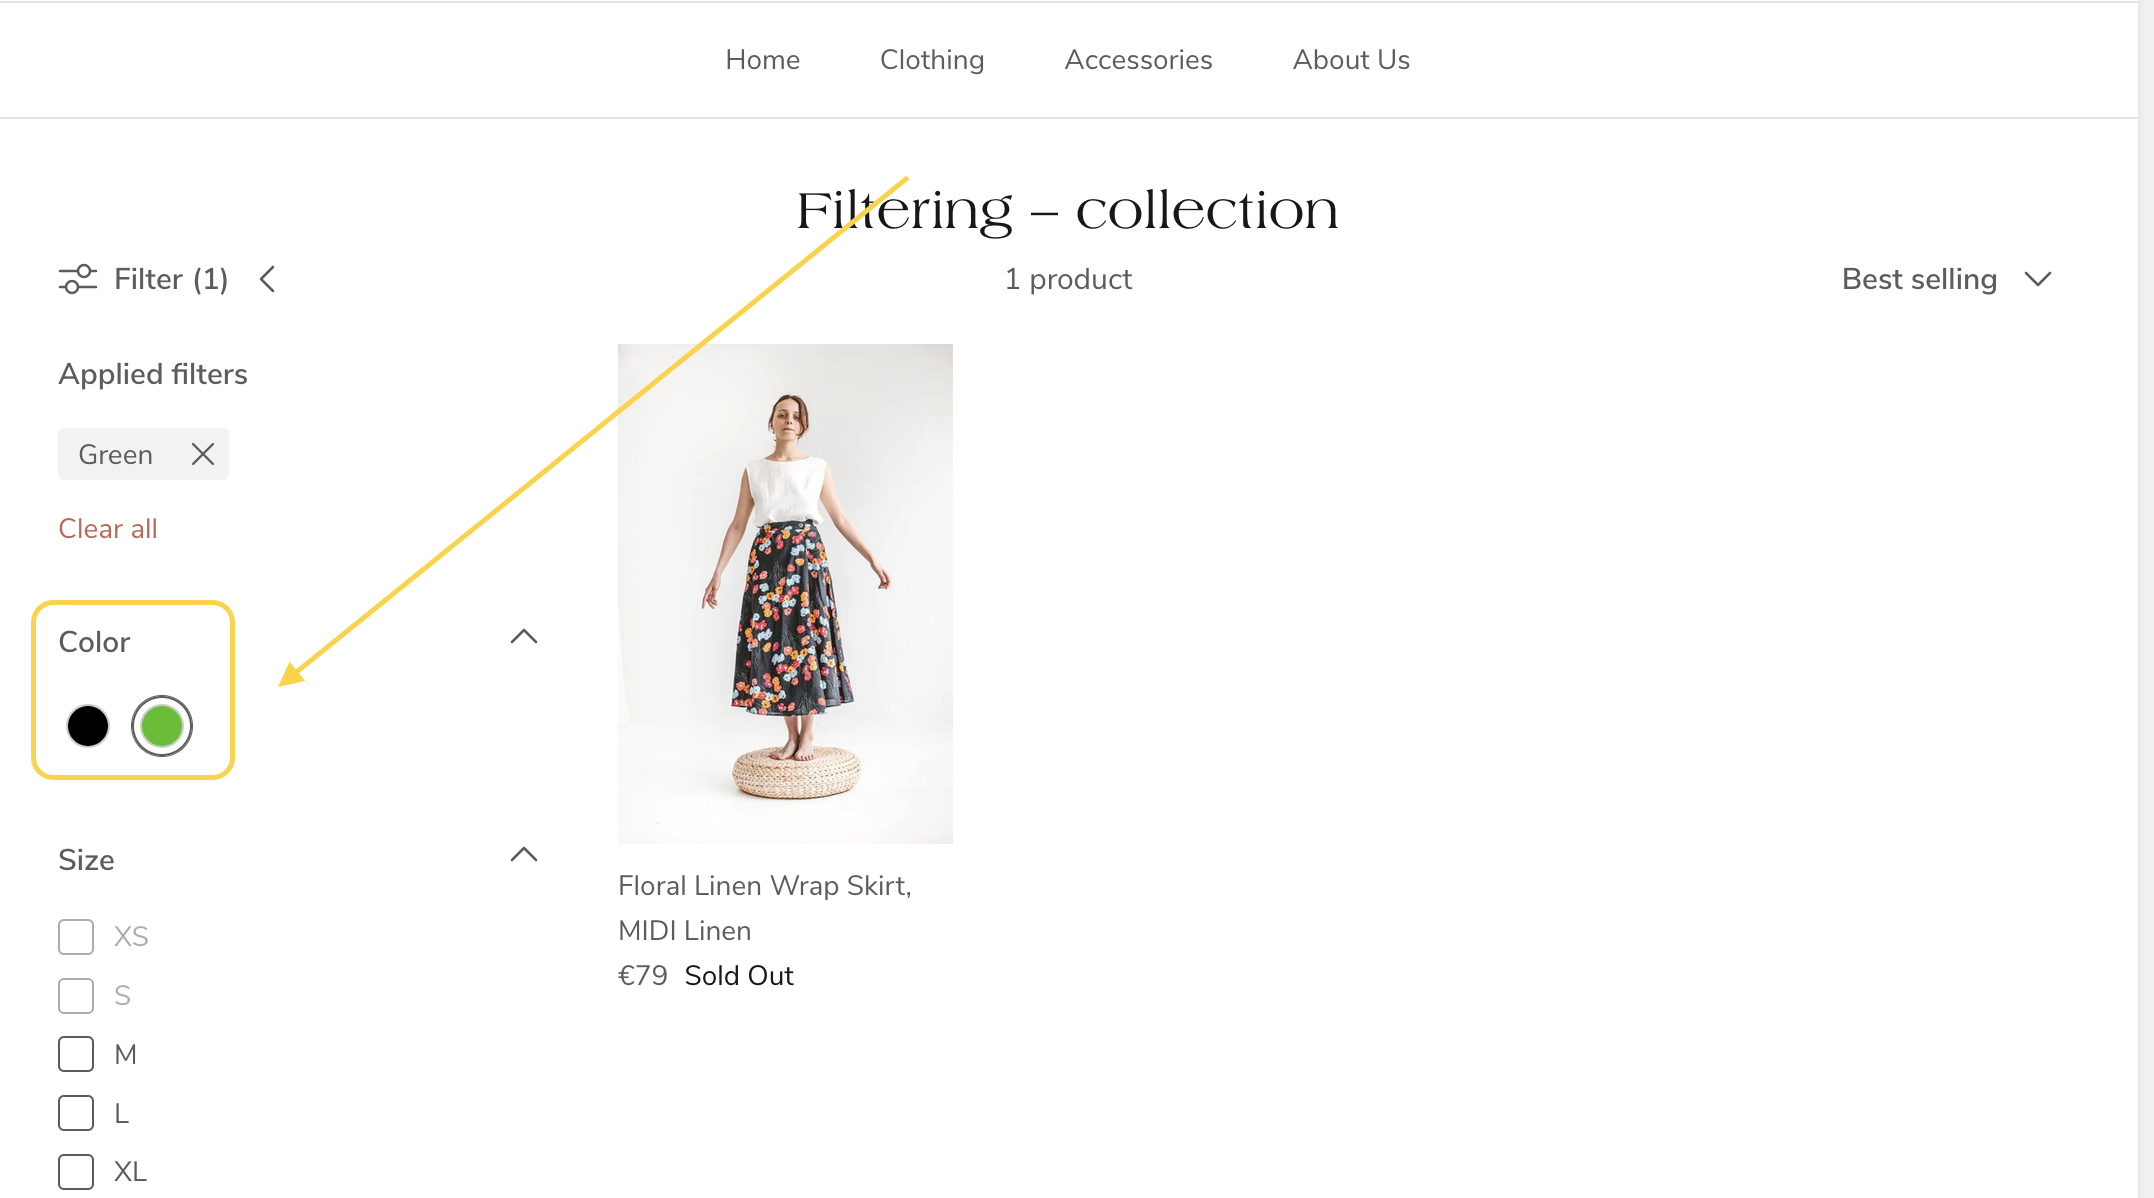
- Save your changes, and you should now observe the color swatches available in your collection filters.
I hope this guide helps you add visual filters to your Shopify store. Given that this feature is relatively new, you might encounter some challenges during the setup on your theme. If you face any issues or have questions, don’t hesitate to reach out for assistance.
Tip: Were you trying to use product tags to filter products on your collection pages but noticed that all tags get mixed into one filter? Product tags are better suited for different tasks, so it’s recommended to use product metafields for filtering.
Check out our article for a step-by-step guide on How to set up metafield filtering on collection pages, including instructions on translating filter labels and values.