
How to leverage metaobjects for your Shopify store?
Metaobjects are a powerful new tool introduced with Shopify’s Winter 2023 release. These objects allow you to create custom data structures for your store, much like metafields. With metaobjects, you can add and store structured information that goes beyond the basic store data available in Shopify.
By taking advantage of metaobjects, you can unlock new possibilities for customization and flexibility in your store. In this article, we’ll explore how to leverage metaobjects to enhance your Shopify store.
Update July 2023: Shopify has announced the release of an exciting new feature that empowers you to build and manage custom landing pages powered by metaobjects. Learn more about this new feature and How to create custom landing pages powered by metaobjects on Shopify? in our article.
Update: In response to feedback, I have included a brief paragraph at the end of the article explaining how to access metafield values in Liquid.
Understanding the difference between metafields and metaobjects
It’s essential to understand the difference between metafields and metaobjects. Metafields allow you to define and associate custom or standard fields with various parts of Shopify, such as products, customers, or blogs.
On the other hand, metaobjects represent a new custom data structure, similar to existing Shopify objects such as product, variant, or collection. With metaobjects, you can create multi-field data objects that can be displayed anywhere on your store.
Not sure what metafields are? To learn more about how to use metafields in Shopify, you can read our article on How to display additional product information on your store? Use integrated Shopify metafields. (Themes 2.0. and vintage themes) to get more insights.
When to use metaobjects instead of metafields
Metaobjects can be a more effective solution than metafields in certain scenarios. For example, imagine that you collaborate with a few influencers and would like to display the profile of the top influencer on the bottom of pages for the products they support. The profile would include:
- Influencer name
- Influencer age
- Influencer image
- Link to influencer’s blog/Instagram
Creating individual metafields for each product to include all influencer information (e.i. single-line text, integer, file and URL metafield definitions) would be a cumbersome and time-consuming process. Additionally, if the influencer wants to change, e.g. their profile image, you would need to manually update each product’s metafields, which can be an inefficient process.
In this scenario, using metaobjects would be a better solution. To set up a metaobject for this use case, you would need to follow these high-level steps:
- Create a metaobject definition that includes the influencer’s name, age, image, and link.
- Add entries to the metaobject for each influencer you collaborate with.
- Create a metafield that references the metaobject.
- Assign the appropriate metaobject entry to the specific object (such as a product) that corresponds to the top influencer.
- Display the metaobject entries on your store, such as at the bottom of product pages for the influencer’s supported products.
How to create a metaobject definition?
Let’s create a metaobject for our example. To do so, please follow the below-mentioned steps.
- Go to Shopify admin -> Settings -> Custom data (previously metafields)
- Scroll down to the “Metaobjects section” -> Click Add definition

- Name the metaobject (let’s use single wording so that we meet the object naming), in our case “Influencer Profile”
- Now, let’s add the fields:
- Influencer name: single-line text
- Influencer age: integer
- Influencer image: file
- Link to influencer’s blog/Instagram: URL
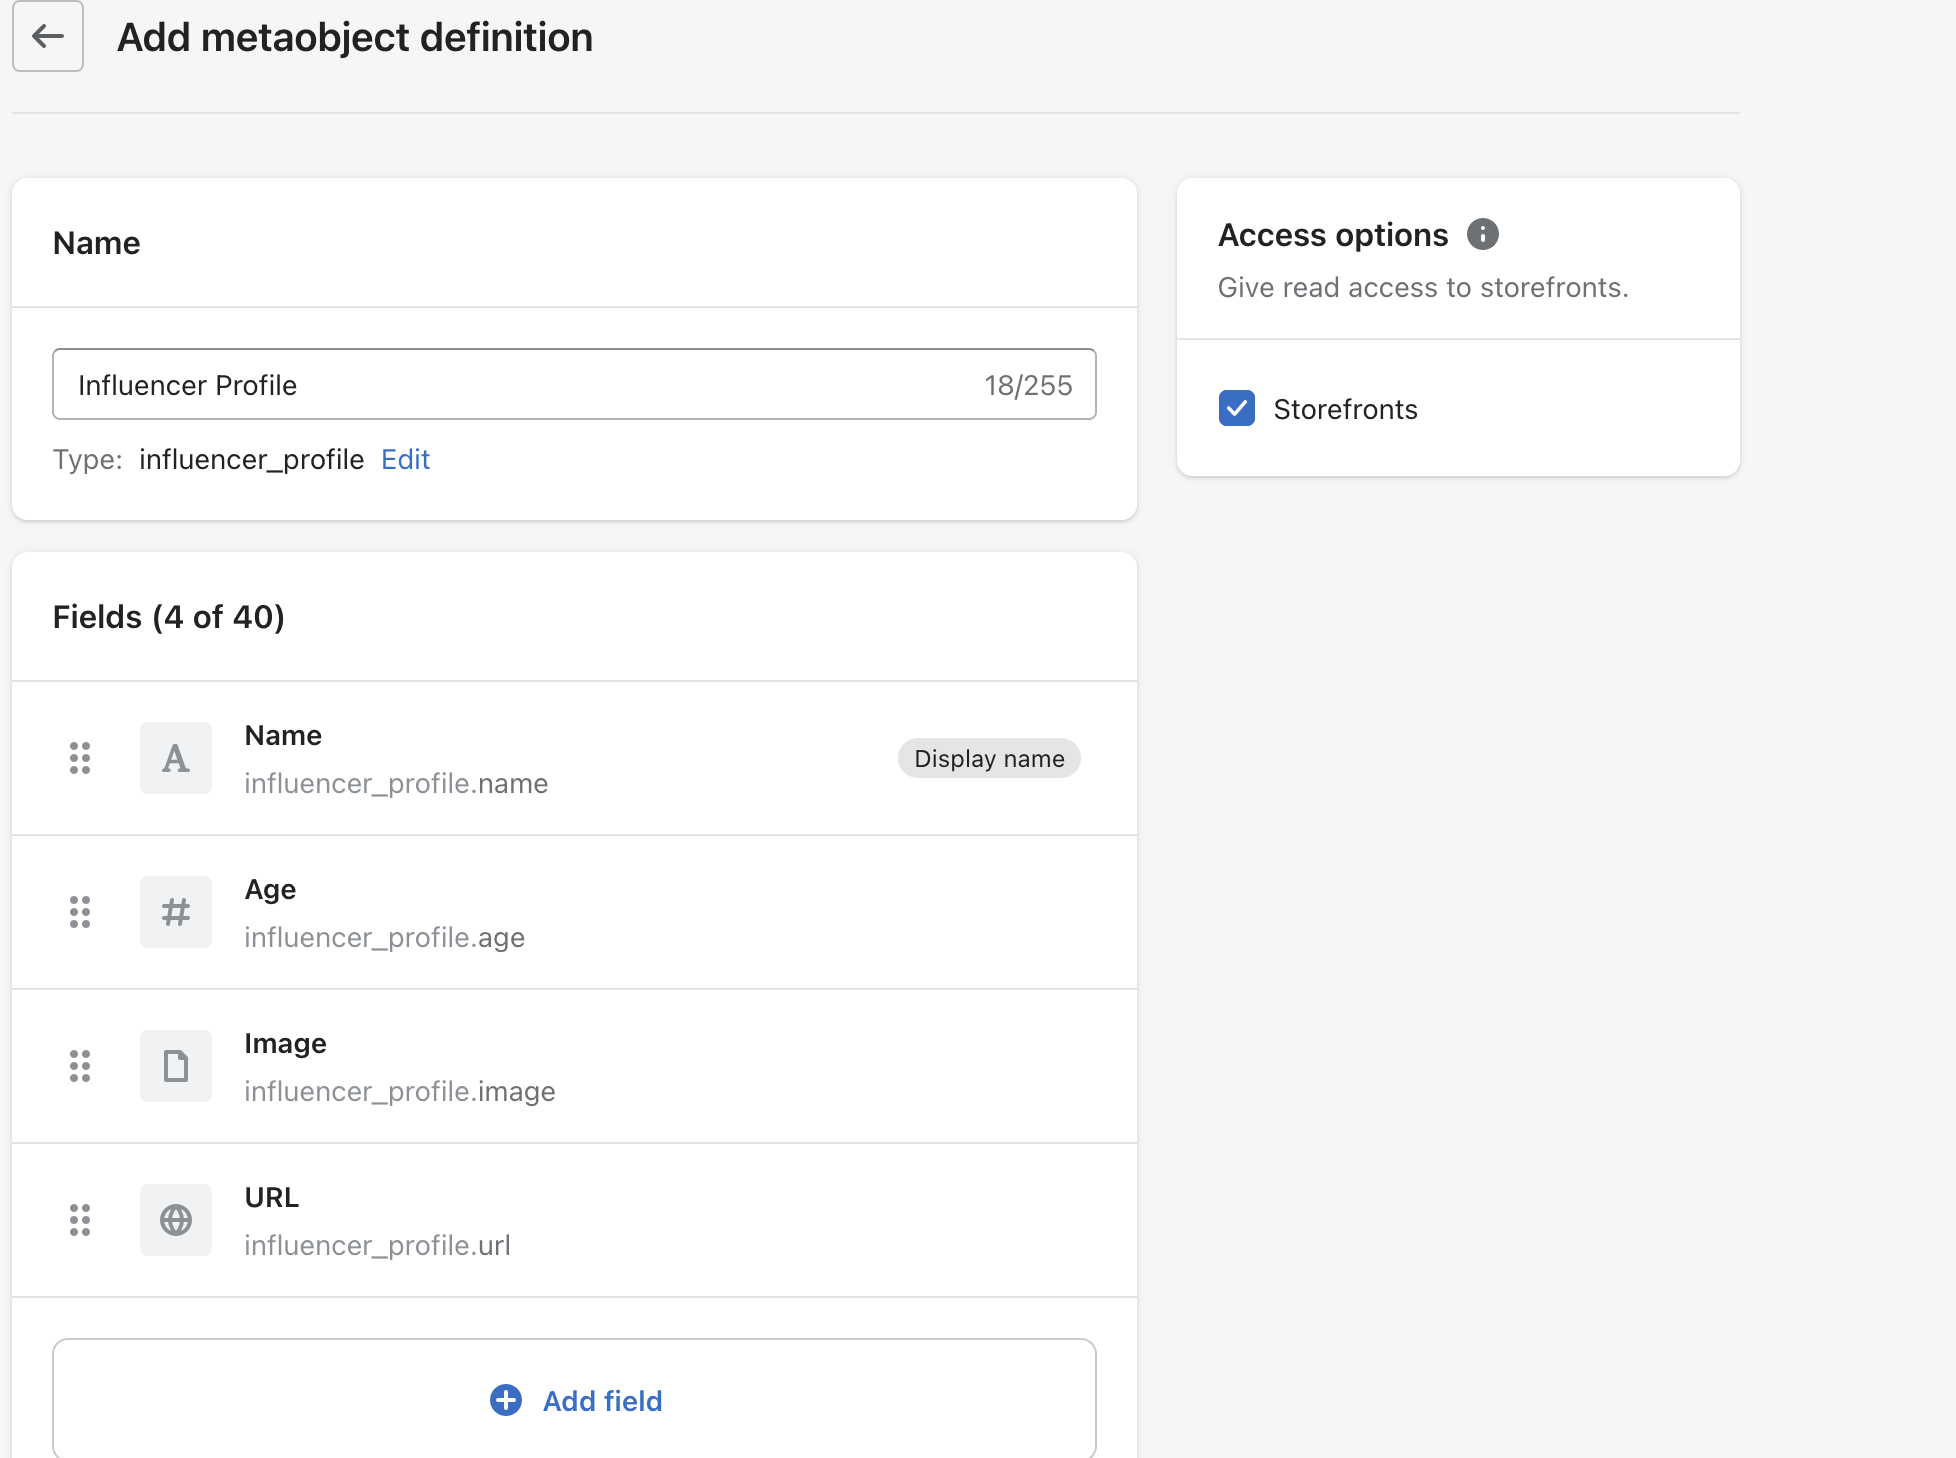
Name each field, add a short description, and choose one value (not list of values – this will be explained in another guide). Don’t forget to check off “Access options” for Storefronts (to allow storefront visibility). Check the settings and save the metaobject definition.
Adding entries to the newly created metaobject
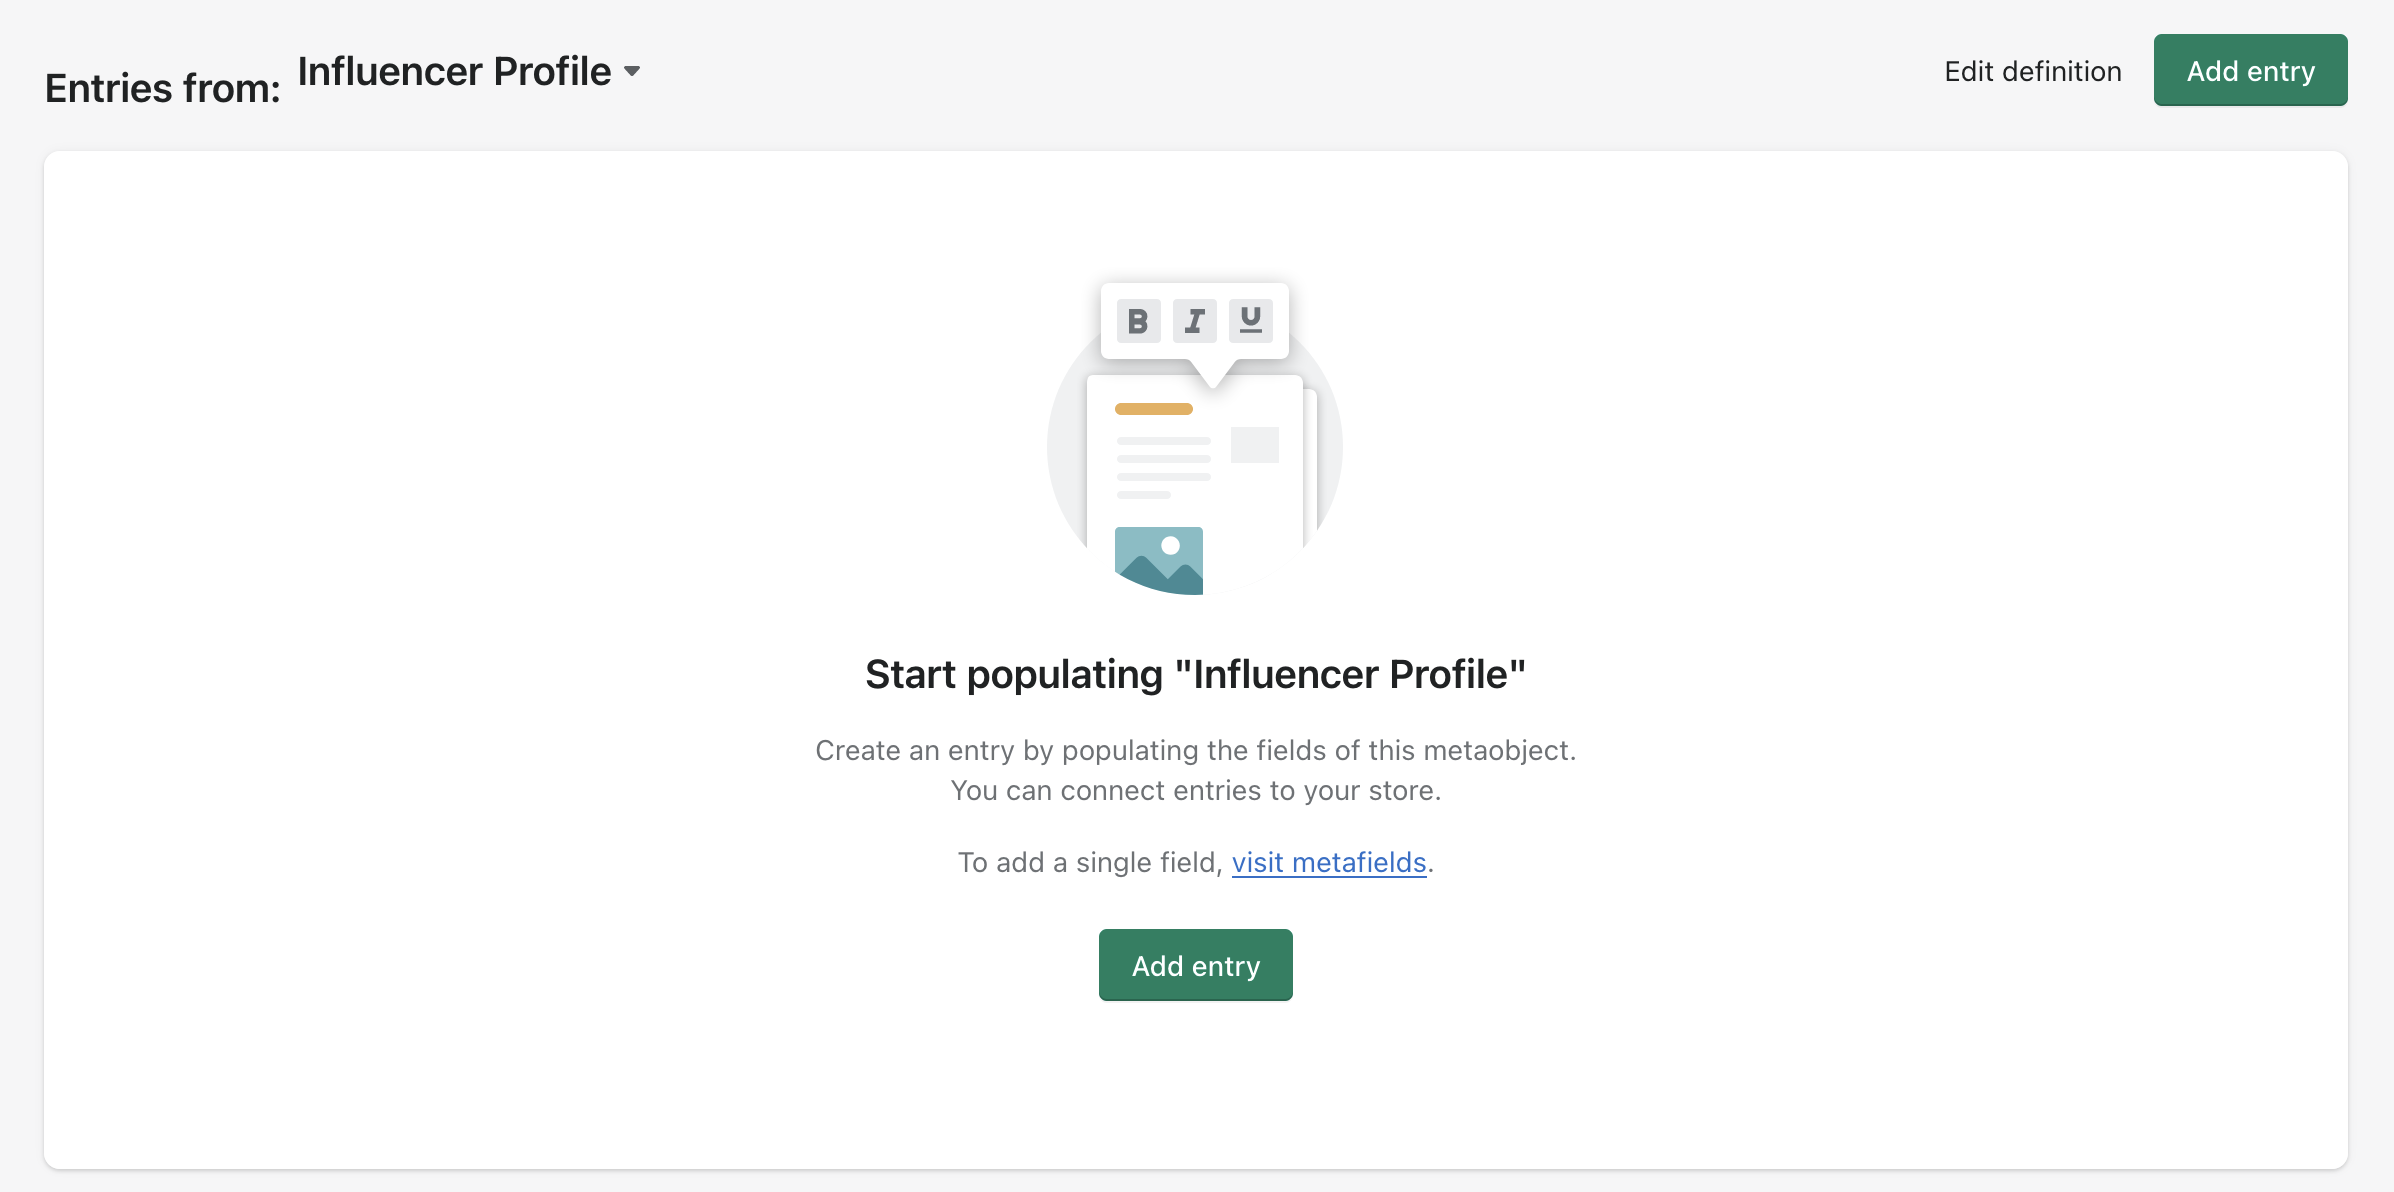
To add entries to the newly created metaobject, begin by creating one entry for each influencer profile. After saving the metaobject definition, a prompt will appear, giving you the option to either add a new metaobject definition, start adding entries, or add a metafield reference for dynamic content. Choose the second option to start adding entries, and if you can’t see the prompt or have already closed it, go to the Content section in the Shopify admin dashboard and click on Metaobjects.
- In the metaobject dashboard, click the green “Add entry” button to create a new entry for an influencer profile.
- A modal window will appear, where you can fill in the relevant information about the influencer, such as their name, age, profile image, and their URL.
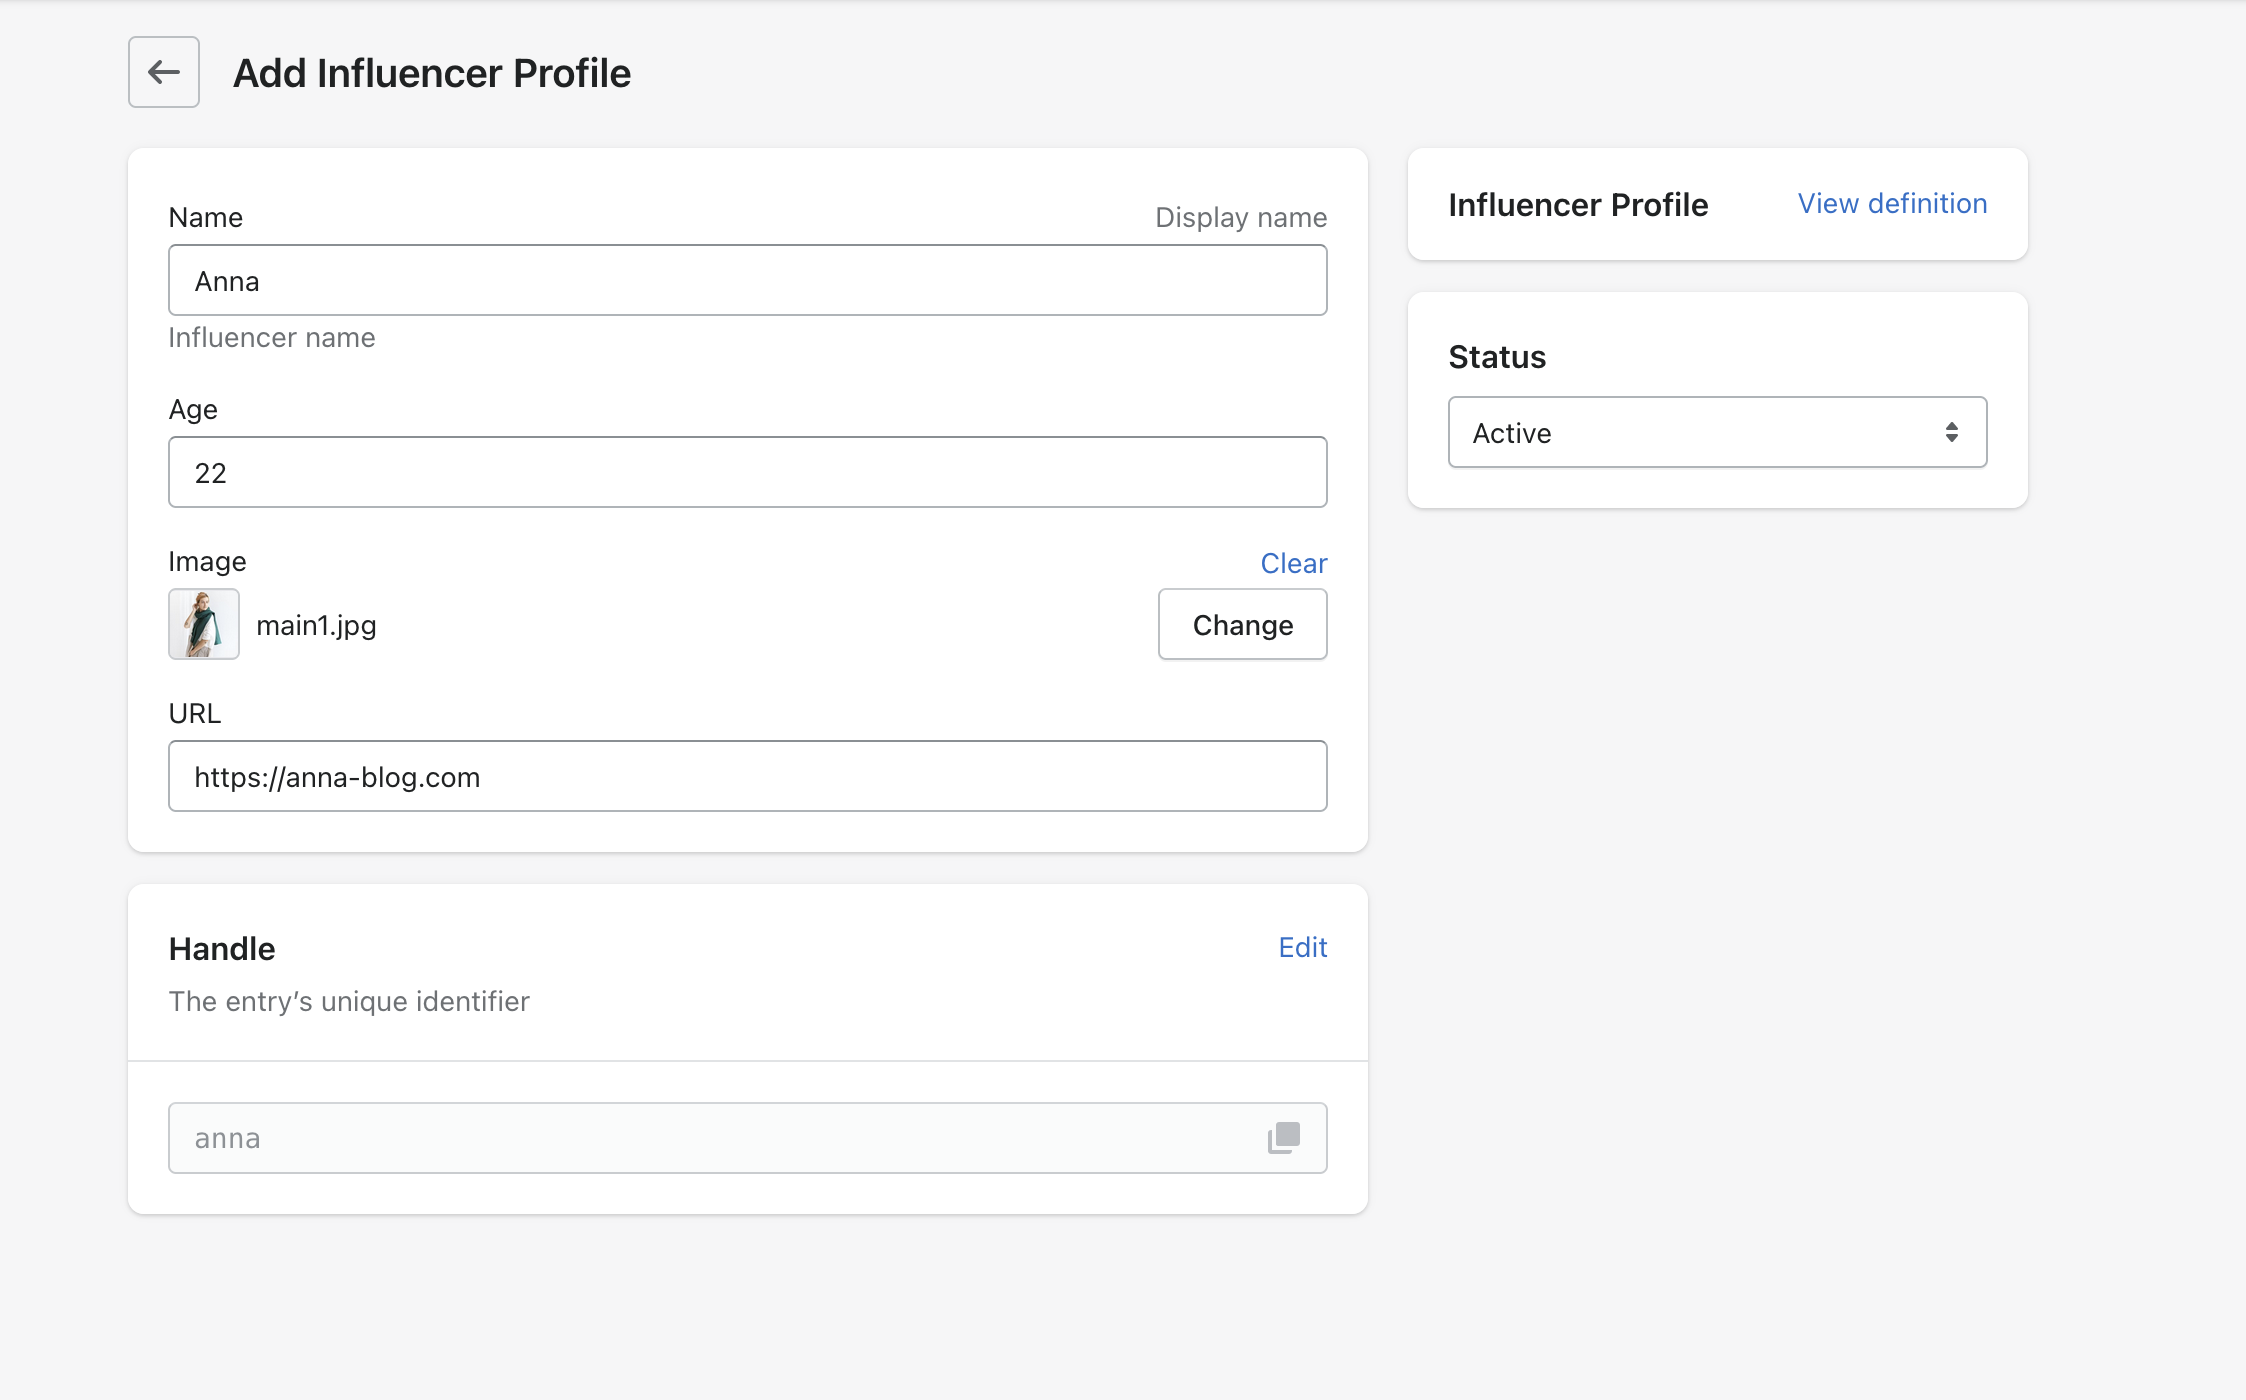
- After adding the necessary details, save the entry and repeat the process for each influencer profile. On the metaobject dashboard, you should see a list of entries (influencers) you added.
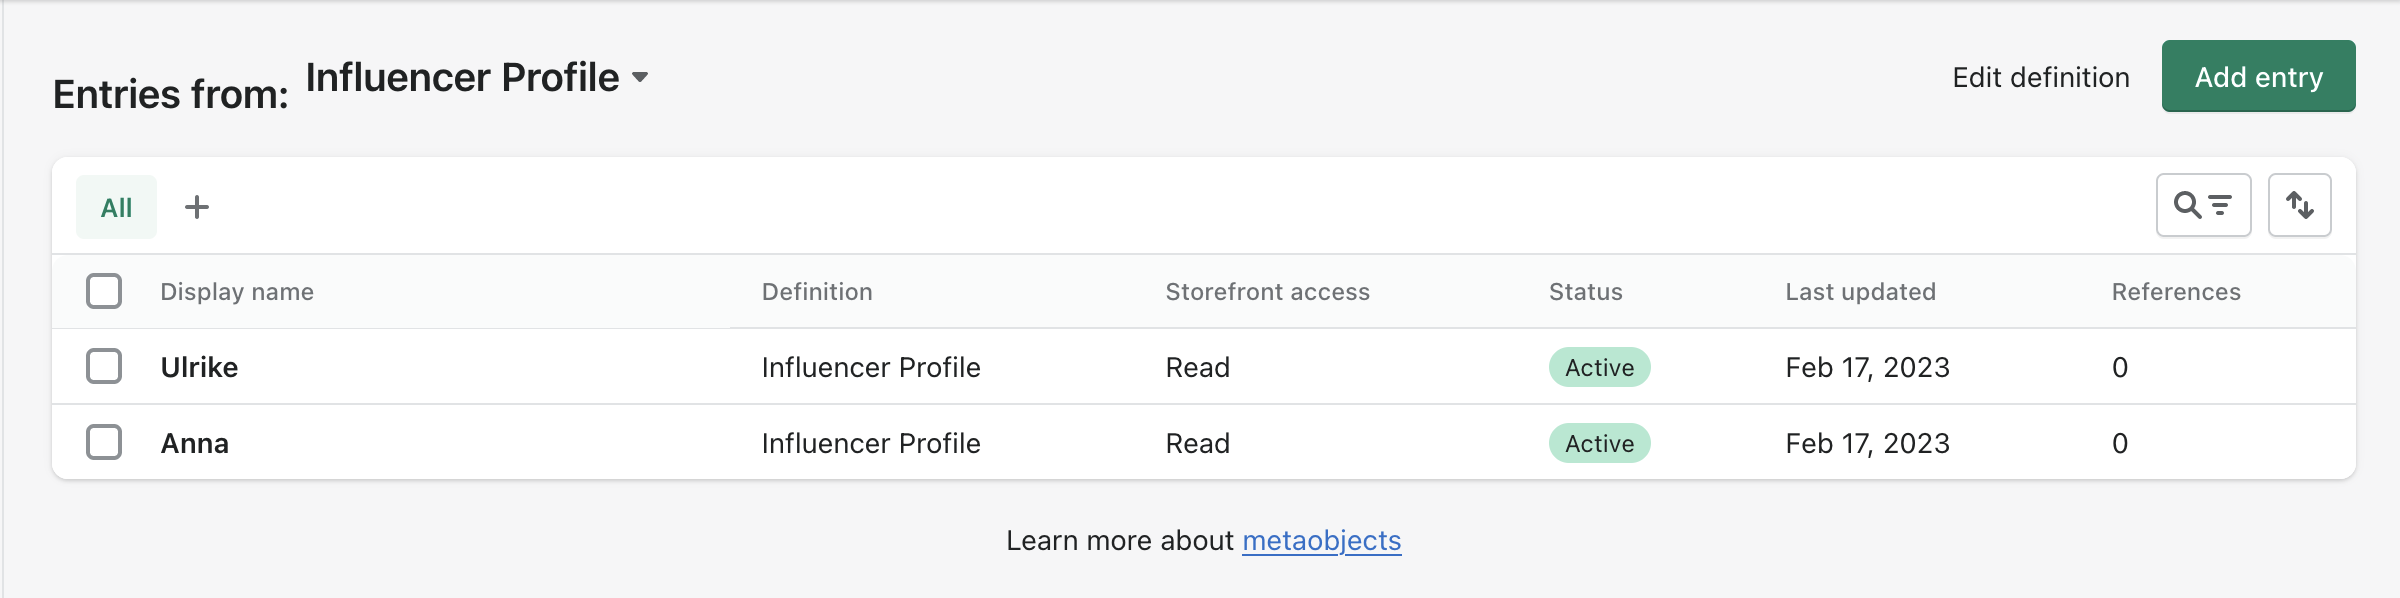
Once you’ve created entries for all the influencers, you can move on to the next step in the process.
Let’s add a reference
After populating the entries for the Influencer Profile metaobject, the next step is to create a product metafield that references the metaobject so that we can display it on the product pages. Here’s how to do it:
- Go to your Shopify admin and navigate to Settings -> Custom data -> Metafields.
- Select Products and click on Add definition.
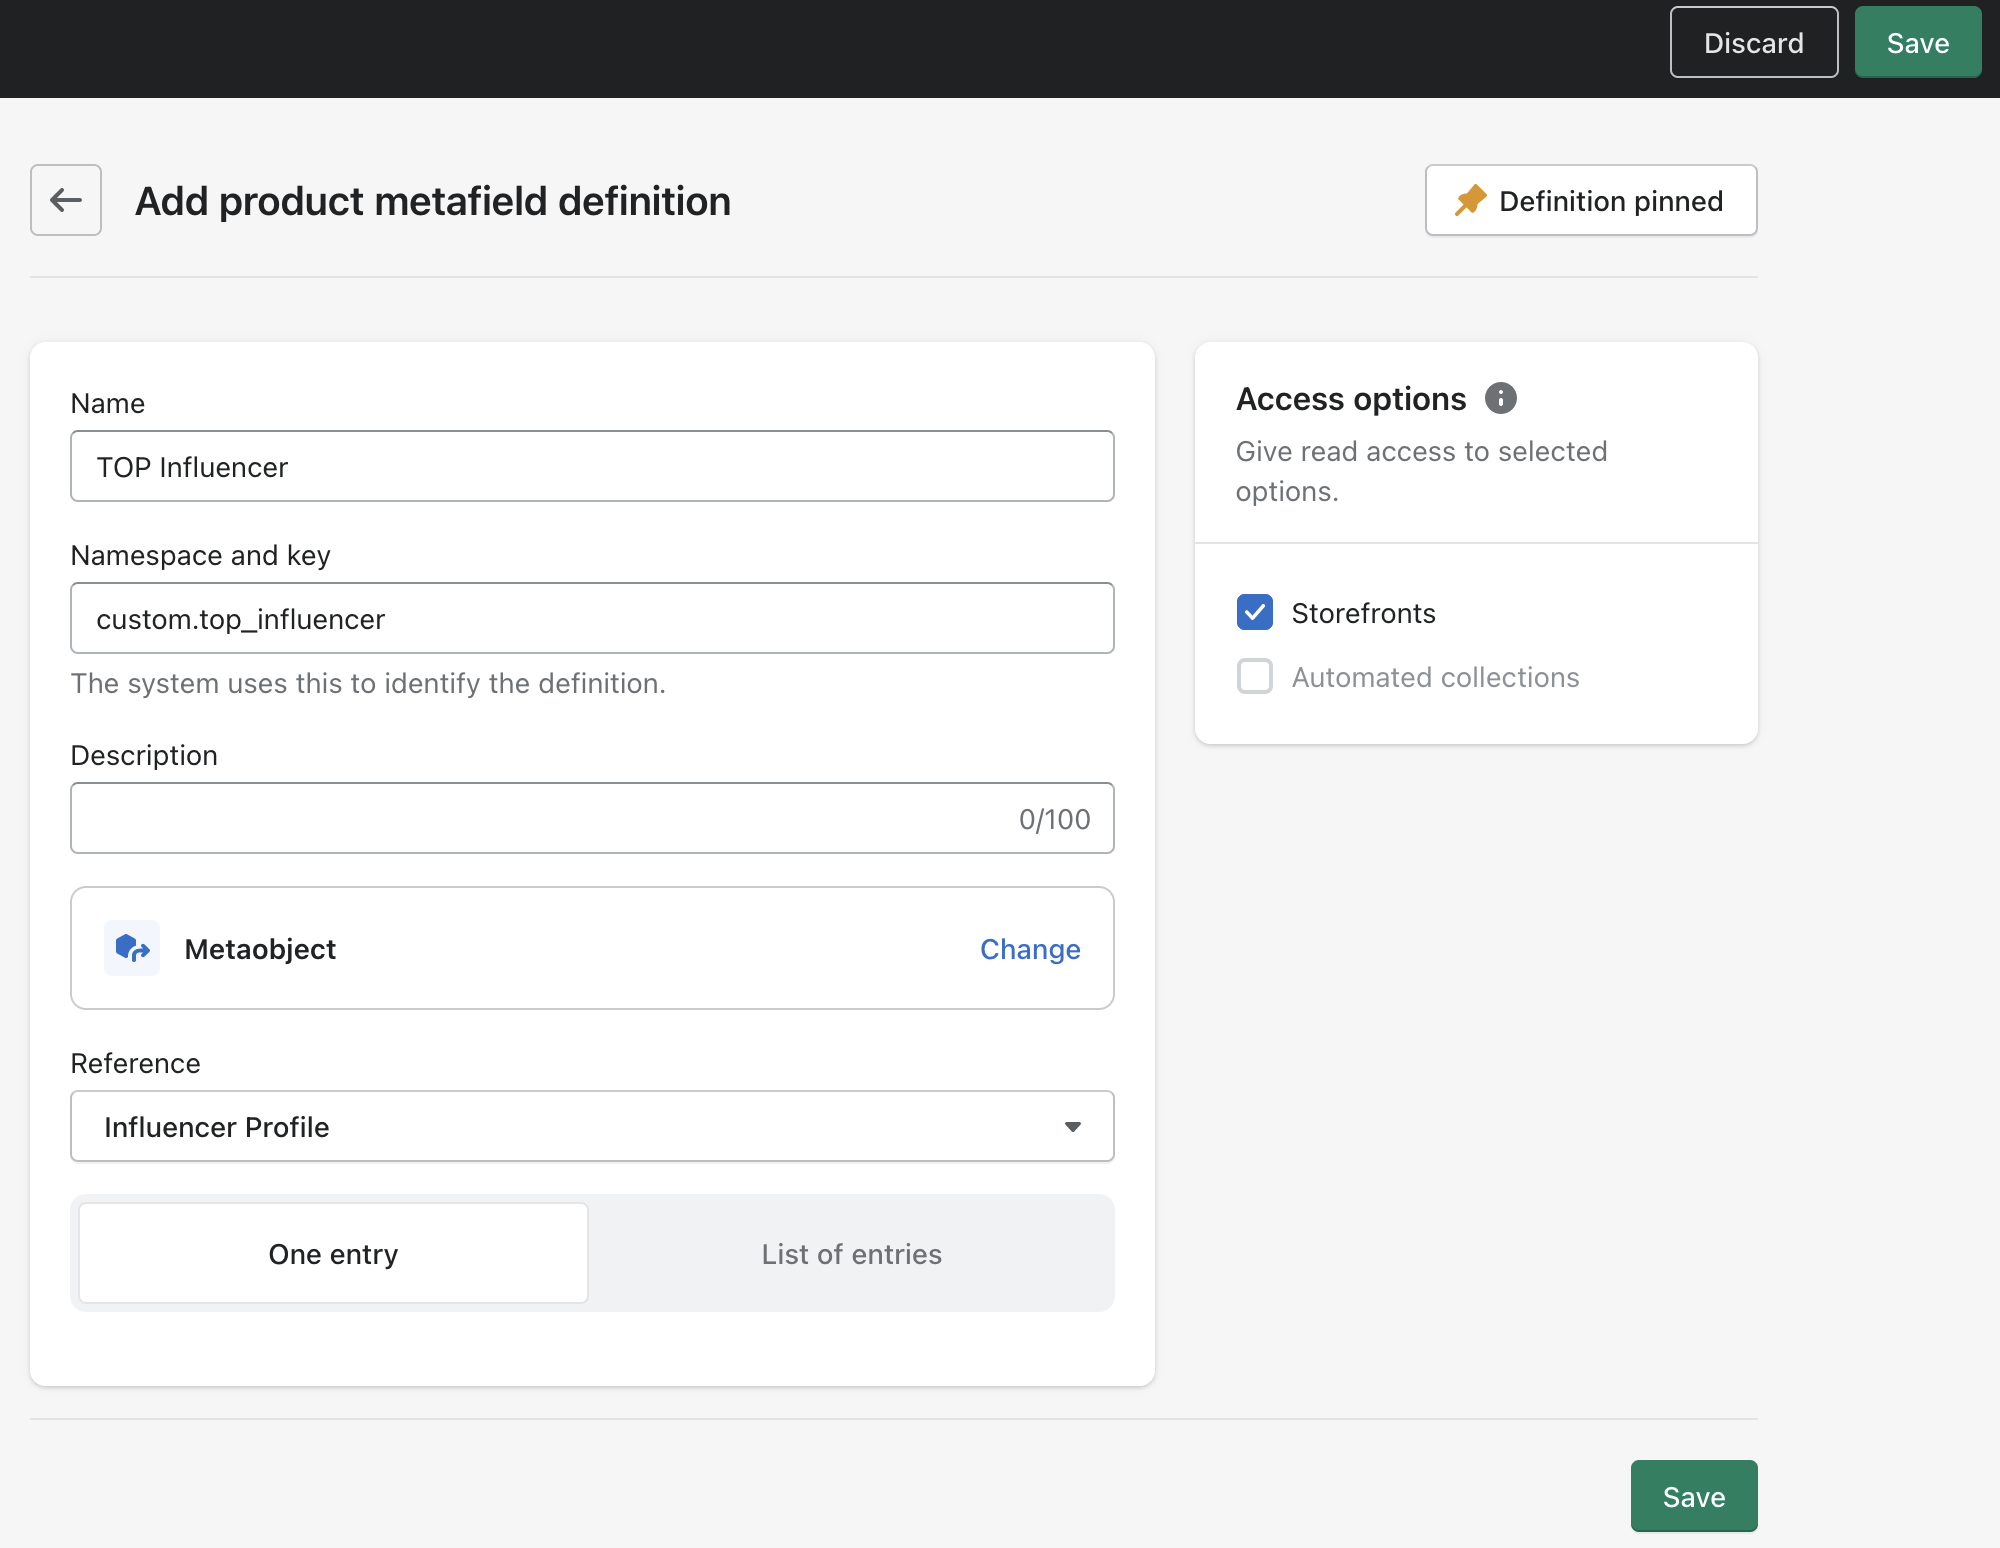
- Name the definition (TOP Influencer in our case) and add a description (optional).
- Choose “Metaobject” as the metafield definition type, and in the Reference dropdown, select the Influencer Profile metaobject that you previously created.
- Select only one entry.
- Make sure to check off the access options for “Storefronts”.
- Save the definition.
Assign influencer profile metaobject entries to products
Now that we have our Influencer Profile metaobject defined and populated with entries, we can assign top influencers to specific products. Here’s how:
- Go to your Shopify admin and select the product you would like to add the influencer for.
- Scroll down to the “Metafields” section.
- Click the field next to the “Top Influencer” metafield and from the dropdown menu, select the influencer name you want to assign to the product.
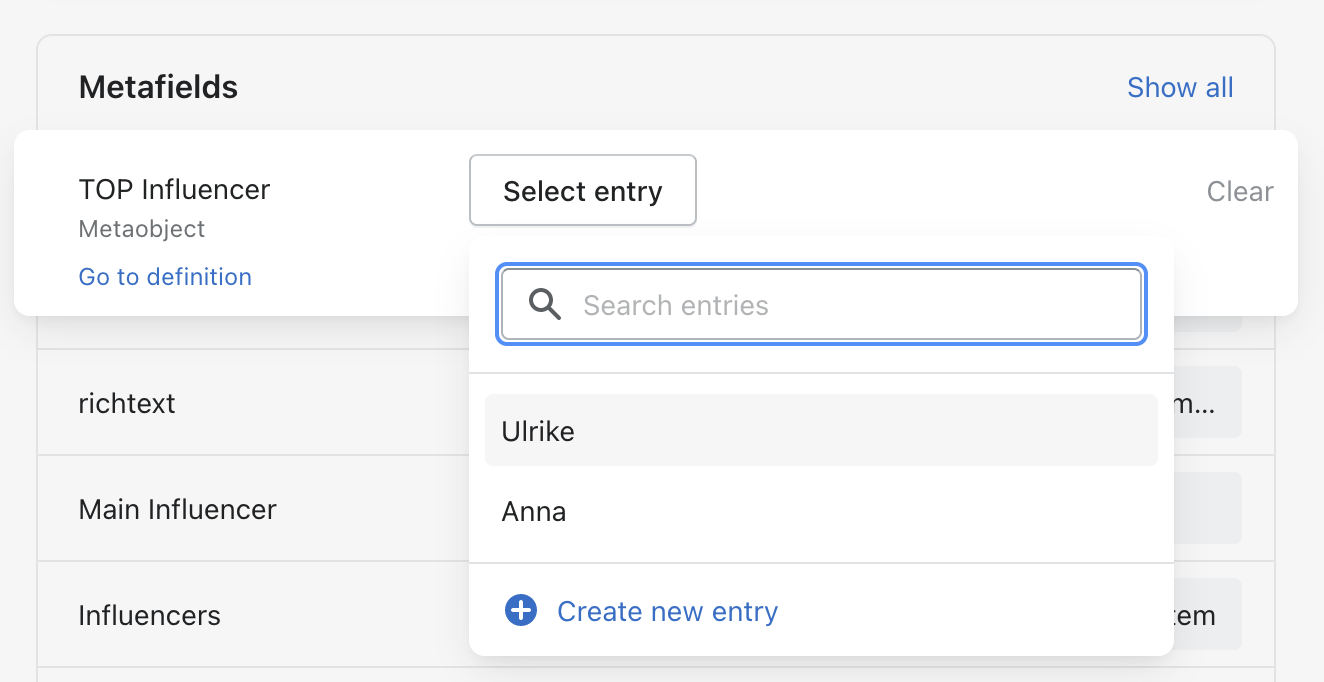
- Save the changes and repeat the same steps for other products.
Let’s render the entries (influencers) information on product pages
We will display the name, age, profile image, and link to the influencer’s blog under the product information on the product pages. We will use the Image with text section that is already available and render the information with the available blocks.
- Go to your Shopify admin and select Customize.
- From the dropdown menu, choose Products and select the Default product template (or any other template you prefer).
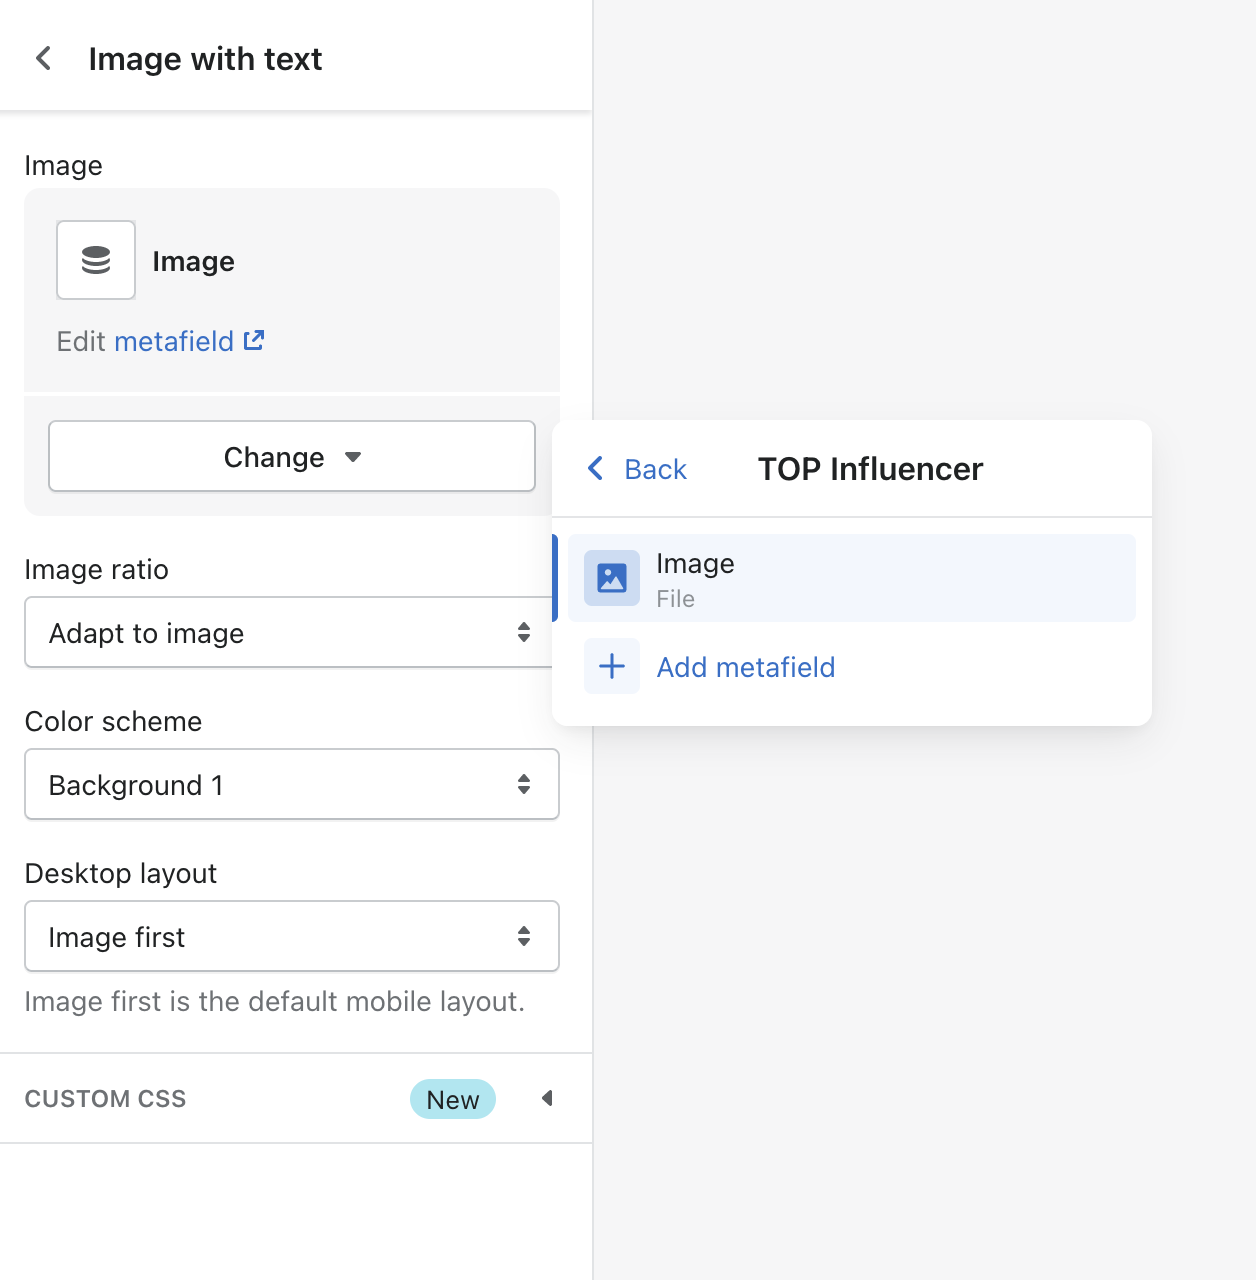
- Add a new section “Image with text” and place it below the product information section.
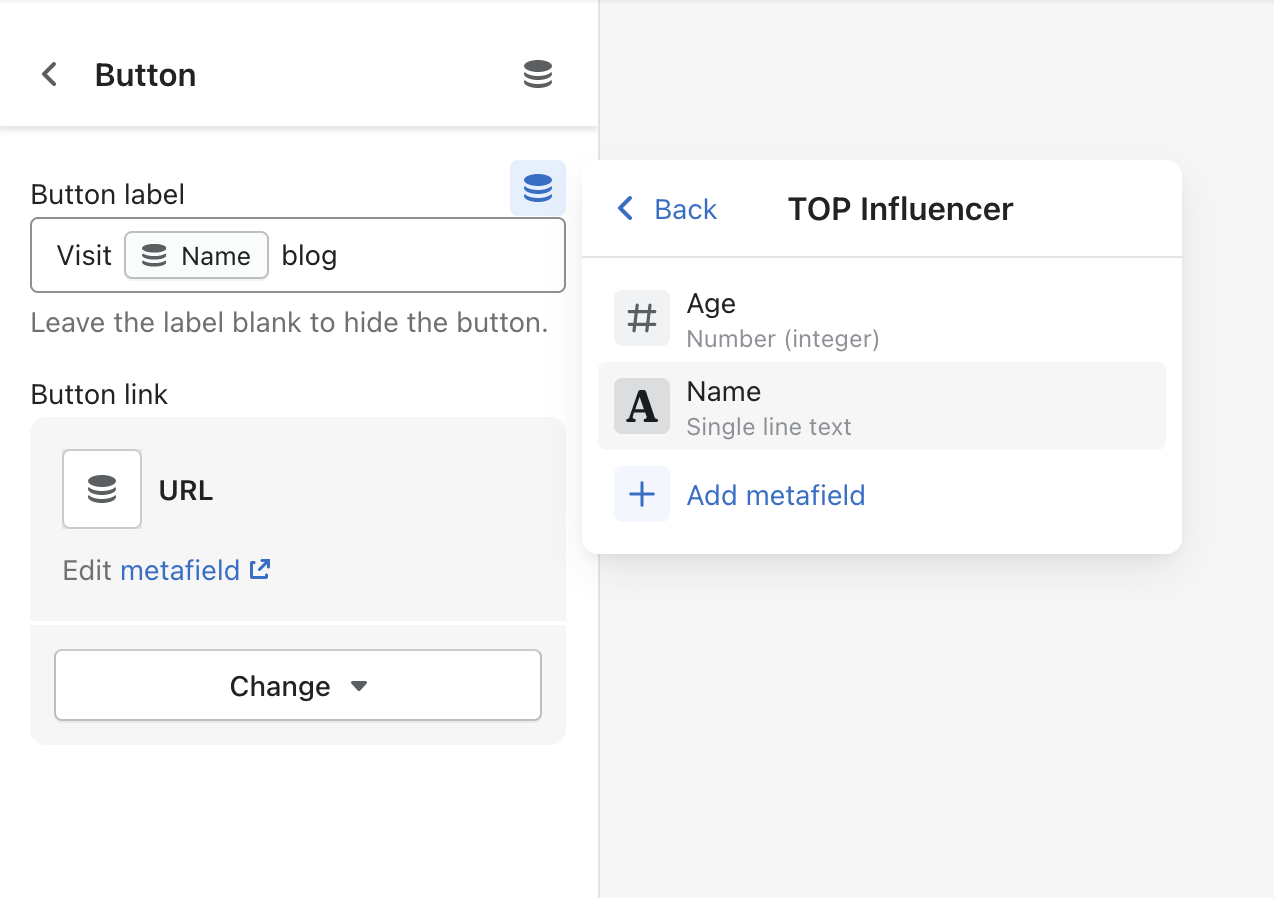
- Click on the “Image with text” section and add the influencer profile image by clicking the dynamic source icon in the section settings. Choose the TOP Influencer metaobject reference and then select the image field.
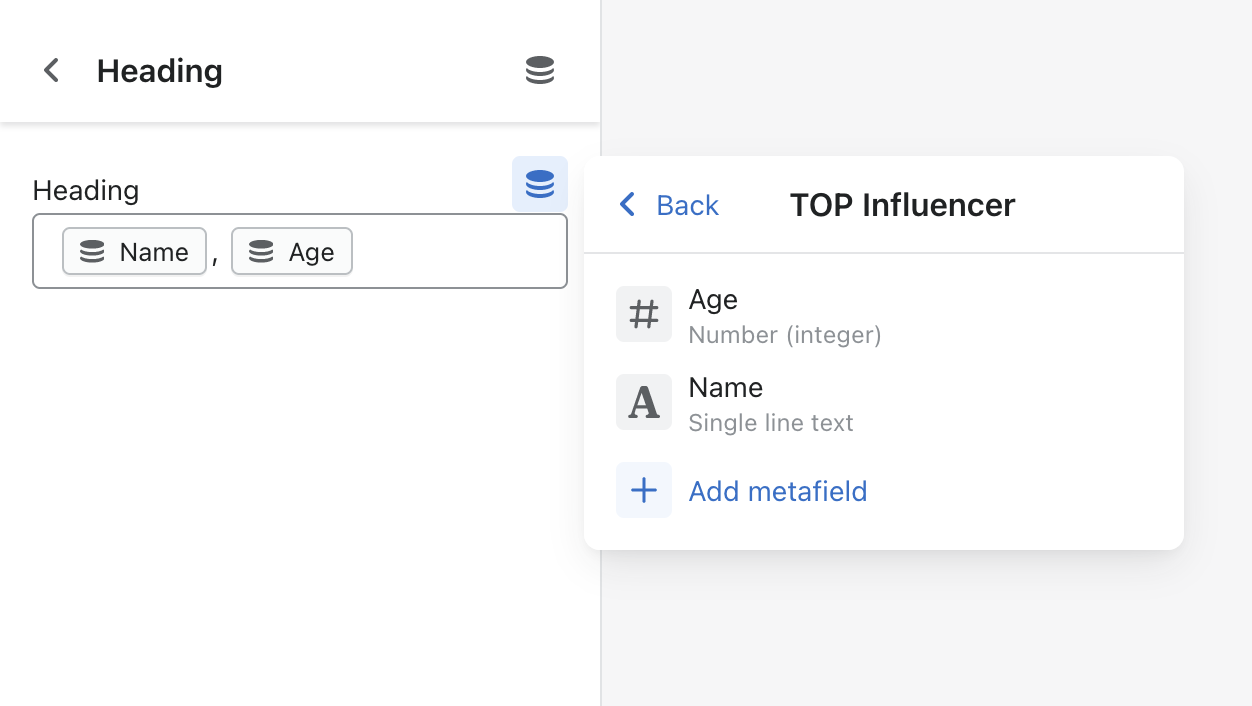
- Repeat the same steps for the other entry values. In our guide, we render the influencer name and age in the heading block and the link to the influencer’s blog in the button block.
- Save the changes and visit any product that has an influencer assigned.
- You can add additional sections (e.g. rich text above the image with text section as in our case) and more metaobject fields to provide more information about the influencer (e.g. influencer introduction and render the field in the text block).
Update: How to access the metafield values in Liquid
To access metafield values in Liquid and make adjustments to the rendering of Top influencer information, you can create a new block specifically for displaying the influencer’s details. Here’s an example of how to access the influencer’s name:
{% assign top_influencer = product.metafields.custom.top_influencer.value %}
  <p>{{ top_influencer.name }}</p>
Note: Please note that you need to access the metafield by adding .value.
Let’s see the result!
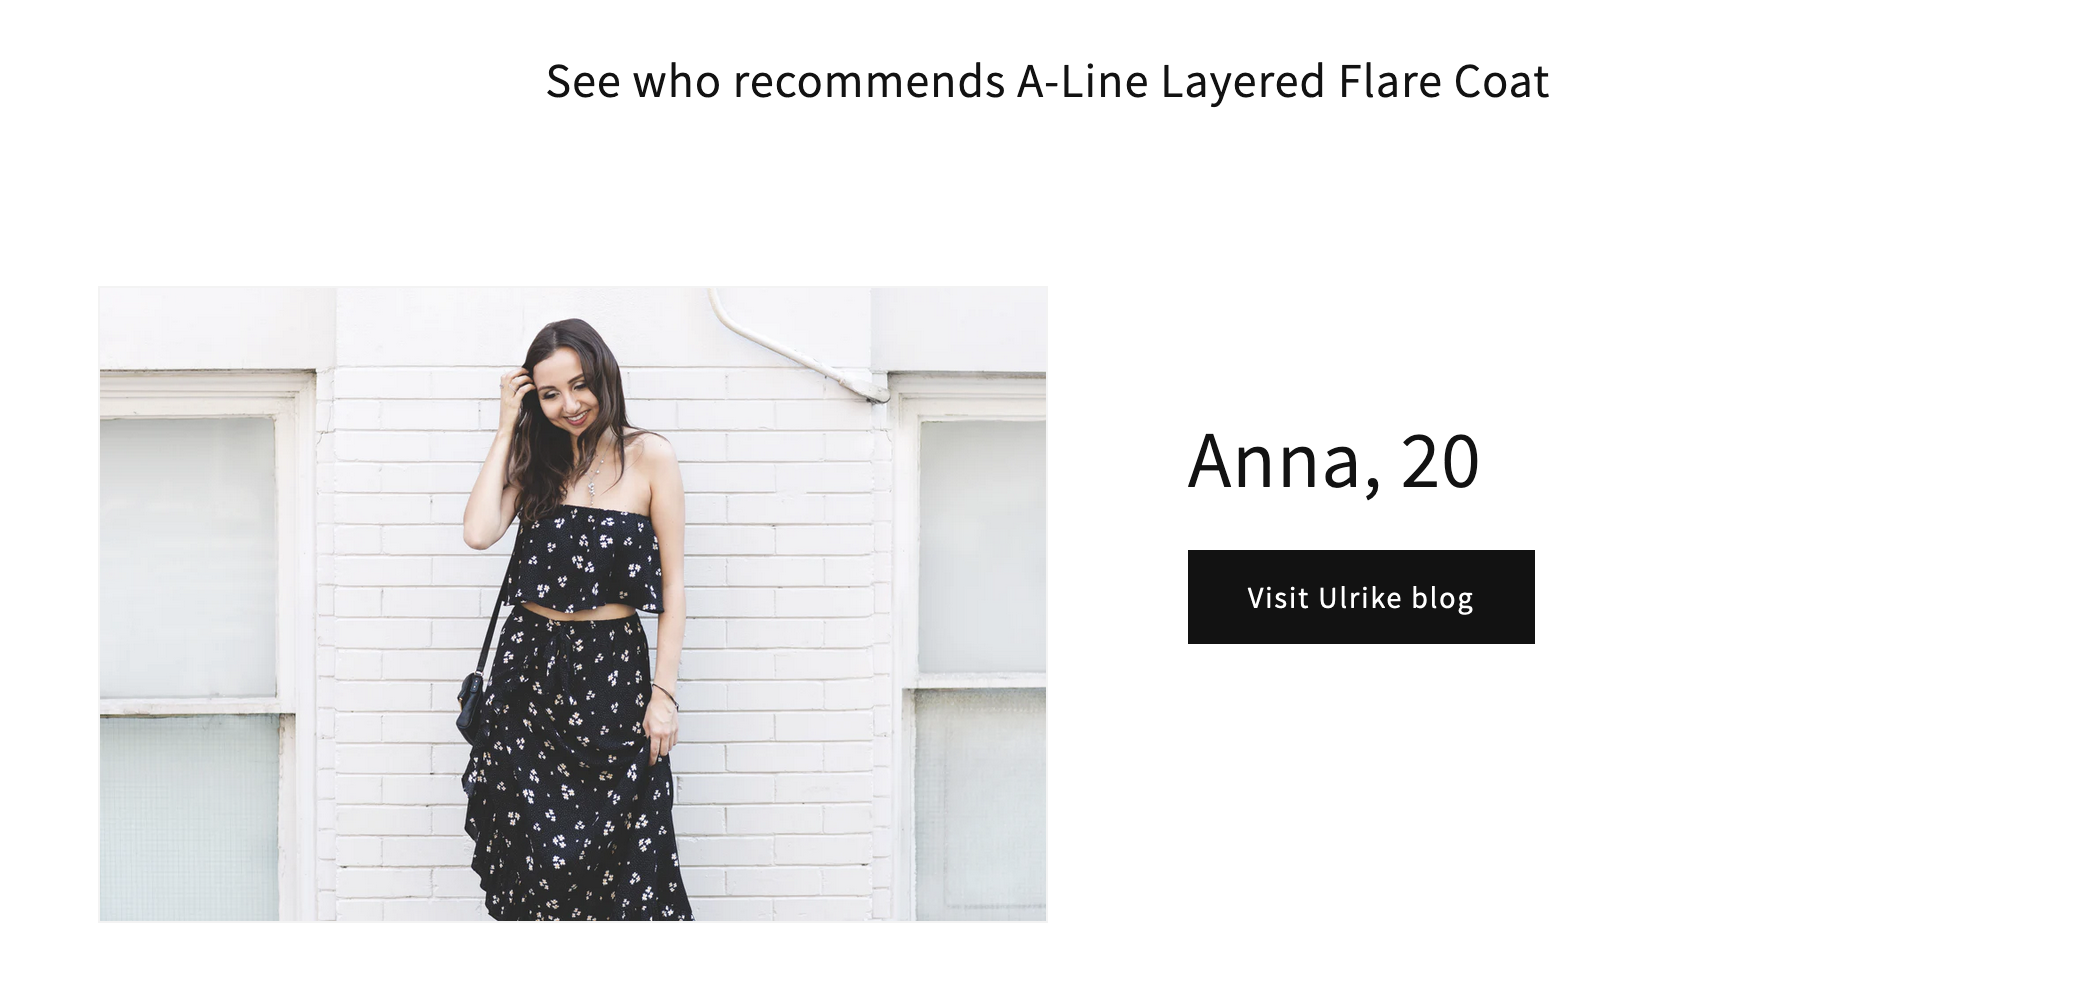
Congratulations! By following the steps outlined in this guide, you have successfully created a metaobject definition, added entries, assigned them to specific products, and rendered the metaobject field values on the product pages.
Now your customers can easily see the top influencer associated with each product, which can help drive sales and increase customer engagement. Don’t be afraid to experiment with additional metaobject fields or sections to provide even more information about your influencers. With the power of metaobjects, the possibilities are endless! And if you ever stumble upon any issues, don’t hesitate to get in touch with us. We are always here to help you.
To learn more about metafields, visit one of our articles How to display metafield list of values? or A file metafield list of values: How to render a file name (with a link)?