
How to create custom landing pages powered by metaobjects on Shopify?
In the summer of 2023, Shopify announced the release of an exciting new feature that empowers you to build and manage custom landing pages powered by metaobjects. With this feature, you can now easily launch new landing pages for each entry, complete with dedicated page templates for specific metaobject types. This allows you to showcase the unique aspects of your brand in a more efficient manner.
In this article, we will guide you through a step-by-step process of creating landing pages powered by metaobjects. To proceed with building these pages, it is essential to have a metaobject definition correctly set up for your store.
If you haven’t done this yet, we covered the process of setting up a metaobject definition, adding entries, creating a metafield that references the metaobject, and more in one of our previous articles titled How to leverage metaobjects for your shopify store?
Before delving into this article, it is crucial to ensure you understand the concept of metaobjects and how to set them up (we will build upon the example provided in the aforementioned article).
Activating the web pages feature for metaobjects
Assuming you have already set up a metaobject definition (for instance, Influencer Profile), the next step is to enable the web pages feature for the specific metaobject. To do this, follow these straightforward steps:
- Go to your Shopify admin panel.
- In the left menu, navigate to Settings -> Custom Data.
- Scroll down to the “Metaobjects” section and select the relevant metaobject definition.
- On the right side, find the “Features” section and check the “Web pages” checkbox.
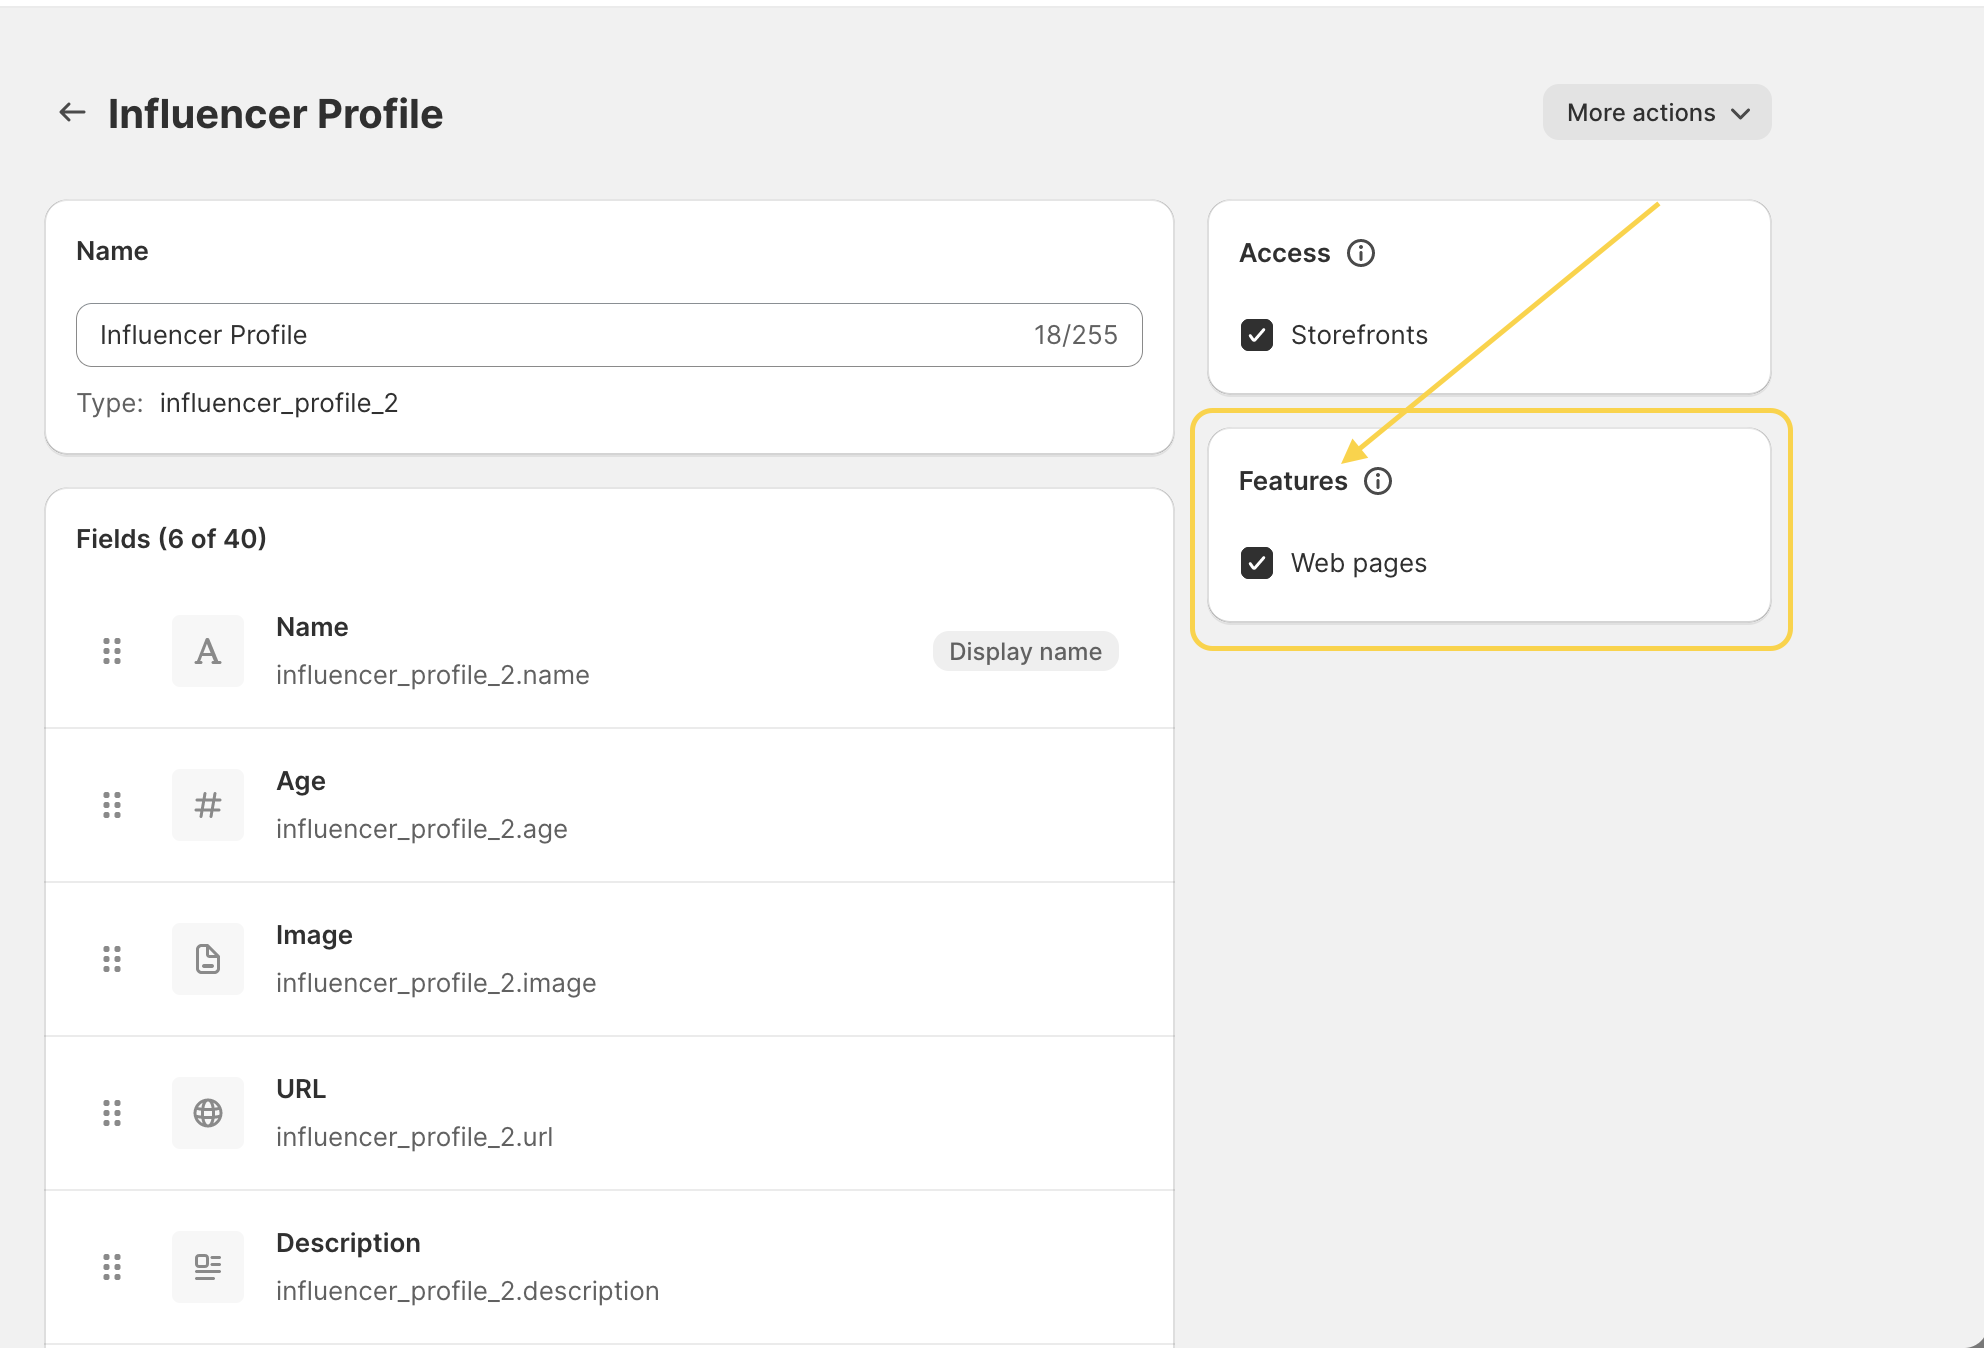
- Save your changes to activate the web pages feature for your chosen metaobject.
Note: If you have already started creating a metaobject page template, the theme editor will automatically activate the Web pages feature for you.
Create a metaobject page template
Now, we need to create a metaobject page template. Please, follow the steps to make it happen.
- Access your Shopify admin panel.
- Choose “Customize” for the theme where you want to create the metaobject pages.
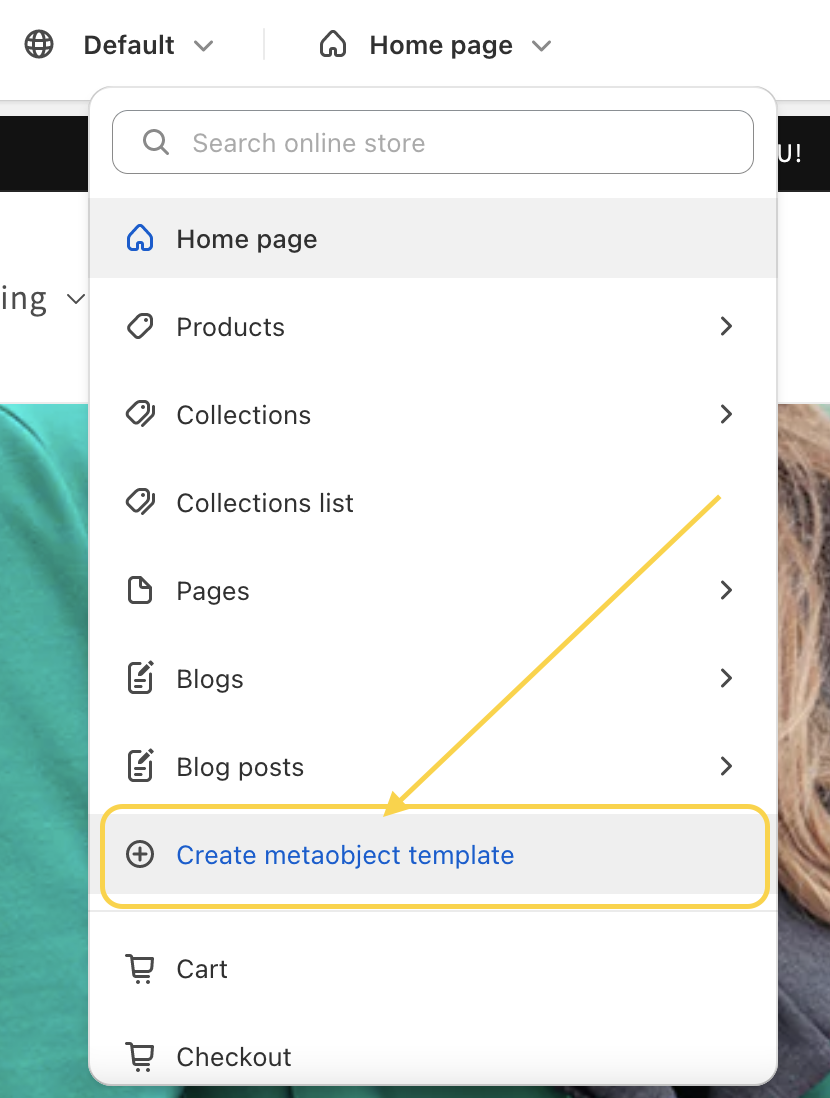
- In the upper dropdown menu, click on “Create metaobject template”.
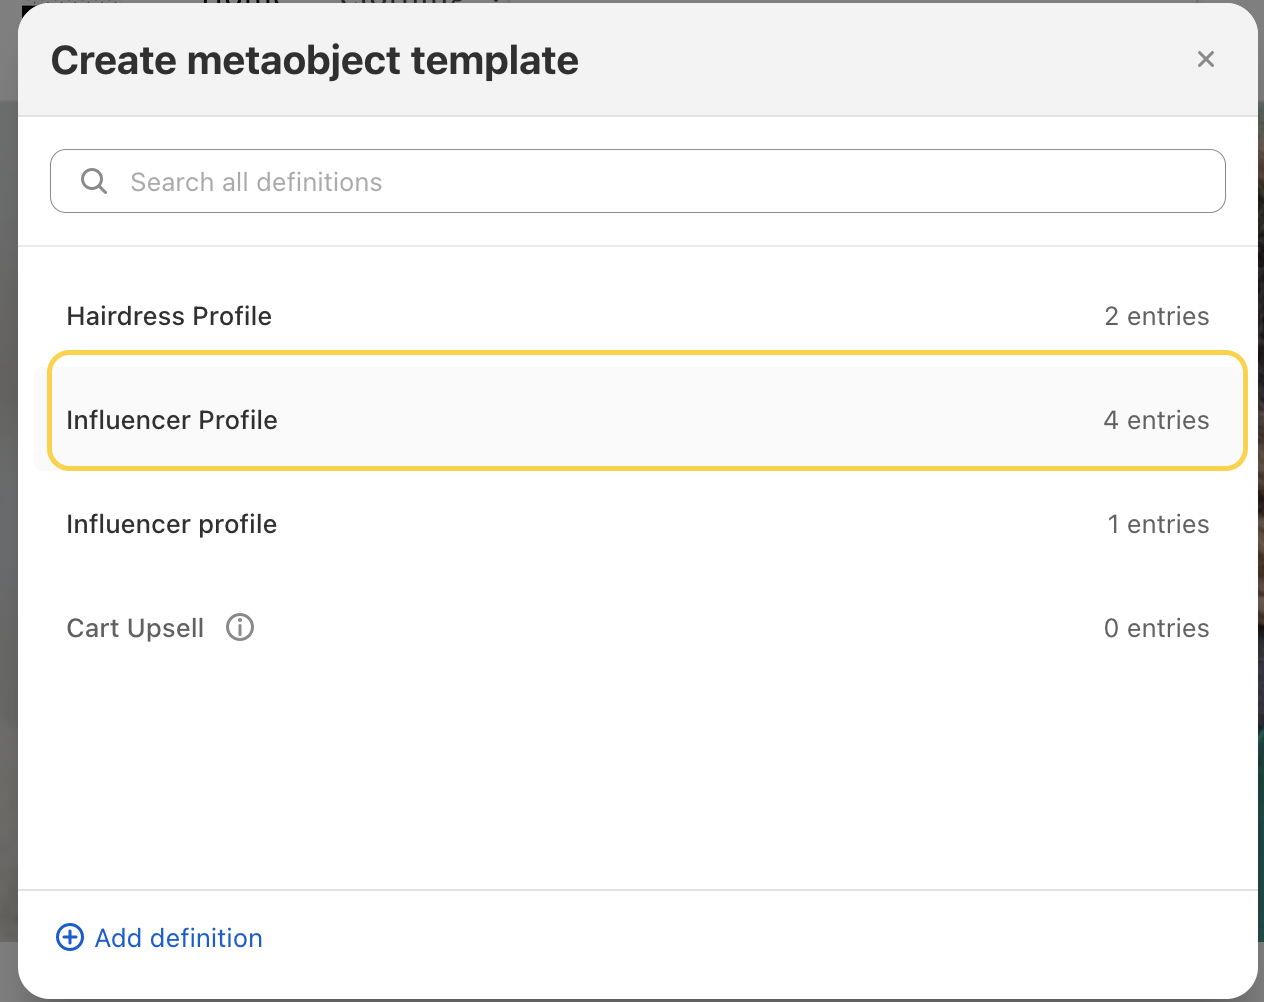
- A new modal window will appear. Here, select the desired metaobject definition for which you wish to create the metaobject pages.
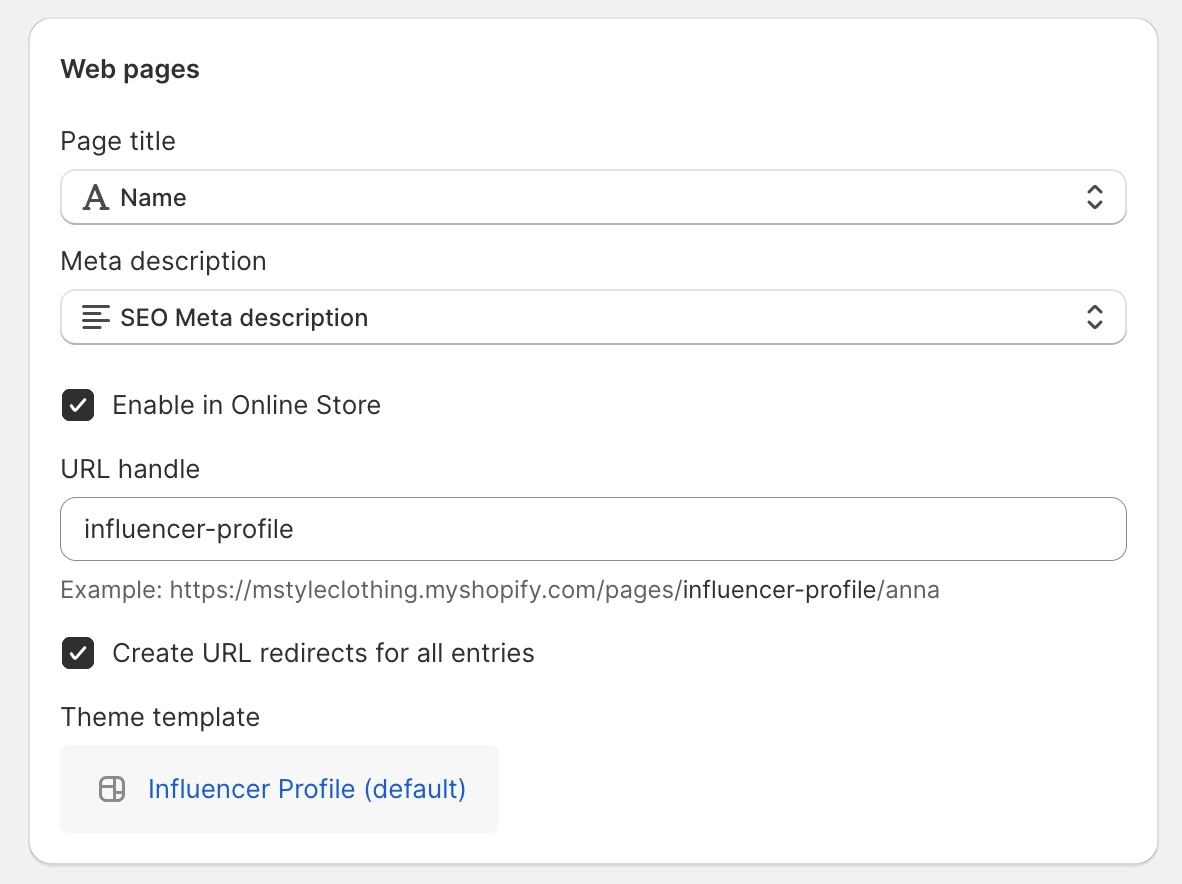
- Next, a new pop-up window will appear, prompting you to provide SEO information:
- Page title: Select a metaobject field that you would like to use as the page title. In our case, you can simply choose the influencer’s name or create a new metaobject field, like “SEO Page Title,” and ensure it meets the SEO title requirements.
- Meta description: For this, I created a new metaobject field that saves SEO meta description information.
- URL handle: You have the option to modify the URL handle or use the suggested one.
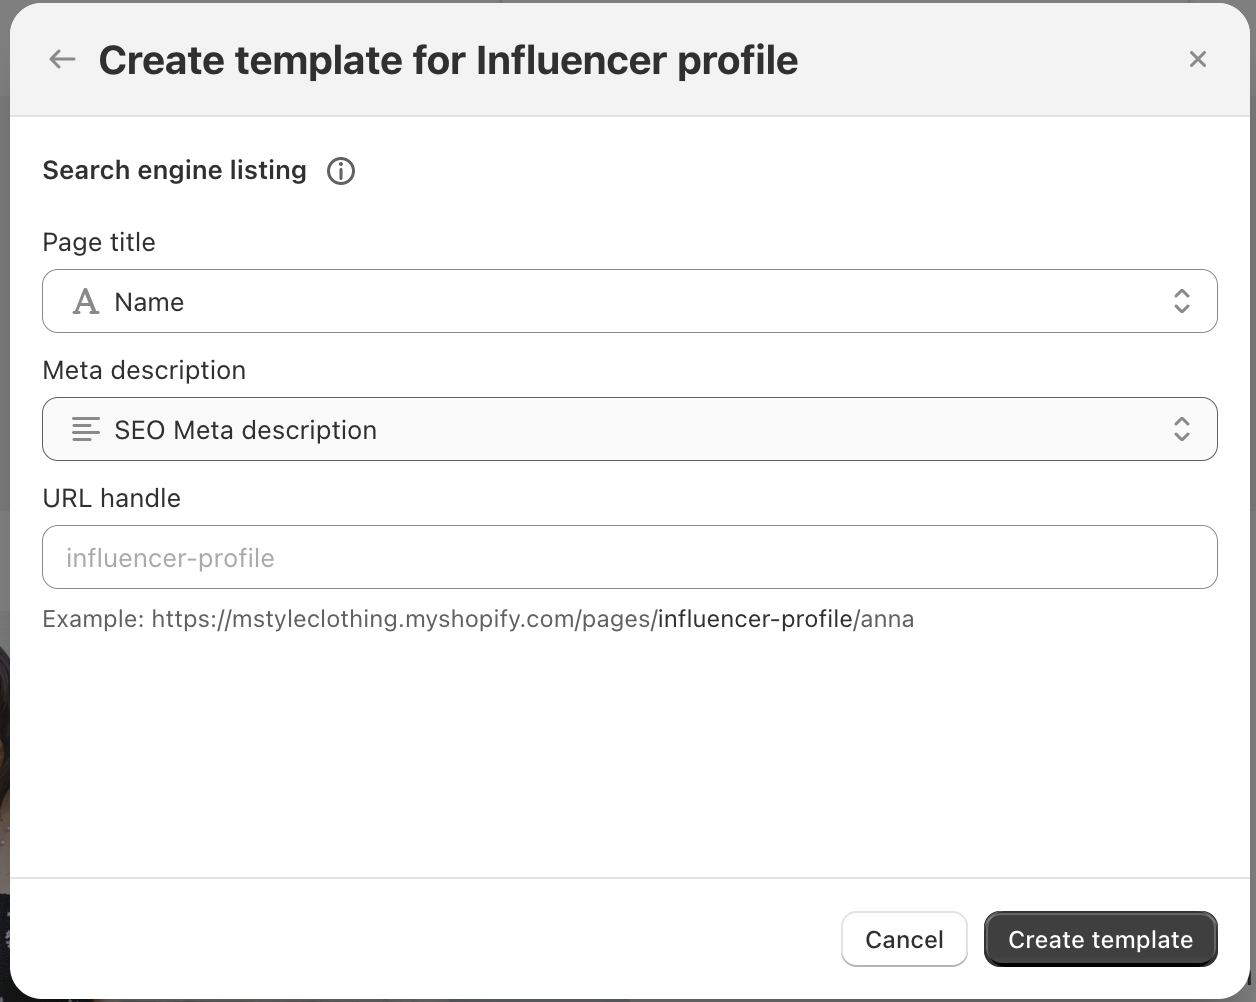
- When you are done, click “Create template”.
If you decide to modify the SEO information later on, you can easily do so by accessing the metaobject definition. Simply choose the relevant definition and scroll down to find the “Web pages” section. From there, you can make the necessary changes.
Customize the metaobject template
Similar to any other template in Shopify, you can begin building the metaobject template. Add sections and blocks based on the information you’ve saved in metaobject fields. In our case, let’s include the “Image with Text” section.
Additionally, you have the flexibility to add various other sections such as “Rich Text” to incorporate headings and subheadings on the pages. Furthermore, you can include “Featured Collection” or “Product” sections and much more. Discover how to render the metaobject entries fields.
- To render the data, click on the relevant block in the section and then click the “Insert Dynamic Icon”.
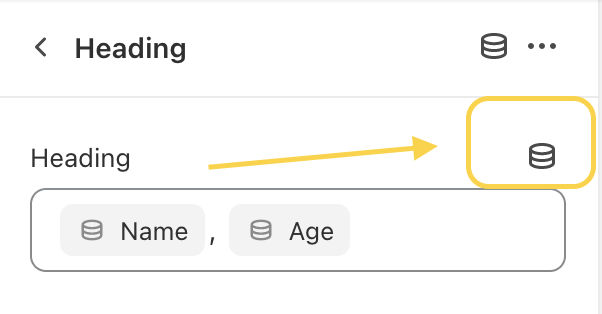
- Repeat the first step for other blocks and section settings (e.g., image). Remember that you can only render the metaobject entries in corresponding blocks! This means that if any of the entry fields are rich text, you can only render the entry field in blocks that support rich text!

- Once you have customized the template, remember to save it.
- You can manually add the link to the page in your navigation menu using the “Link” field.
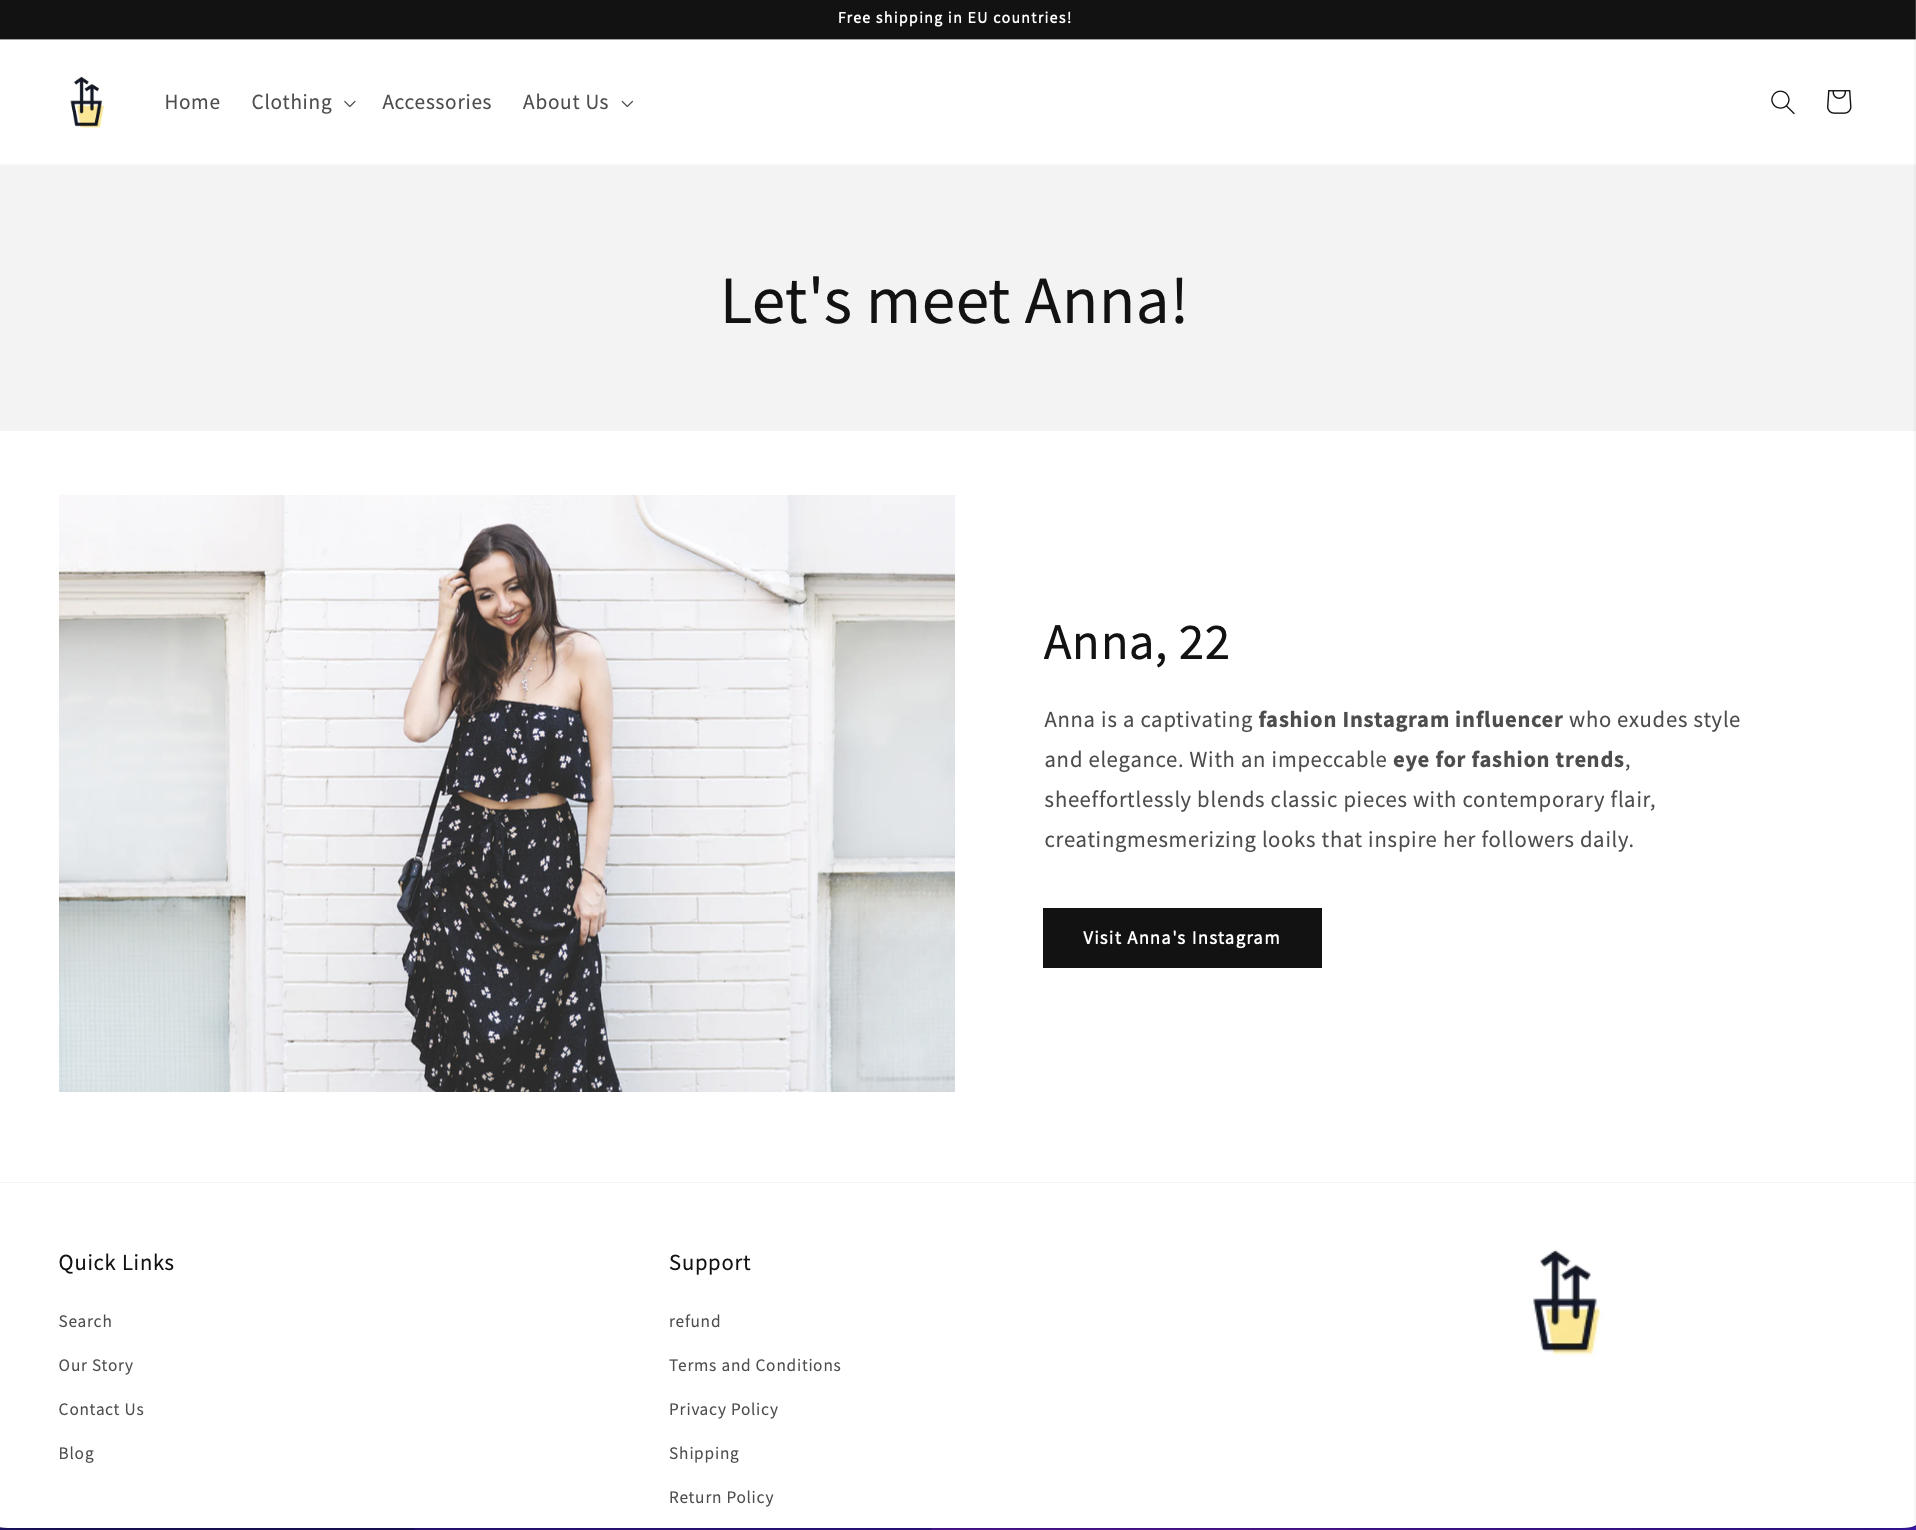
Let’s take a look at the result
Below is an example of how a very basic metaobject page can look. You have the flexibility to add more sections, blocks, customize the design, and make any other desired adjustments. With the incredible power of metaobject pages, you can effortlessly create custom landing pages for each of your metaobject entries in significantly less time and with minimal effort.
If you encounter any issues, don’t hesitate to reach out to me, and I’ll gladly assist you. To delve deeper into the topic of metaobjects, you can explore our informative articles on the subject: