
How to display multiple metaobject entries on Shopify?
In our previous article, we provided a detailed guide on creating metaobject definitions, adding entries, referencing metafields, and displaying metaobject entries on product pages. However, that guide only demonstrated how to display a single metaobject entry assigned to a product.
In this article, we’ll focus on how to display multiple metaobject entries on a product page. To achieve this, we’ll use a similar scenario to our previous guide (displaying influencers’ profiles) and create a new metafield definition with a reference to a metaobject as a list of entries.
Important to note! Before proceeding with the steps outlined below, we recommend reading our previous article on metaobjects, which explains what metaobjects are, how to create a metaobject definition, and add entries. Once you’re familiar with the basics of metaobjects, you can continue with the steps in this article.
Besides, if you’re not familiar with metafields, please refer to one of our previous articles on How to display additional product information on your store? Use integrated Shopify metafields. (Themes 2.0. and vintage themes).
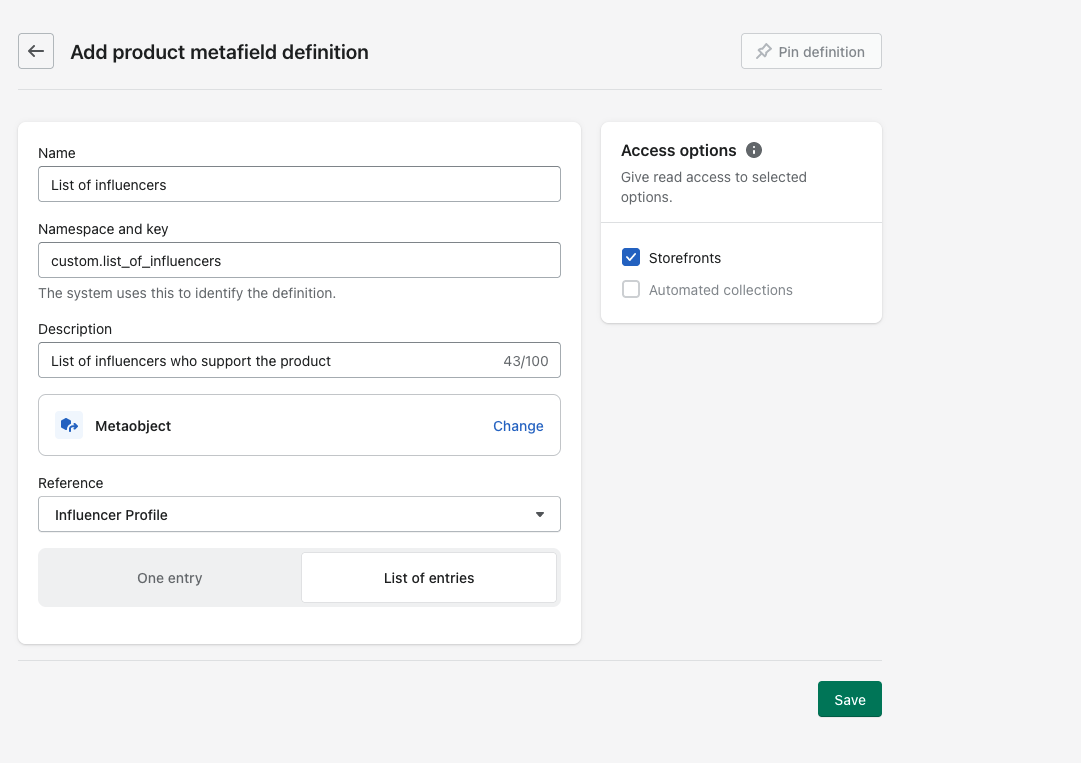
Create a new metafield definition (list of entries)
To display multiple metaobject entries, you don’t need to create a new metaobject (applicable to our example). Instead, you can create a new metafield definition with a list of entries that references the metaobject.
This is the only difference between displaying one top influencer and several influencers on the same product page. With a new metafield definition, you can assign multiple entries to a product and display them on the product page. Let’s take a closer look at the steps involved.
- Open your Shopify admin and go to Settings > Custom data > Metafields.
- Select Products and click “Add definition.”
- Name the definition (e.g. “List of Influencers”) and add an optional description.
- Choose “Metaobject” as the metafield definition type, and select the Influencer Profile metaobject you previously created from the Reference dropdown.
- Select “List of Entries.” Note that this is where you decide whether to assign one entry or multiple entries to a product.
- Check off the access options for “Storefronts.”
- Save the definition.
Assign influencer profile metaobject entries to products
Now that we have created a new metafield definition, we can assign influencers to the products they support. Here’s how:
- Go to your Shopify admin and select the product you would like to add influencers for.
- Scroll down to the “Metafields” section.
- Click the field next to the “List of influencers” metafield and from the dropdown menu, select all influencer names that you want to assign to the product.
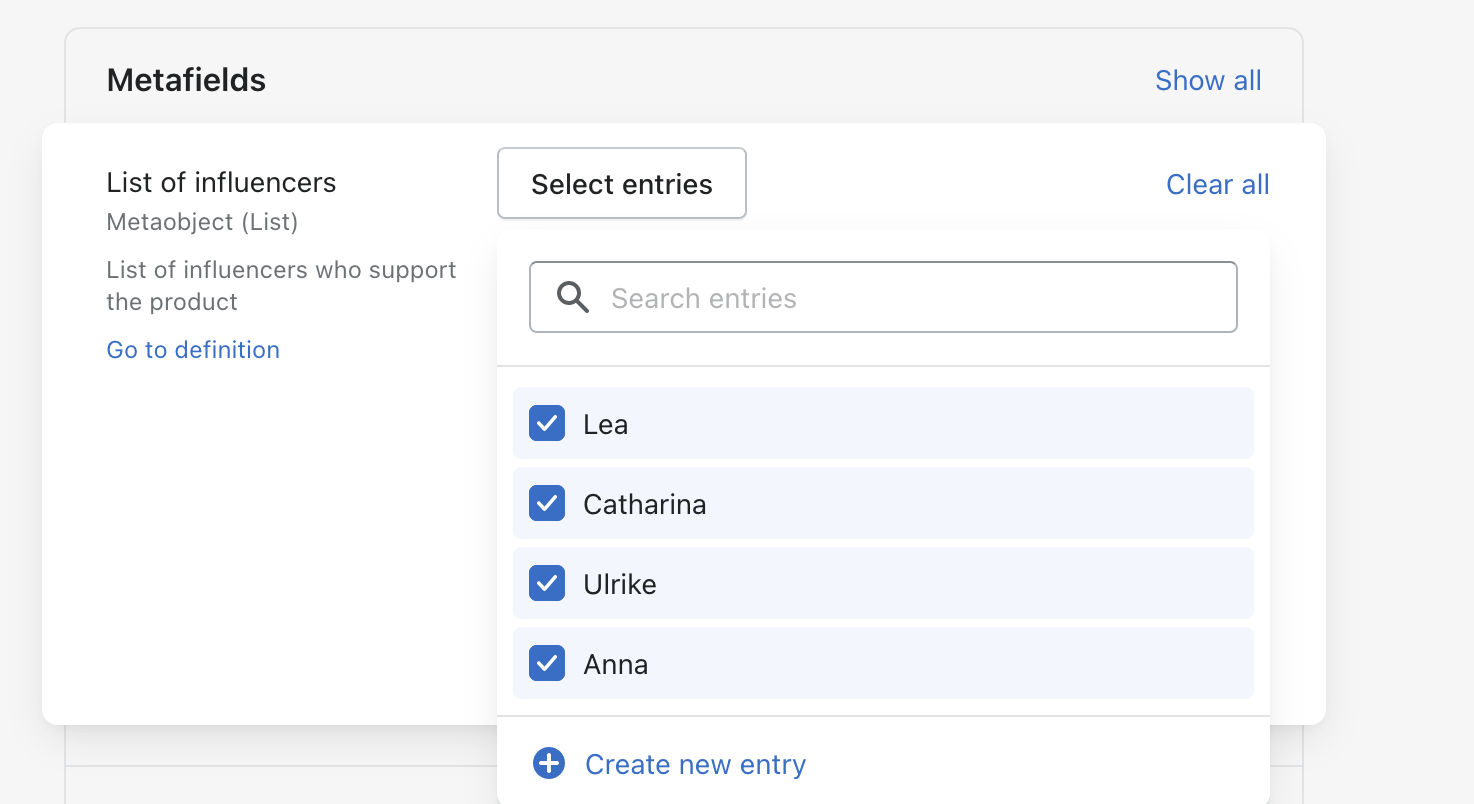
- Save the changes and repeat the same steps for other products.
Display the entries (influencers) on product pages
To display multiple influencers on the product pages, a new section needs to be created that displays the influencer cards in a grid. In this example, the custom-liquid.liquid section was used as the base.
The new section will display clickable influencer cards that include their image, name, and age, which redirect to the influencer’s blog. However, keep in mind that this is just a basic example and additional customization may be needed to align with your brand, storefront layout, and overall store theme.
Looping over the entries and displaying each entry assigned to the product is necessary to display multiple influencers. The “image with text” section used for displaying one TOP influencer is not compatible with displaying more influencer profiles.
Create a new section “Influencers”
As mentioned previously, a new section will need to be created to display multiple influencers on the product pages. In this example, we will base the new section on the already existing custom-liquid.liquid section. However, you can create a section completely from scratch or base it on another one.
- To create the new section, simply copy the code provided and paste it into a newly created section. Be sure to name the file
influencers.liquid. - Create a new CSS file and paste the code below. Name the file
influencers.css. - In your Shopify admin, navigate to the Customize theme section and select the Default product template (or any other template you prefer).
- Add a new section and choose “Influencers” from the list of sections you’ve created.
-
Save the changes and refresh your product page. You should now see the influencer profile cards displayed in the section, as shown in the screenshot.
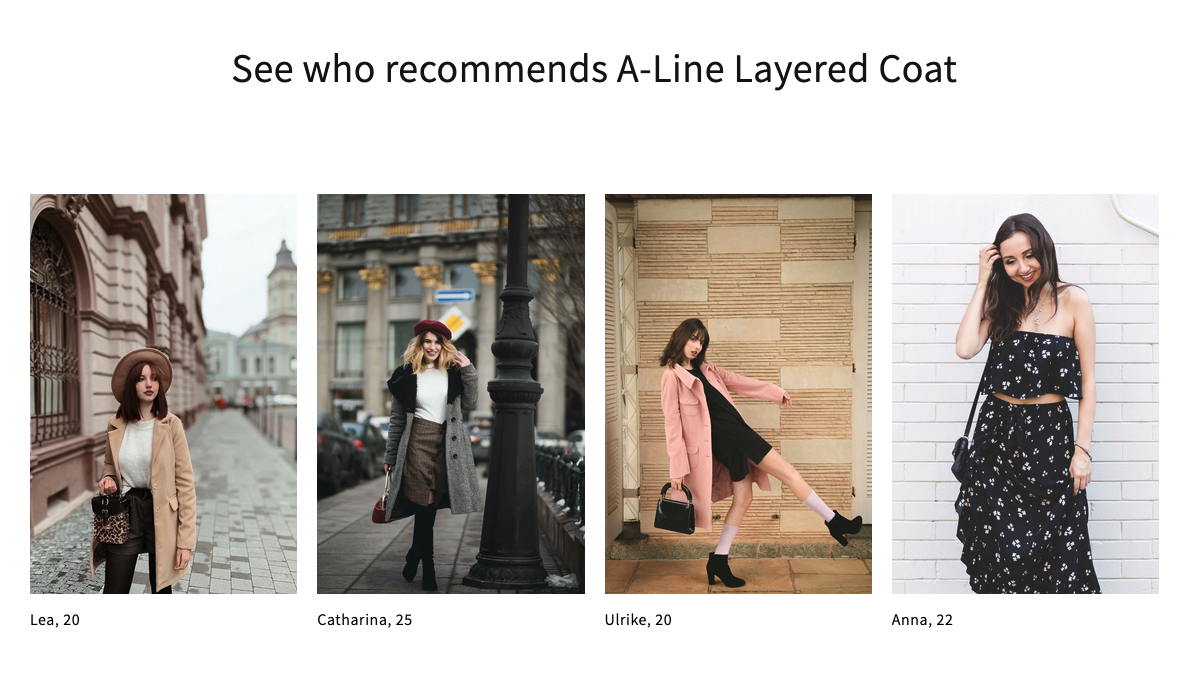
- Notice that we added a heading above the influencers section using the already existing rich text section. Feel free to customize the newly created influencers section further!
Great! Now, it’s all done and set up. By using metafields and metaobjects in Shopify, you can easily assign influencers to your products and display them on the product pages. Creating a custom section with a grid of influencer profile cards can help showcase multiple influencers and redirect customers to their blogs. With some additional customizations, you can create a unique and personalized storefront that fits your brand and aesthetic.