
How to implement metafield filtering on collection pages?
It’s not news that filters are managed by the Search and Discovery app on Shopify. This app allows you to establish standard filters, like filtering by price or product options (e.g., size), or you can create custom filters unique to your online shop.
In the past, merchants used product tags and custom code to implement custom filtering (e.g., filter products based on season, age, gender, fashion style, or else). However, product tags serve better for purposes other than storefront filters, such as creating automated collections or admin product list filtering.
Additionally, when you activate filtering by tags in the Search & Discovery app, all product tags are consolidated into a single filter. This means that all tags get mixed together, resulting in a lengthy list of product tags for filtering options, which is definitely not a user-friendly way to filter products.
Note: Some older versions of certain themes still support filtering by product tags.
Moreover, thanks to the Search and Discovery app, we can now easily establish custom filters (e.g., filtering based on season) using metafields without the need for custom code.
In this guide, we will demonstrate how to set up custom filtering for an example store that aims to allow customers to filter fashion products based on body fit: Tall, Petit, Classic, Maternity, and Plus size.
Create a product metafield definition.
Create a product metafield definition. If you haven’t created any product metafield definition and the term is a completely new for you, I recommend reading one of our previous articles How to display additional product information on your store? Use integrated Shopify metafields. (Themes 2.0. and vintage themes).
For our case, we will assign one value for each product. No product will have more than one body fit value. To create the metafield definiton, please follow these steps:
- From your Shopify admin, go to Settings -> Custom data -> Metafields -> Products.
- Click the “Add definition” button.
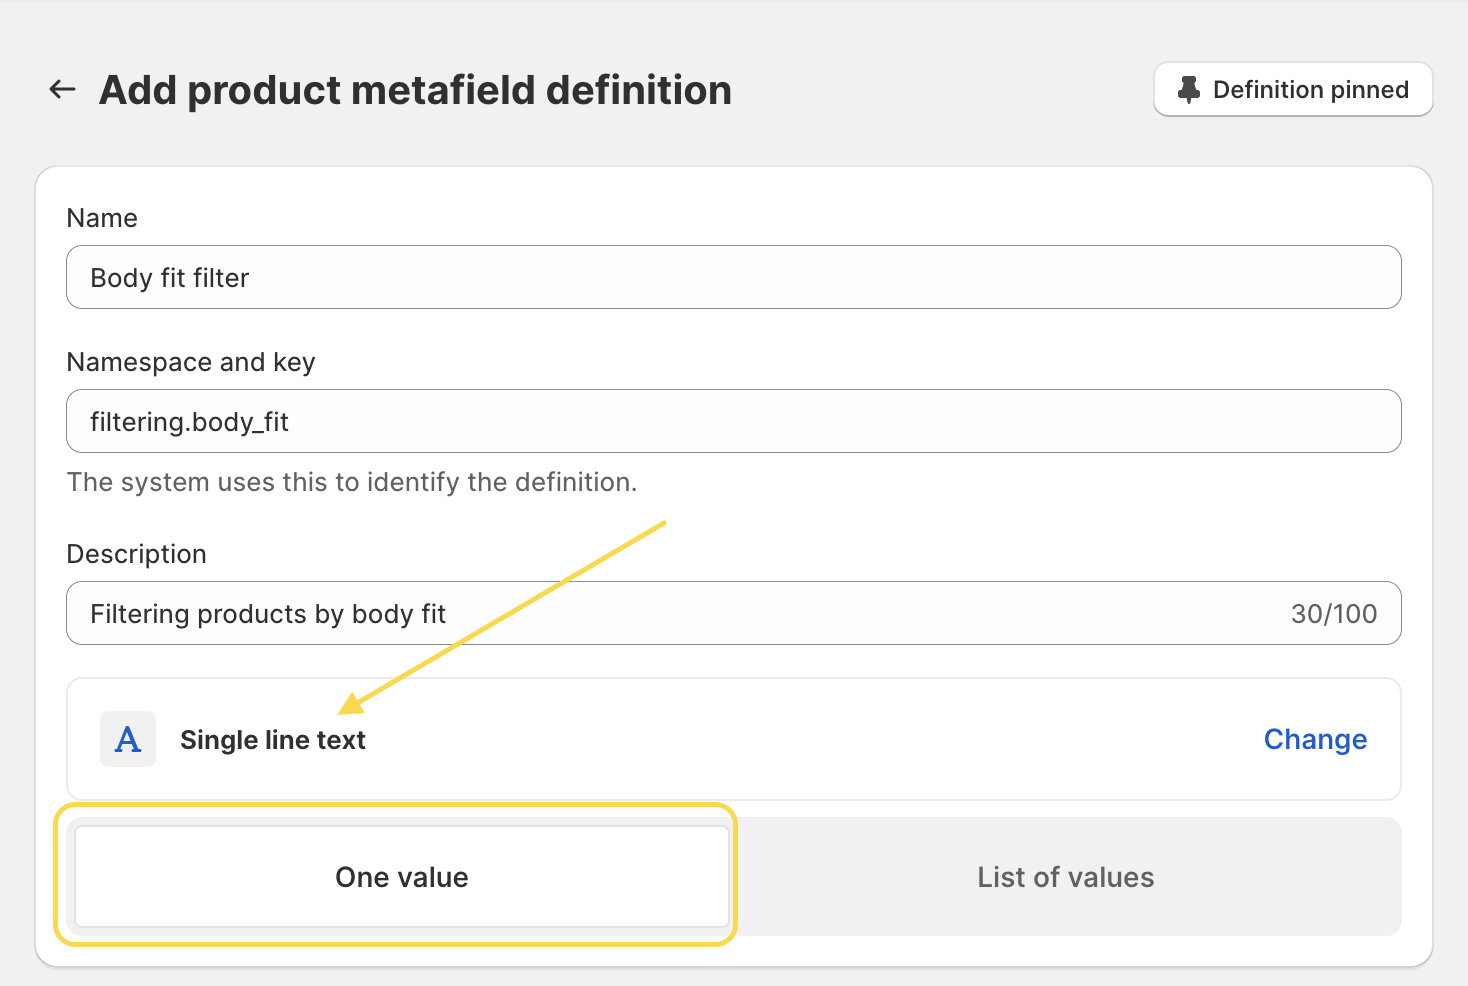
- Name your definition and add a description (optional).
-
Choose the single-line text type, with only one value (a list of values can be used if a product can have more than one value assigned).
-
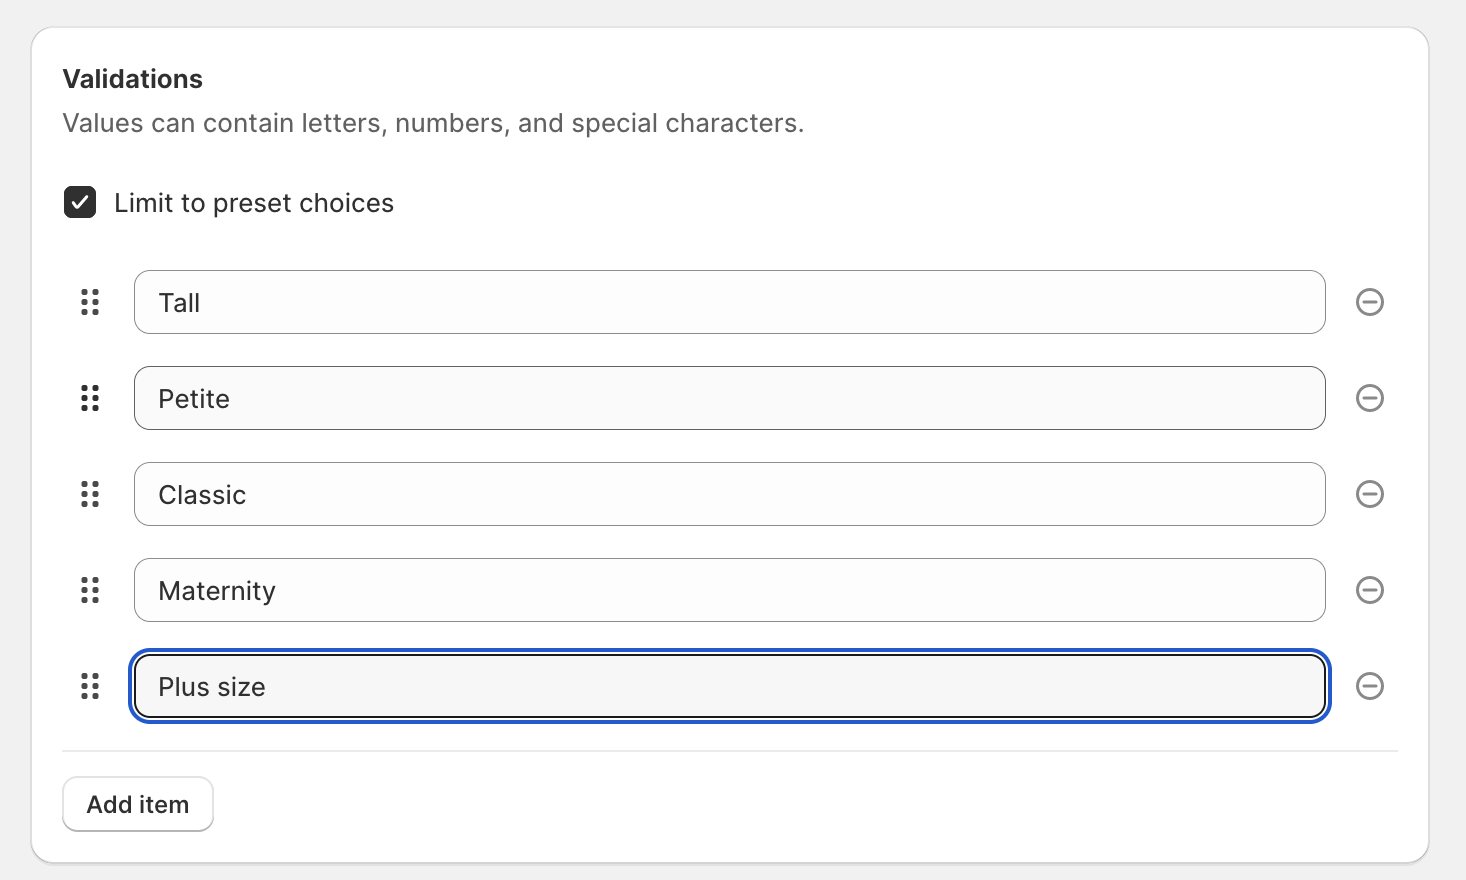
In the Validations section, check the “Limit to preset choices” checkbox and add your values.
-
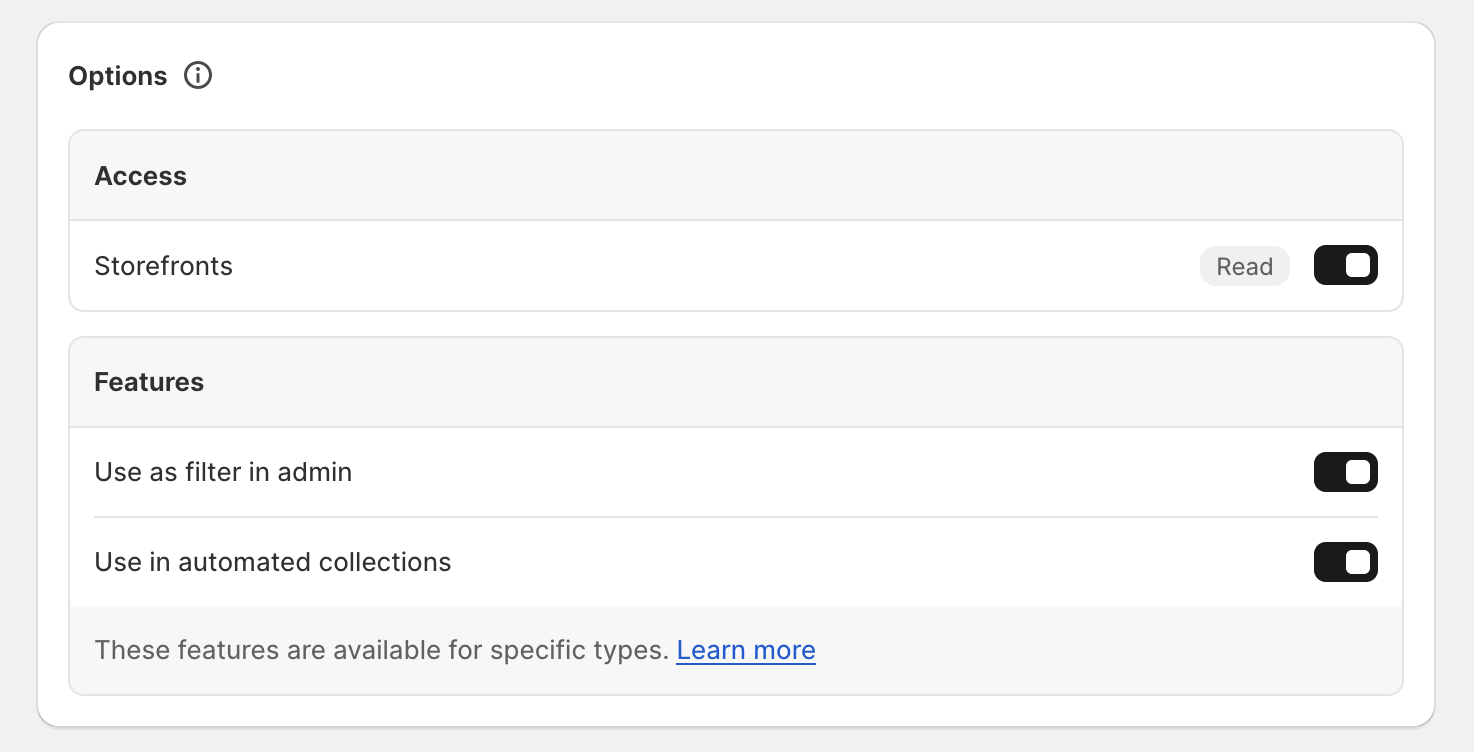
In the Options section, ensure the “Storefront” checkbox is checked. The rest of the settings are optional (you don’t need to use this metafield definition for filtering options in the admin or for creating automated collections; however, I recommend doing so in case you may need it in the future).
- Save your metafield.
Assign metafield values to your products
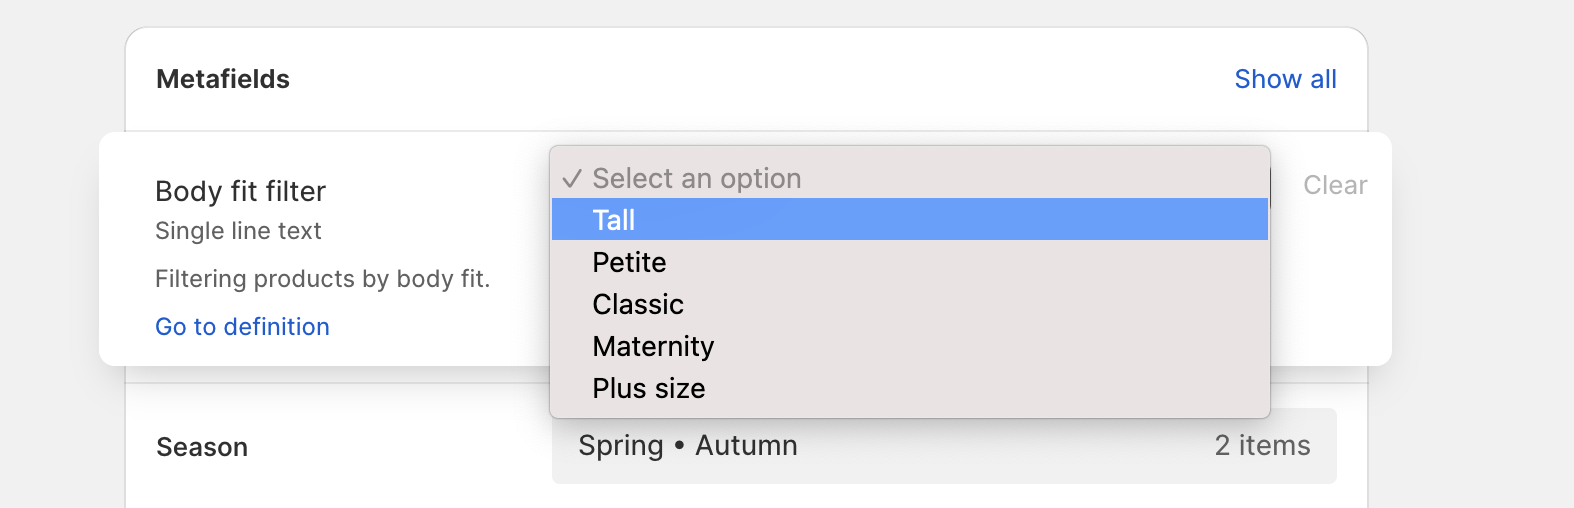
Now, we need to assign values to your products. To do this, open a product and scroll down to the Metafields section.
-
Click on the “Body fit” metafield definition (or the one you created).

-
Choose from the already predefined values. If you use the single-value setting, you can select only one option; if you use a list of values, you can check off multiple values.
- Save the changes.
- Repeat these steps for all of your products.
Note: If you have many products, you will probably spend hours on assigning the values. Instead, use bulk editor to assign the values. Unfortunately, metafields are still not available in CSV exports.
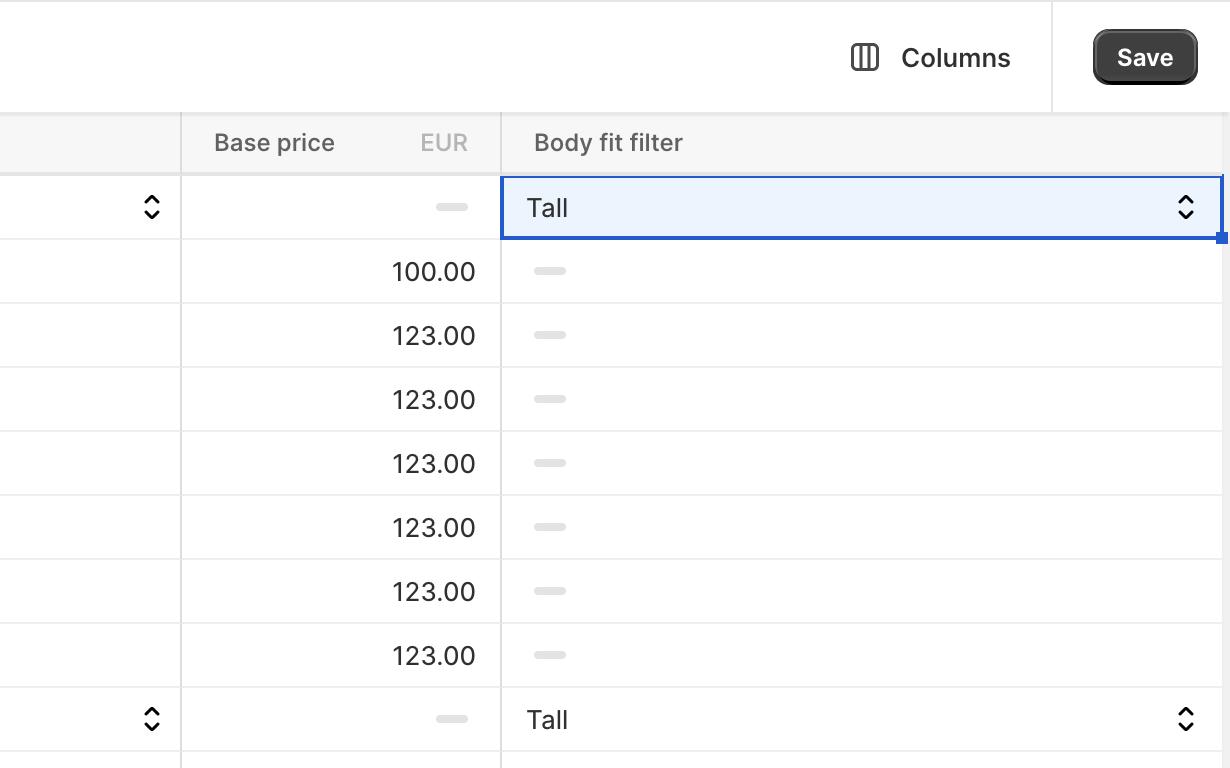
Tip: When using bulk editor, you can filter out your products in admin by tags, collection, product type or else - filter the products so that you get products which will get the same body fit value. Open these products in bulk editor, add the column “Body fit filter” select the desired value and copy paste the value to all other products.
Set up the filter in Search & Discovery app
Once you have body fit values assigned to your products, it’s time to configure the filter through the Search & Discovery app.
- Install the Search & Discovery app (if you don’t already have it in your eshop).
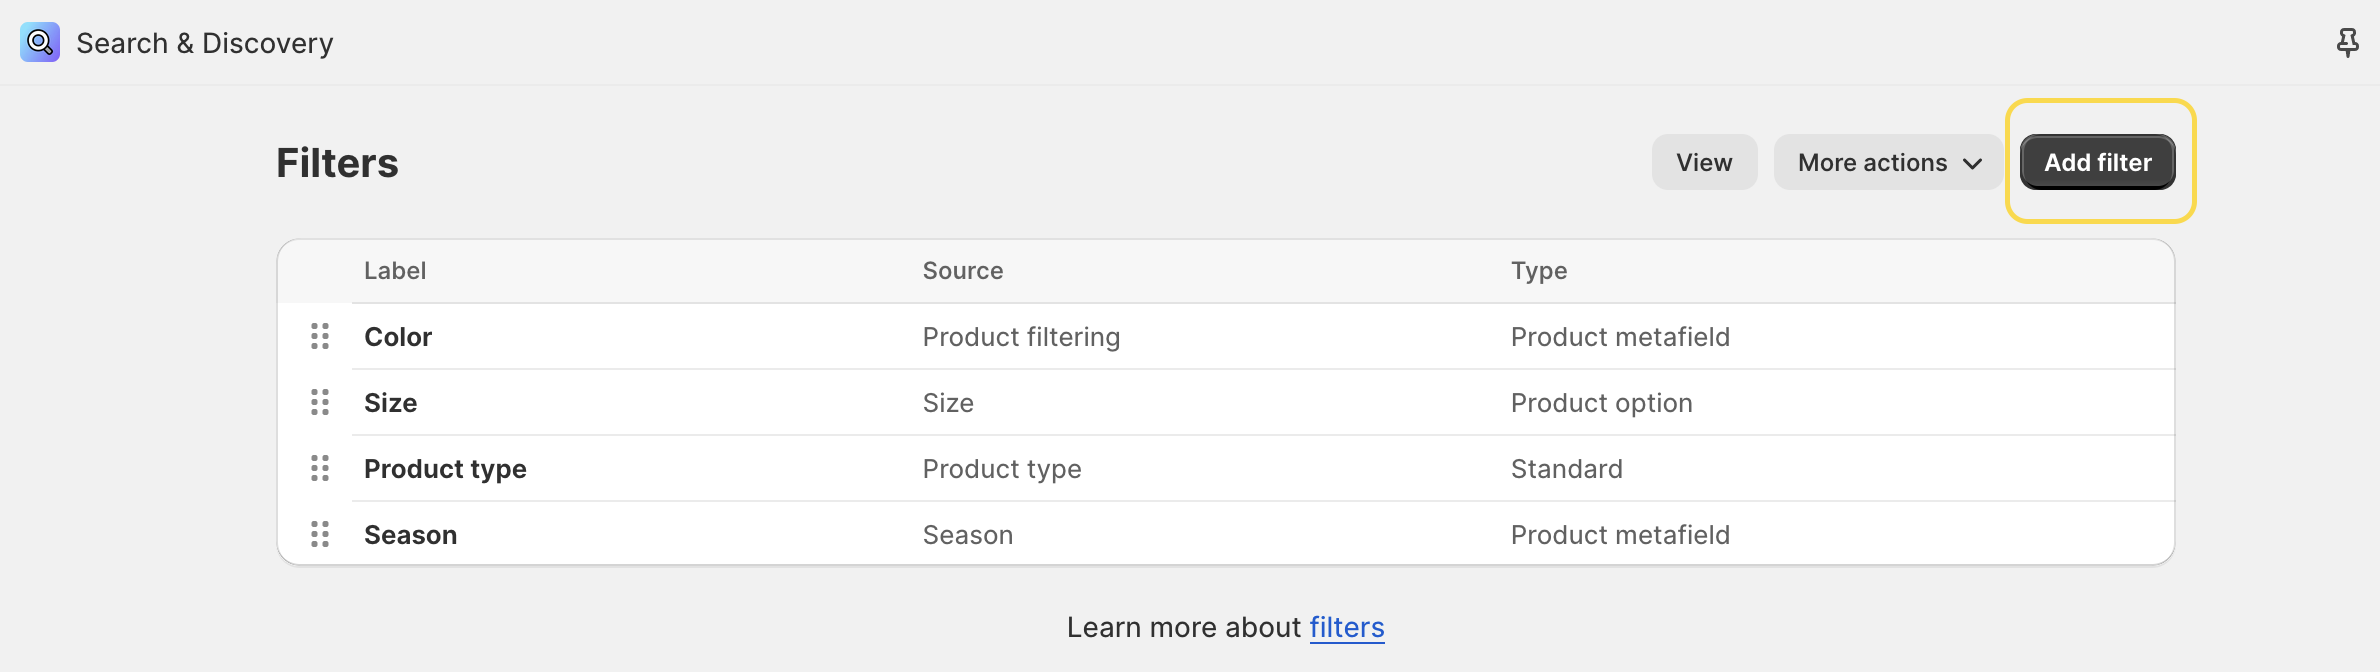
- Open the app and navigate to the Filters section.
-
Click the “Add filter” button.
- Choose the metafield definition in the source field that you would like to use for filtering.
-
Rename the filter if you wish.
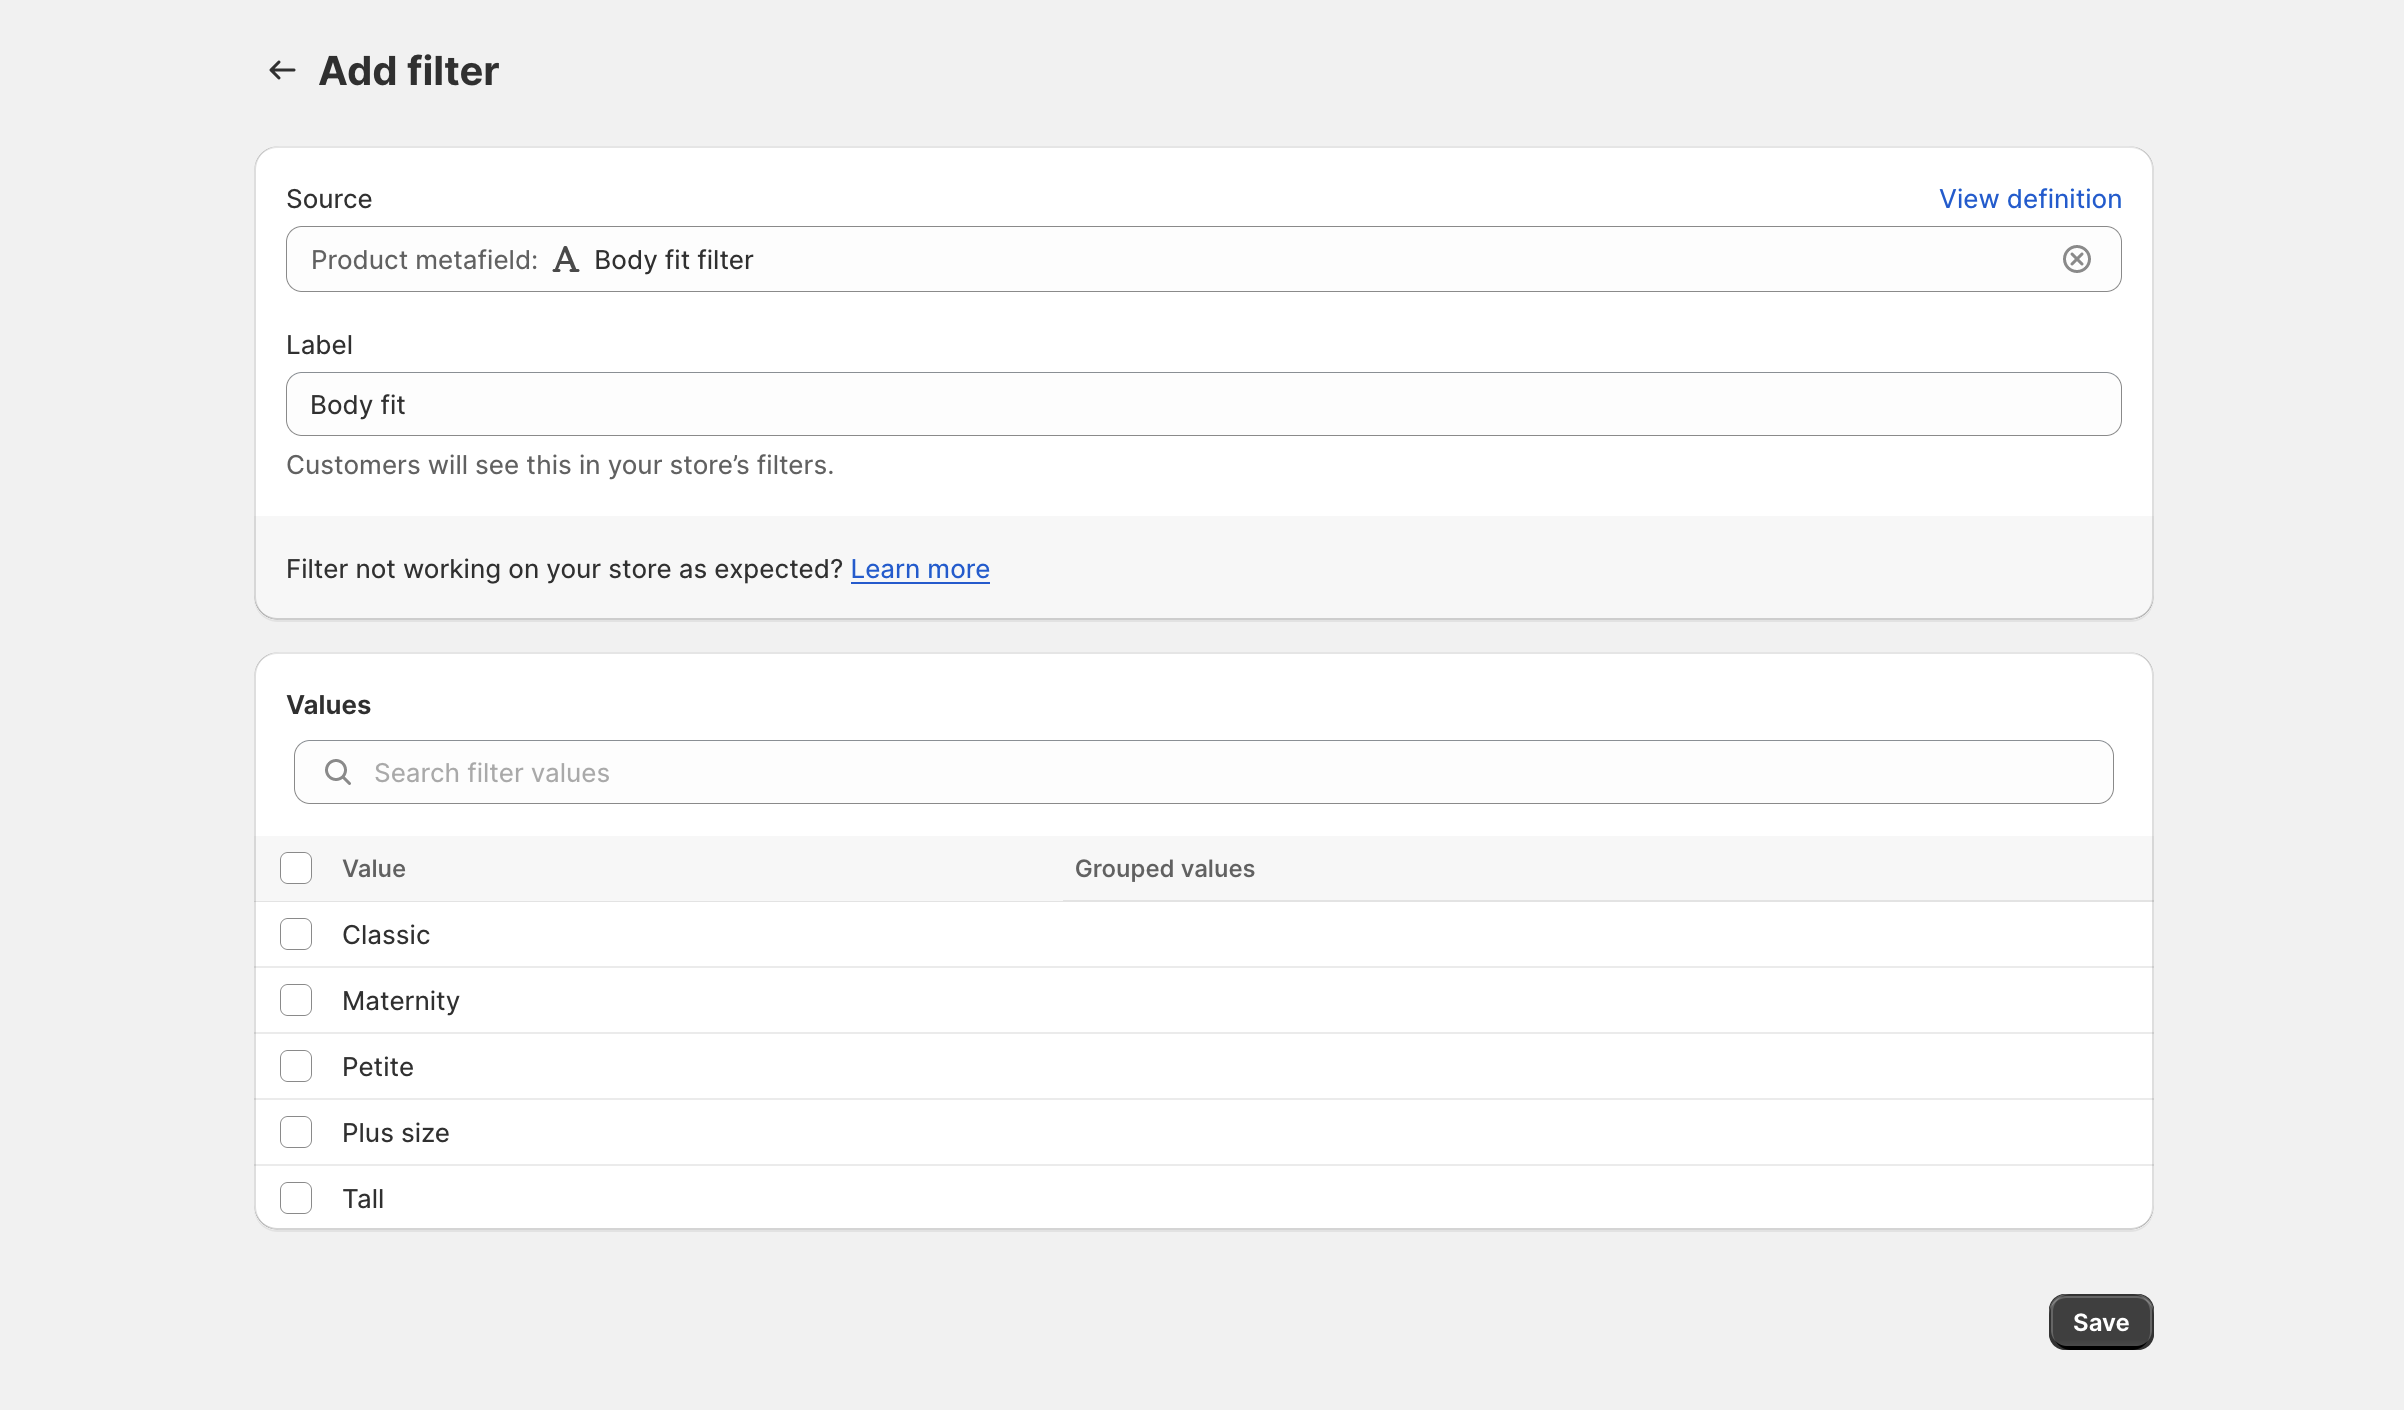
- Do not group the values, if not needed.
- Save your changes.
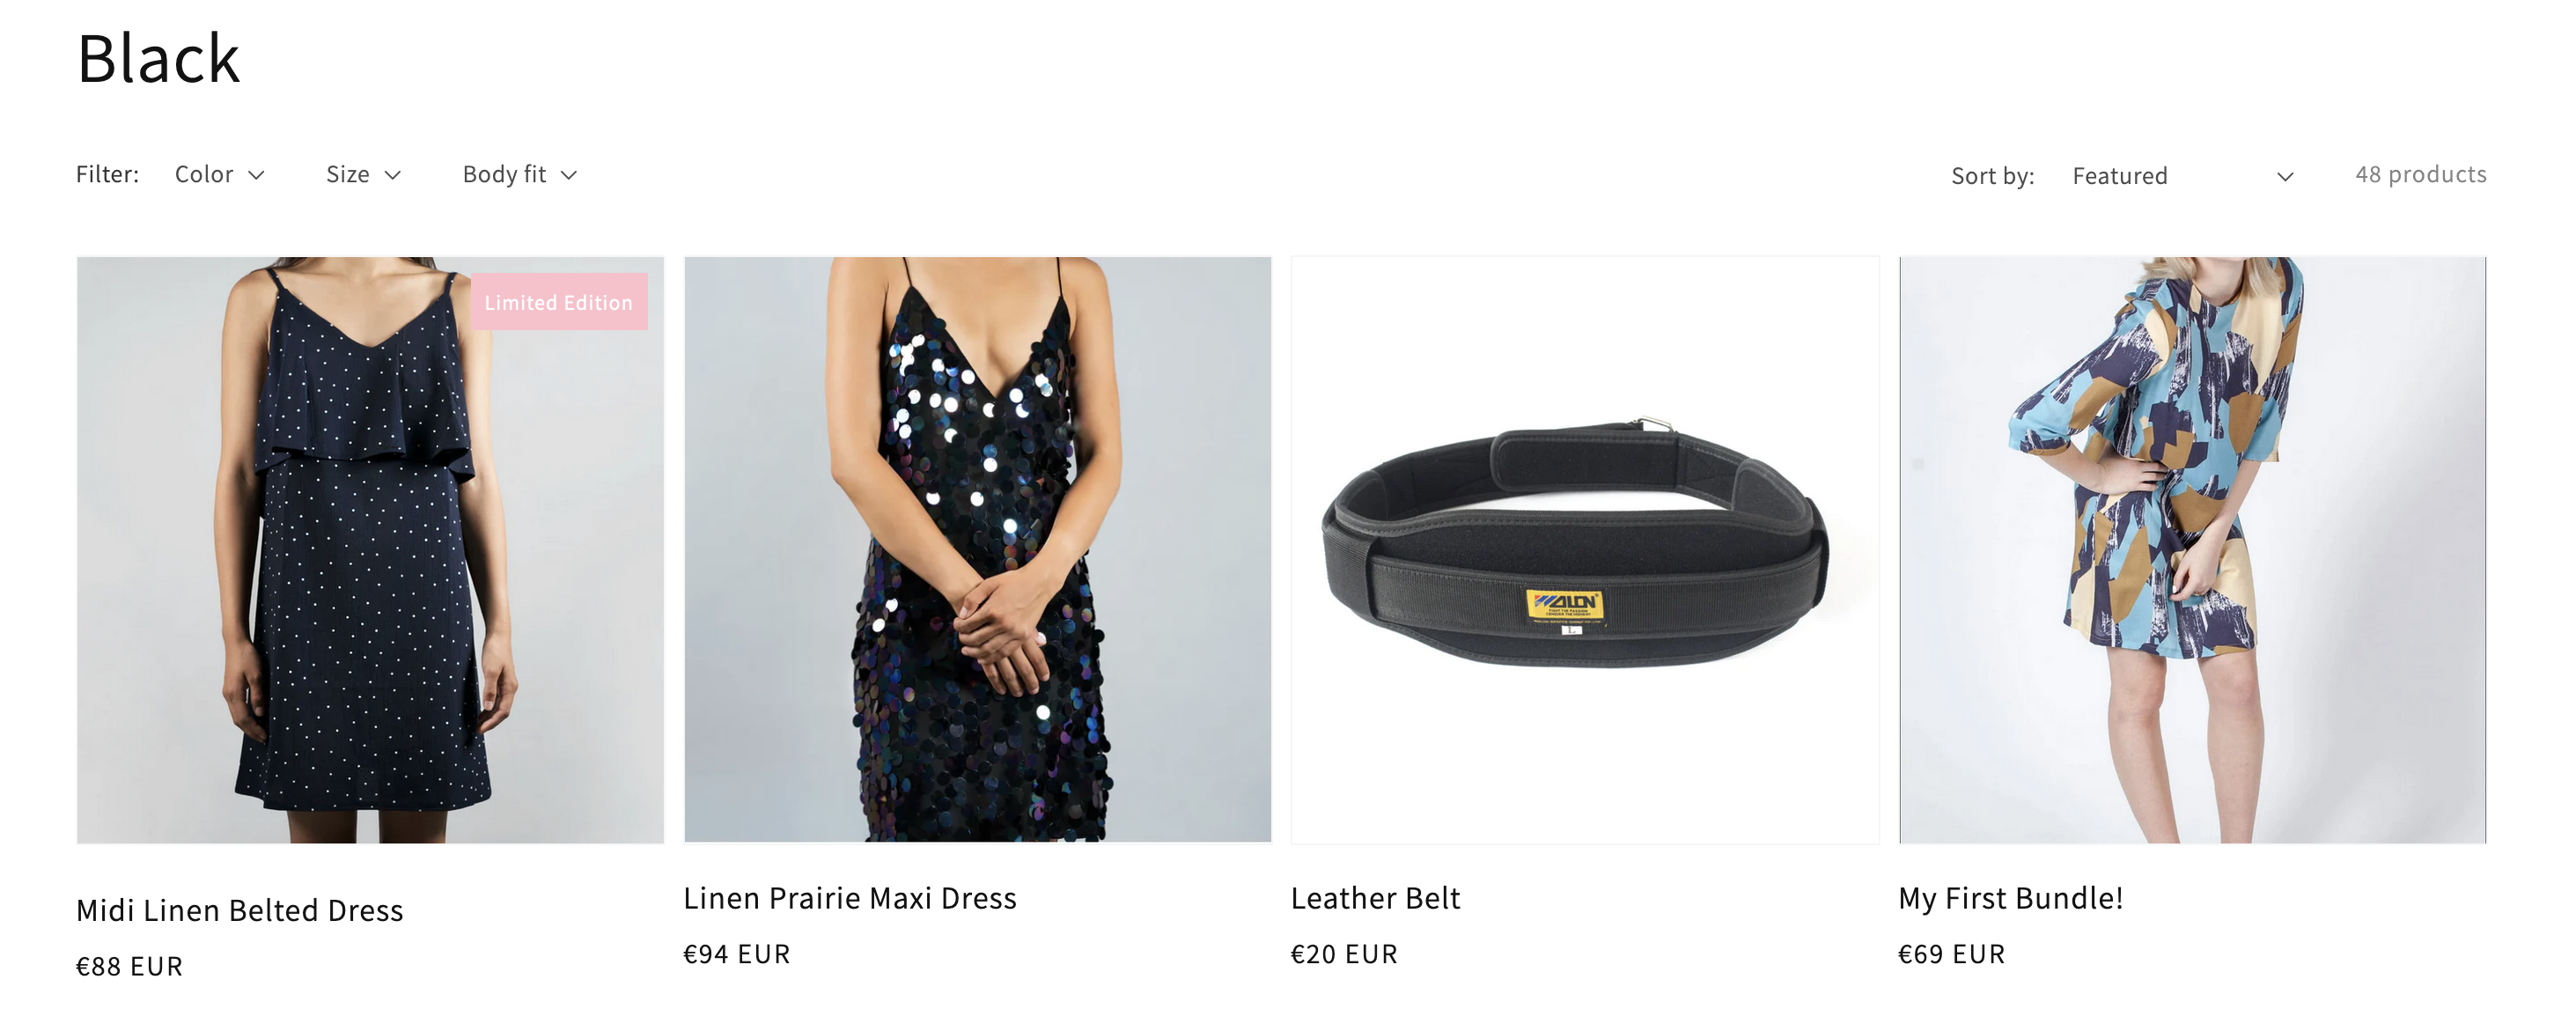
- Visit any collection that includes products with the filter values assigned, and you should see the filter option there.
Translating filter options and the values
If you operate your store in more than one language, it’s practical to undestand how to translate the filter label name and the values.
How to translate the filter label name?
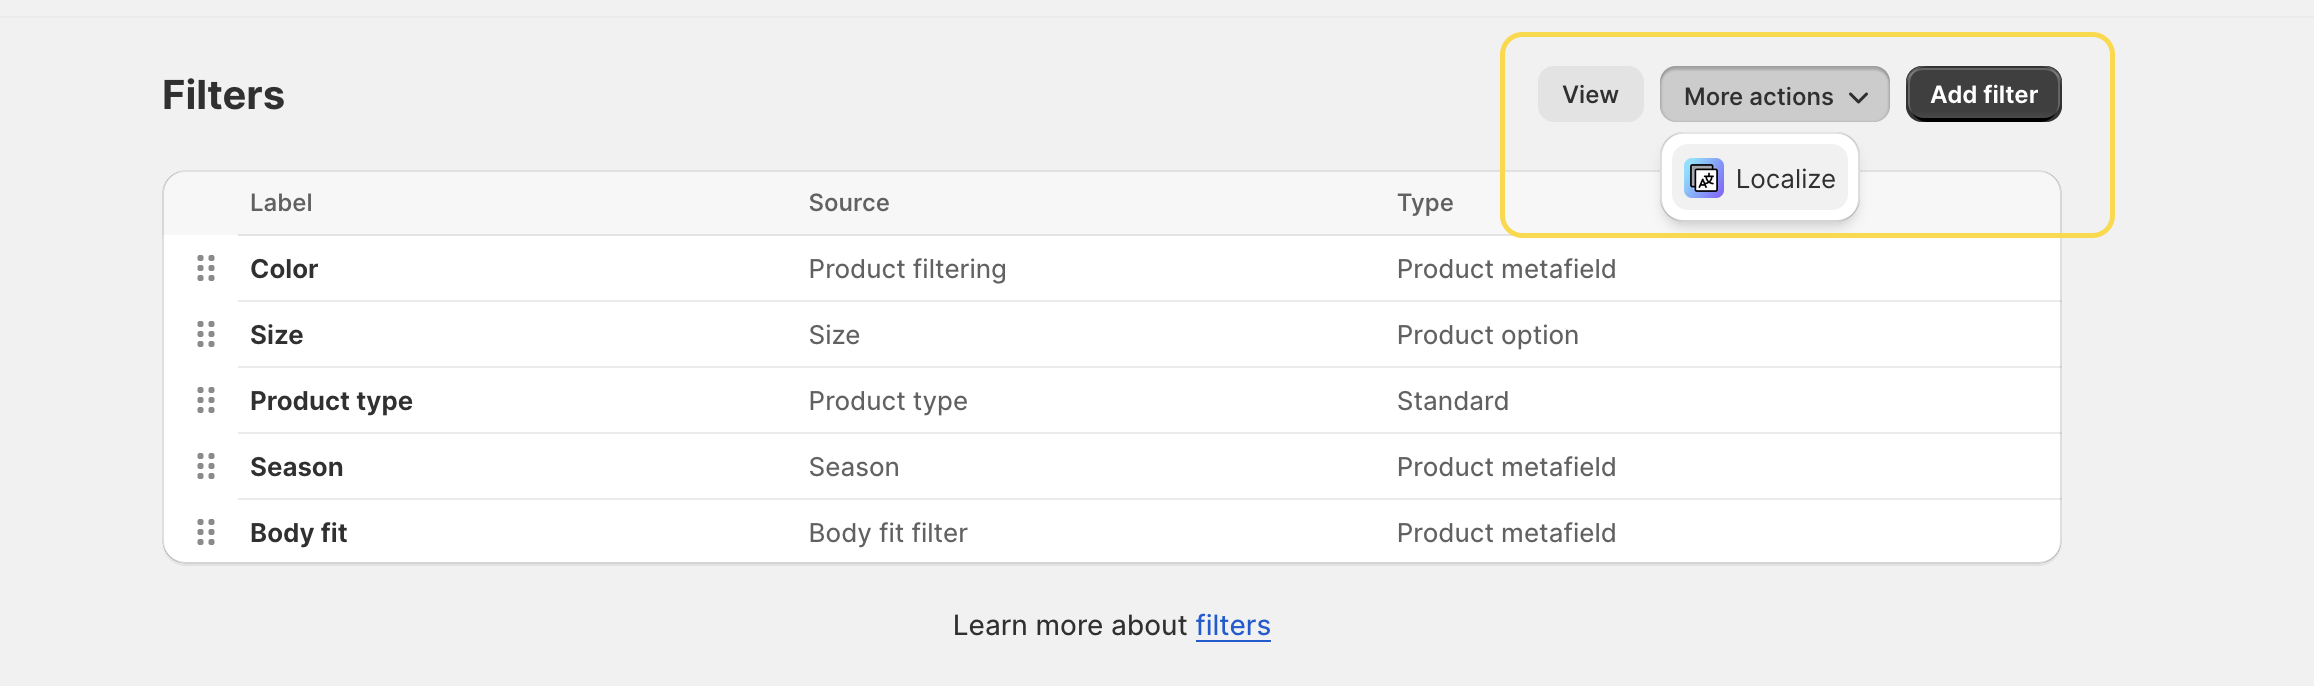
This process is straightforward. The best way is to go to the dashboard of your filters in the Search & Discovery app, click the dropdown menu “More actions,” and select the “Localize” icon. This action will redirect you to the translation app. Select the filter label name add your translations for each language.
How to translate the filter values?
Translating filter values can be a bit tricky because, since it’s a product metafield, you’ll need to translate the value for each product individually. If you have only a few products, you can do it manually, translating one product at a time.
However, if you have tens or hundreds of products, this process could be time-consuming. So, with a few CSV filtering tips, you can easily streamline it.
- I recommend exporting your translations and filtering out the “Metafield” in the first “Type” column.
- In the default column, you will find the original filter value.
- You can then filter out only the same filter value in this column, add translated content to the “Translated content” column, and copy-paste the translated filter value to all other cells. Warning! Please make sure that you use the correct quotes!
- Repeat these steps for each filter value.
- Save your changes and upload the file back to Shopify.
- Check if the translations were correctly uploaded.
And that’s it. I hope this article will assist you in setting up your filters and translating the values seamlessly. If you encounter any issues, please let us know. We will be happy to help you out.
Tip: Would you like to set up visual filter (=color swatches) on your colletion pages? Using the Search & Discovery app and metaobjects it’s easy to set up. Follow the guide on Setting up visual filters (color swatches) on collection pages using metaobjects.