How to leverage store credits on Shopify?
Store credits are a powerful new feature recently introduced by Shopify. They can replace many situations where you’d traditionally issue gift cards or create workarounds using discount codes.
This feature is currently in early access release and is enabled by default in your store. However, you have the flexibility to choose whether to display store credits as a payment option during checkout or not.
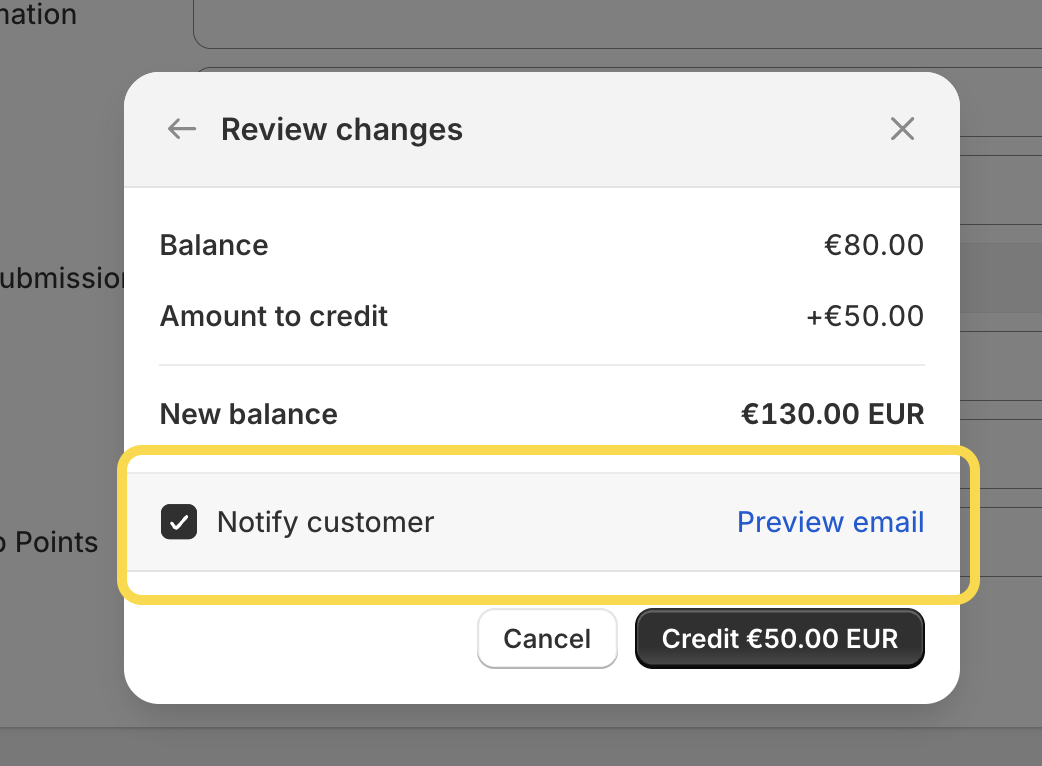
Update: With the September 2025 update, you can now notify customers when store credits are issued. When assigning store credits to a customer, simply check the Notify customer checkbox (see screenshot below).

This will trigger an email letting them know they’ve received store credits for your store. You can customize the content of this email in Settings → Notifications → Store credit → Store credit issued.
When and why should you issue store credits for your customers?
While store credits might seem interchangeable with discounts or gift cards, they offer distinct advantages. Unlike gift cards or discount codes, store credits are non‑transferable, making it easy to tie them directly to a specific customer, with or without an expiration date.
There are several scenarios where store credits can be highly beneficial, such as:
- Compensating customers when there’s an issue with their order, product, or service.
- Rewarding VIP customers for their loyalty and previous purchases.
- Incorporating store credits into your marketing campaigns.
- Boosting customer retention as part of a loyalty program, encouraging repeat purchases.
How to issue store credits to a customer?
Issuing store credits to your customers is a simple process. Follow these steps:
- Navigate to the “Customers” section in your Shopify admin.
- Select the customer you want to assign store credits to.
-
On the right side, above the “Tags” section, you’ll see a newly added block labeled “Store Credit”.

- To assign store credits, click the “pen” icon.
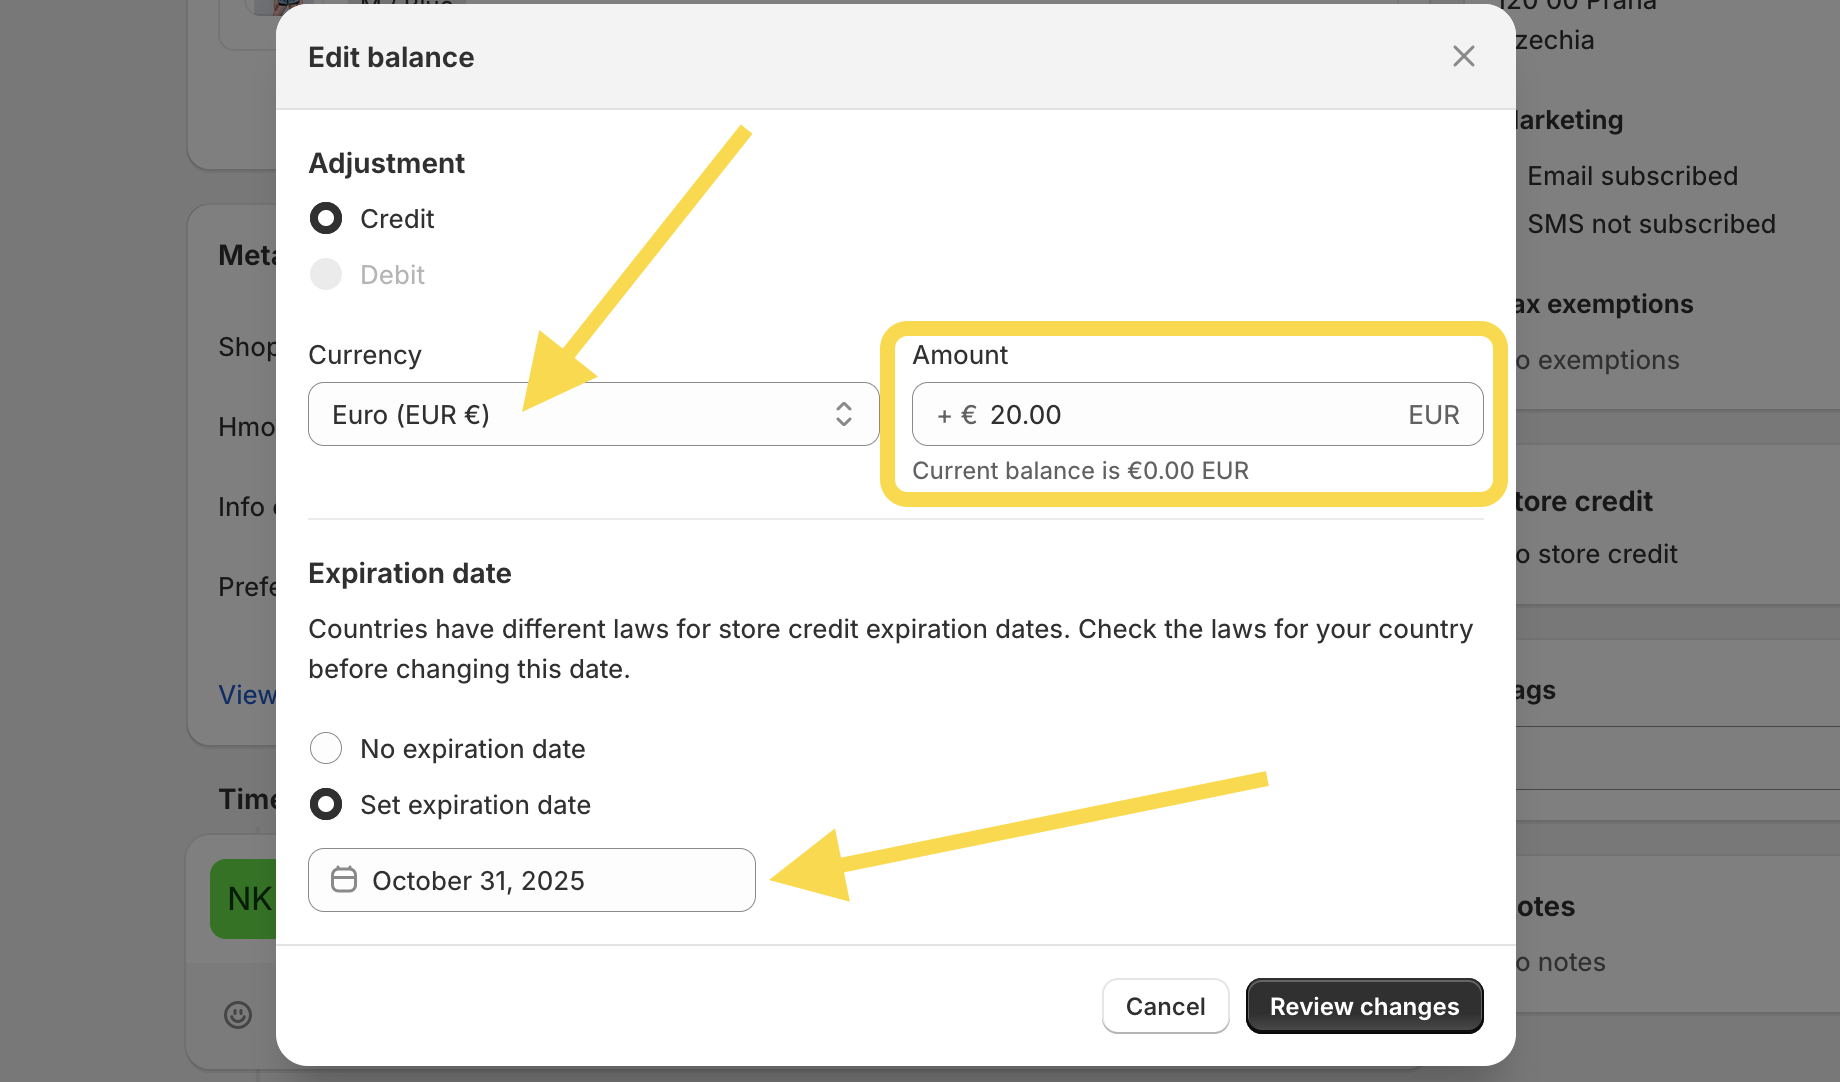
- A new window will appear, allowing you to set up store credits for this specific customer:
- Credit/Debit: Select “credit” to add credits.
- Currency: Store credits can be added in multiple currencies, but during checkout, only the currency in which the transaction is conducted (=based on the market and shipping setup) will be available.
- Amount: Enter the amount of credit you wish to assign.
- Expiration Date: In some countries, you’re required to add an expiration date. Check with your legal advisor to see if this applies to your business.

-
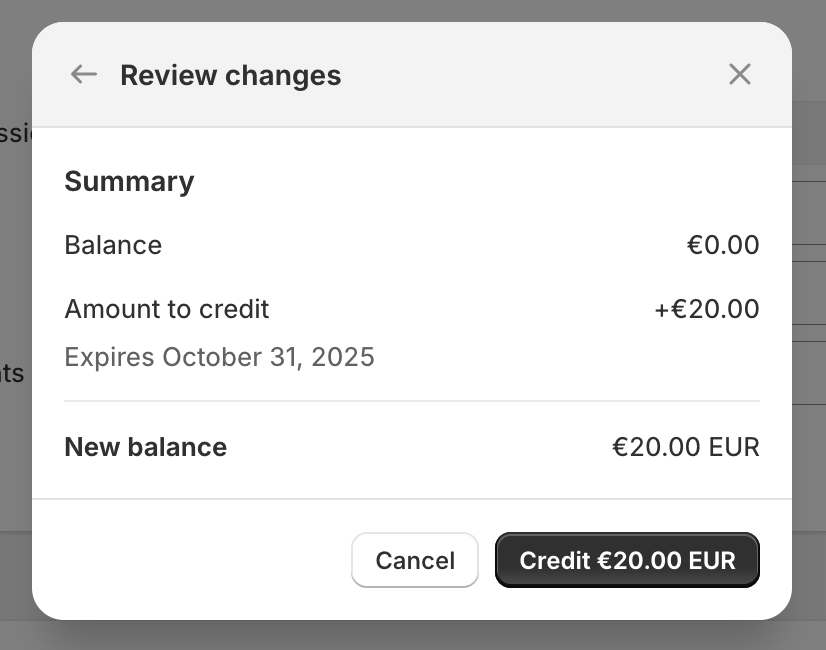
Click “Review changes” to confirm that everything is correctly set up.

- Click the “Credit” button to finalize. The store credits will now be added to the customer’s account.
- If you assing store credits in multiple currencies, the amounts assigned in different currencies will appear on separate rows.
Important Note: Currently, customers do not receive any notifications when store credits are issued to their account. This is a limitation of the early access release. However, according to Shopify, this feature—along with triggers, segments, and automated workflows supporting store credits—will be available later this year.
How to enable store credits as a payment method?
To allow your customers to “pay” using store credits, you’ll need to activate this payment method in your store:
- Go to Settings -> Customer Accounts.
- In the New Customer Accounts section, scroll down to the Store Credit section.
-
Toggle the option to activate store credits as a payment method.

Please note that customers must be logged into their account to use store credits for payment. Additionally, switching to new customer accounts is a prerequisite for allowing your customers to pay with store credits.
How can customers redeem their store credits at checkout?
Once you’ve enabled store credits as a payment method, customers who have store credits can use them to “pay” for their orders. However, they must be logged in with the email associated with their customer account in your Shopify admin for the store credit option to appear at checkout.

A few important things to note:
- Customers are required to use the full amount of their store credit balance when paying. If the balance exceeds the total order amount, the remaining credits will still be available in the customer’s account.
- If a customer has store credits in multiple currencies, only the balance that matches the currency of the checkout will be displayed.
For example, if a customer has store credits in both EUR and USD, but the shipping address is in the United States (and therefore the checkout currency is USD), only the USD credits will appear at checkout.
Limitations
Are there any limitations? Absolutely! Since store credits are still in early access release, there are a few features you might expect to work automatically that aren’t available yet. Here’s a summary of the key limitations mentioned throughout this article:
- Store credit is available as a payment method only on your online store and is not accepted on other sales channels. For example, customers can’t use store credit on the Shop app.
- Customers don’t receive notifications when store credits are issued to their account. Update! You can now notify customers when you issue store credits (see the beginning of this article for details).
-
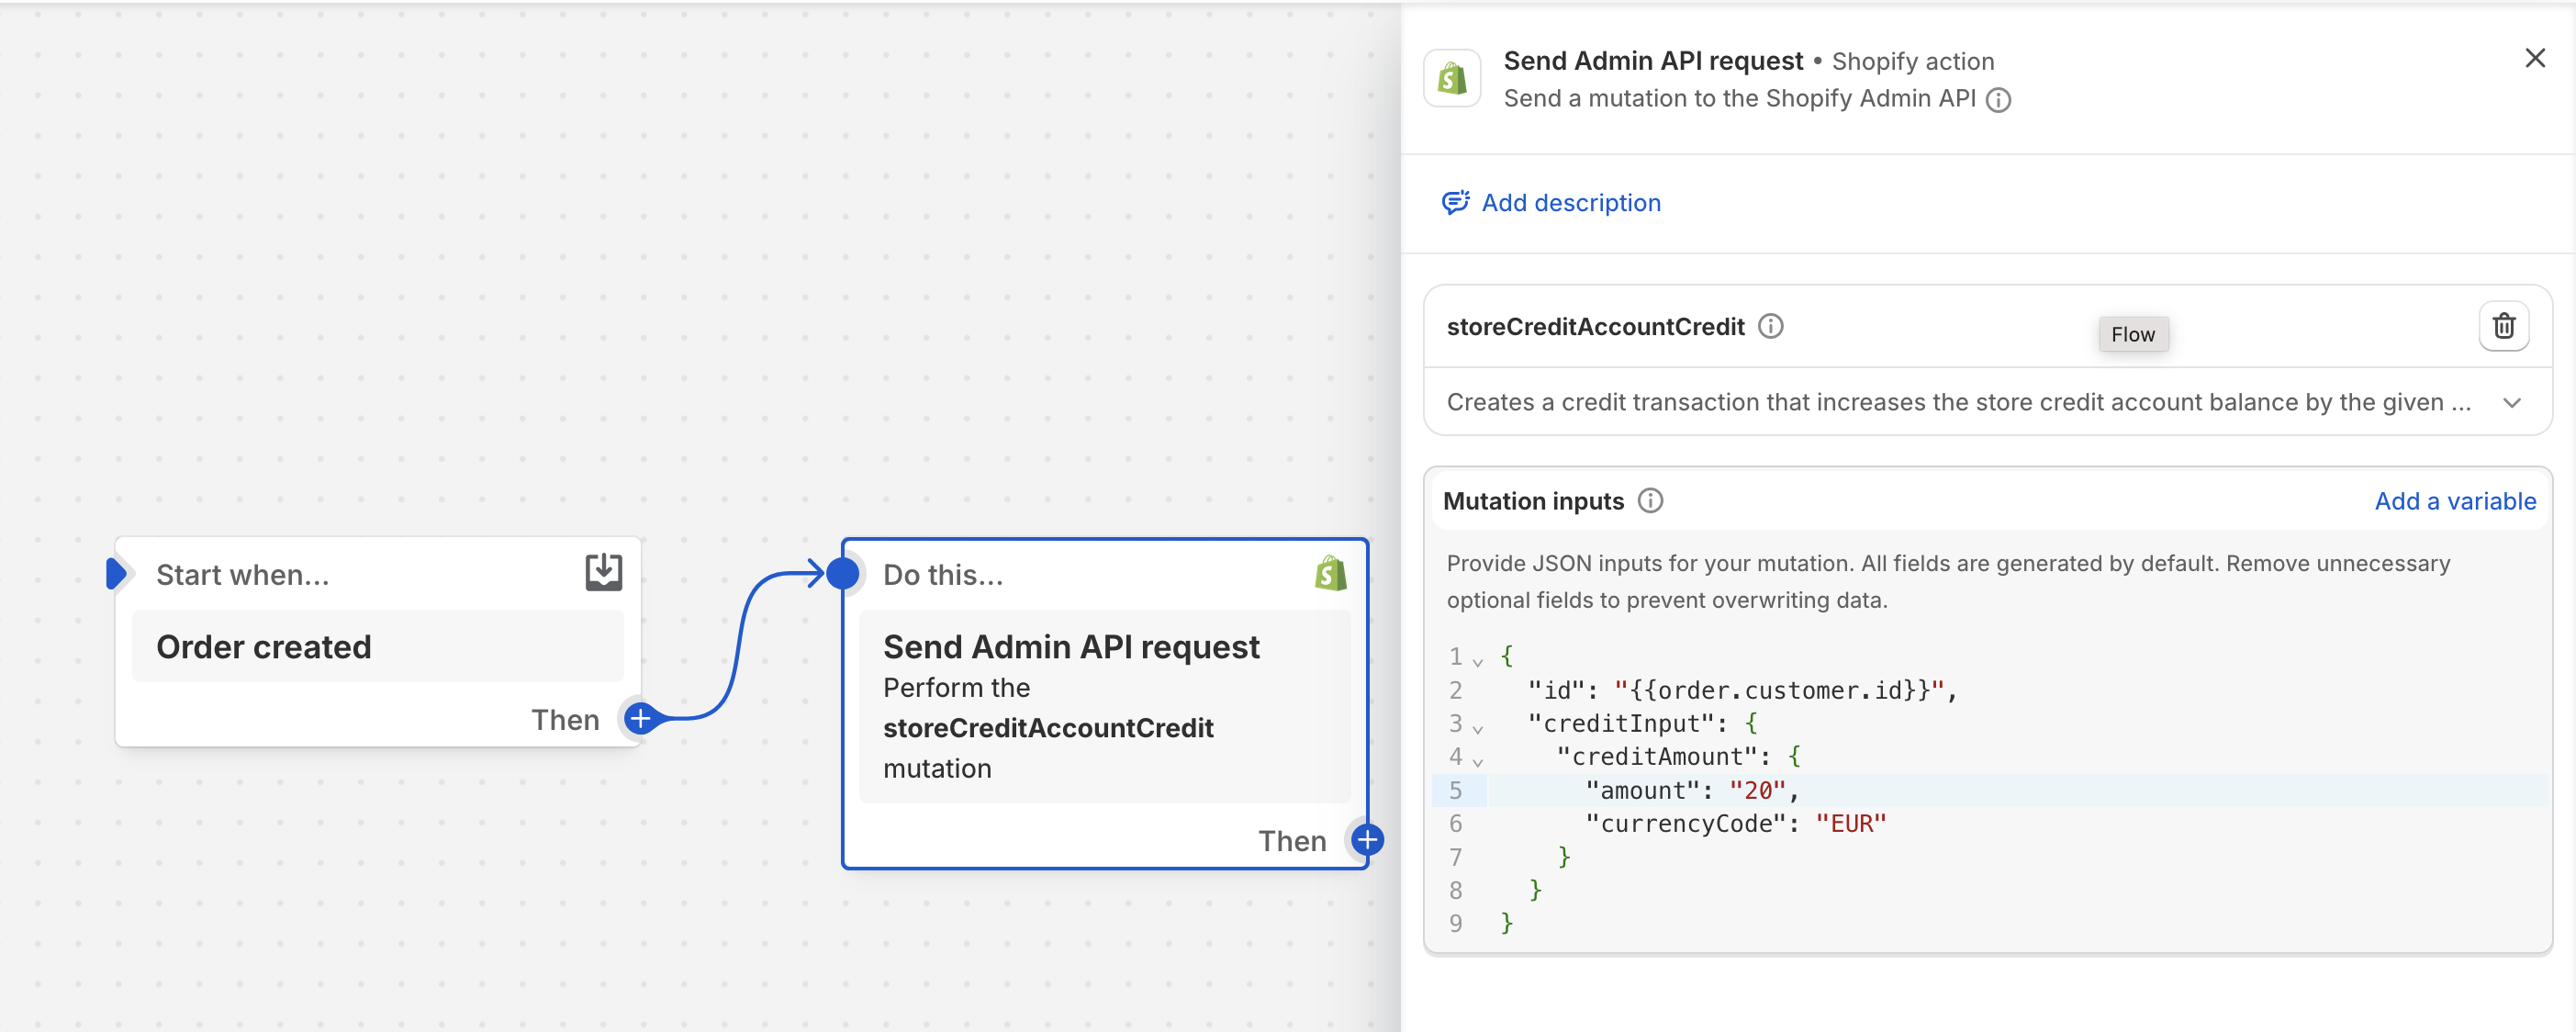
Store credit triggers aren’t yet directly available in Shopify Flow. Instead, you can use the action Send Admin API request. As a mutation, select
storeCreditAccountCreditto assign store credits to a customer (see the screenshot below).
- Customers must apply the full store credit amount at checkout; they cannot choose to apply only a portion of their balance. If the order value is less than the available credit, the remaining balance stays in the customer’s account.
- Store credits can be issued in multiple currencies. However, at checkout, only the store credit balance that matches the currency of the checkout will be shown to the customer.
- Customers can use store credits for their initial subscription purchase, but not for recurring subscription payments.
- Store credits aren’t compatible with Shopify’s B2B functionality.
Final note (especially for those merchants based in EU)!
Make sure to discuss the handling of store credits with your accounting team, especially if you use an accounting integration. Store credit deductions need to be properly recorded in your accounting system and accurately reflected on invoices.
Don’t worry, though! Shopify has plans to roll out some of these missing features later this year. So, let’s keep an eye out for updates by the end of 2024 or in the Winter edition for the latest news on store credits.
