
Automate ecommerce tasks with Shopify Flow: A workflow setup example
Shopify workflows are a handy tool that helps you automate repetitive tasks, which saves time and prevents human errors. In this guide, we’ll demonstrate how to create and test a simple workflow. Besides these simple tasks, you can make more complicated workflows by adding advanced triggers and actions.
Important: Stay updated on the latest news about Shopify Flows. For example, Shopify has recently added a trigger for when customers join or leave segments—an excellent tool for enhancing your marketing automation!
What’s an automated workflow?
An automated workflow is a defined set of instructions that are executed in response to a specific triggering event. A workflow has three main parts:
- Trigger: This is what starts the workflow. It can be an event in your store or an app, like when someone places an order.
- Condition: This part decides if an action should happen. It checks certain rules you set, like if an order is over 500 EUR.
- Action: If the condition is met, an action takes place. It can be a change in your store or app, like adding a “VIP” tag to a customer who made an order over 500 EUR.
With this workflow, all your special VIP customers get tagged with the “VIP” tag. This tag helps you create a customer segment, so you can easily reach out to these customers for marketing purposes, like sending them special offers.
Here are some other examples, when Shopify flow may come in handy:
- Inventory management tasks:
- Hide products that are out of stock and notify your team.
- Automatically publish products when any of the product variants is back in stock.
- Get alerts whenever inventory levels change.
- Preventing fraud orders: Send an internal email to review high-value orders (unusual for your store).
- Product reviews: Alert your team when a negative review is posted.
- Loyalty: Send a “Thank you” email with a discount after a customer makes X orders.
Creating a simple workflow: Step-by-step
We’ll walk you through creating a simple workflow using an example where we’ll tag customers who’ve made orders totaling more than 500 EUR with the “VIP” tag.
- Add Shopify Flow app to your store.
- Once the app is installed, click the “Create workflow” button.
- Give your workflow a name, like “Tagging VIP Customers for Orders over 500 EUR”.
- For our example, select the Shopify “Order created” trigger (you can use the search bar to find it quickly).

- Click the plus sign next to “Then” on the trigger card, then select “Condition” and click “Add Criteria”.
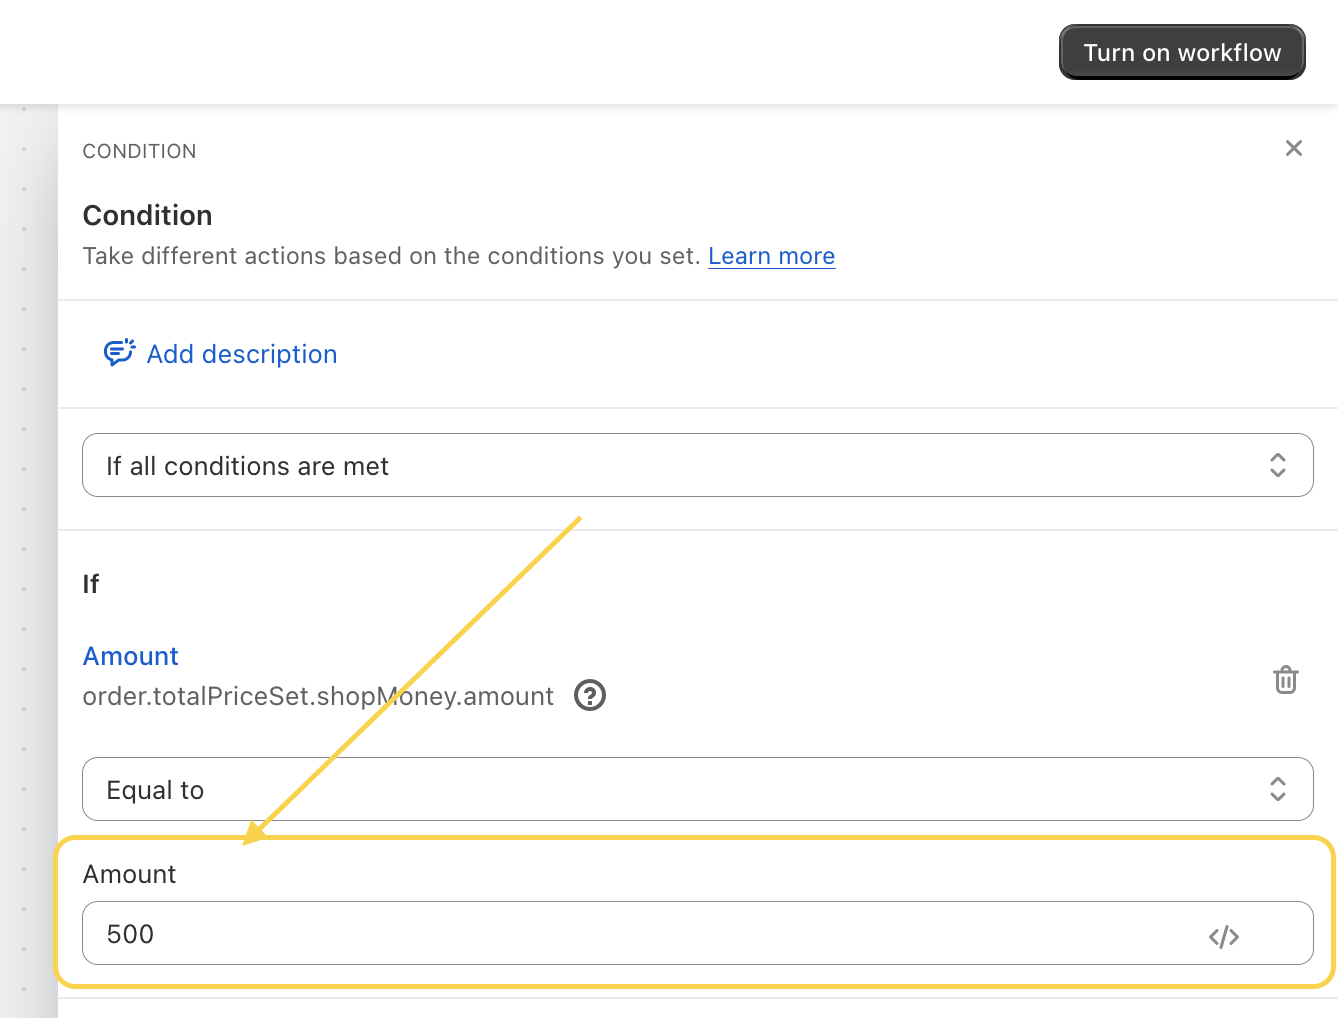
- Next, choose “Order”, then select “TotalPriceSet”, and go to “ShopMoney” -> “Amount.”
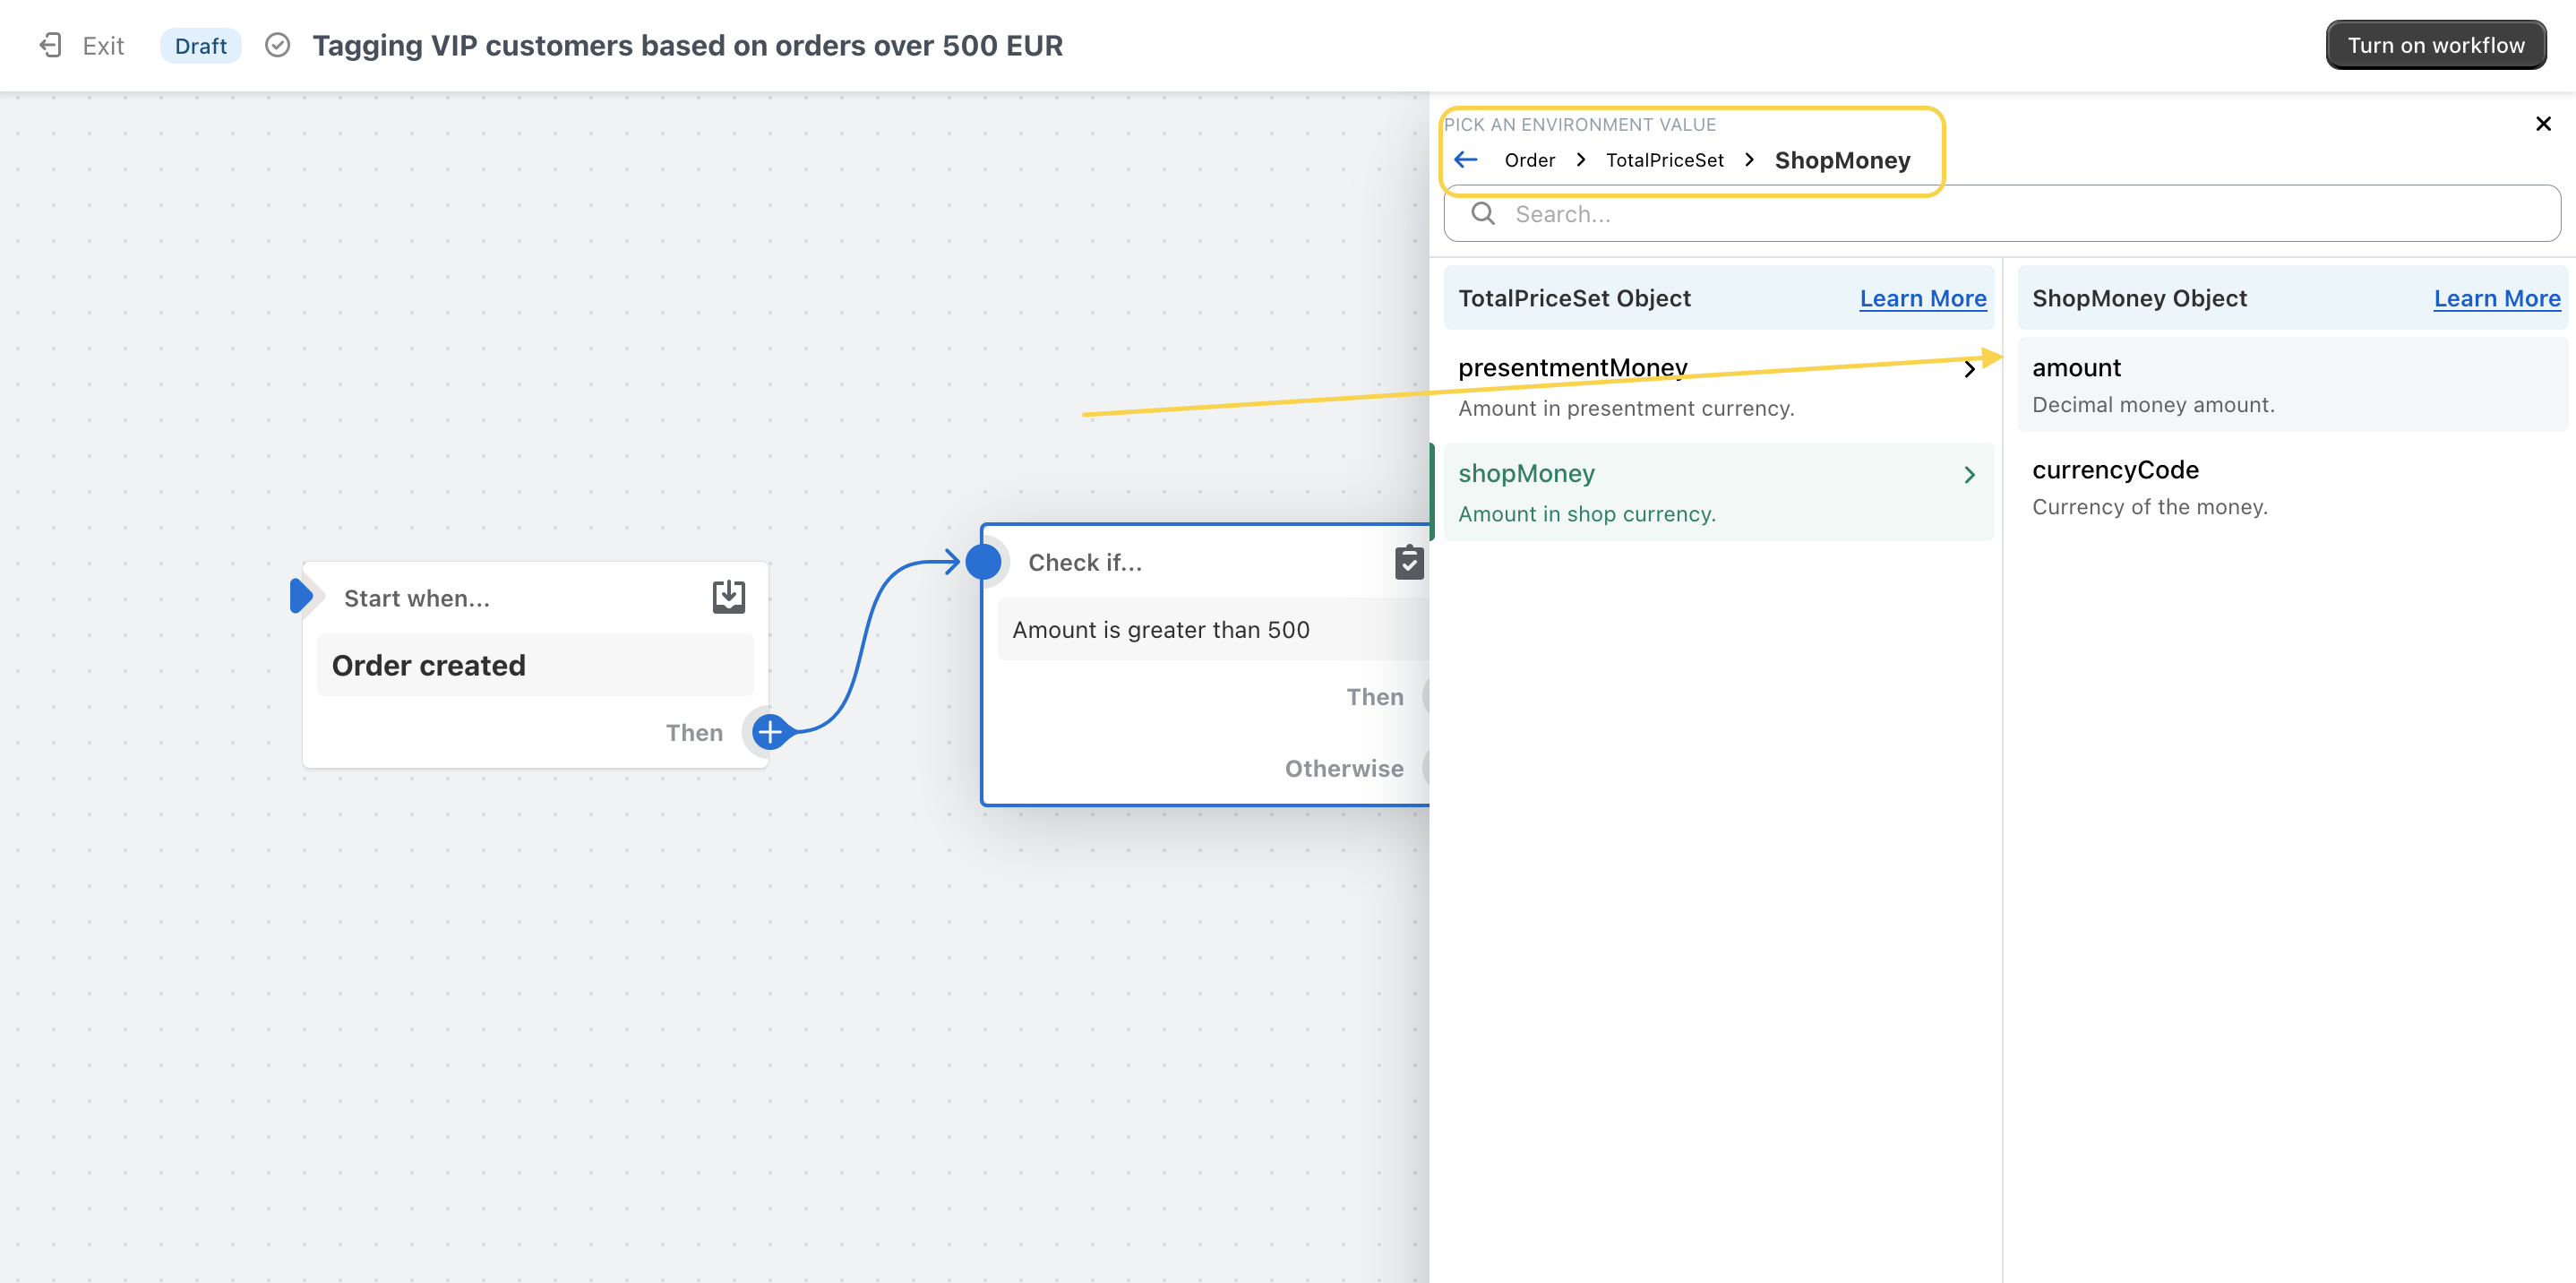
- Specify the amount you want to set as the condition (e.g., 500 EUR).
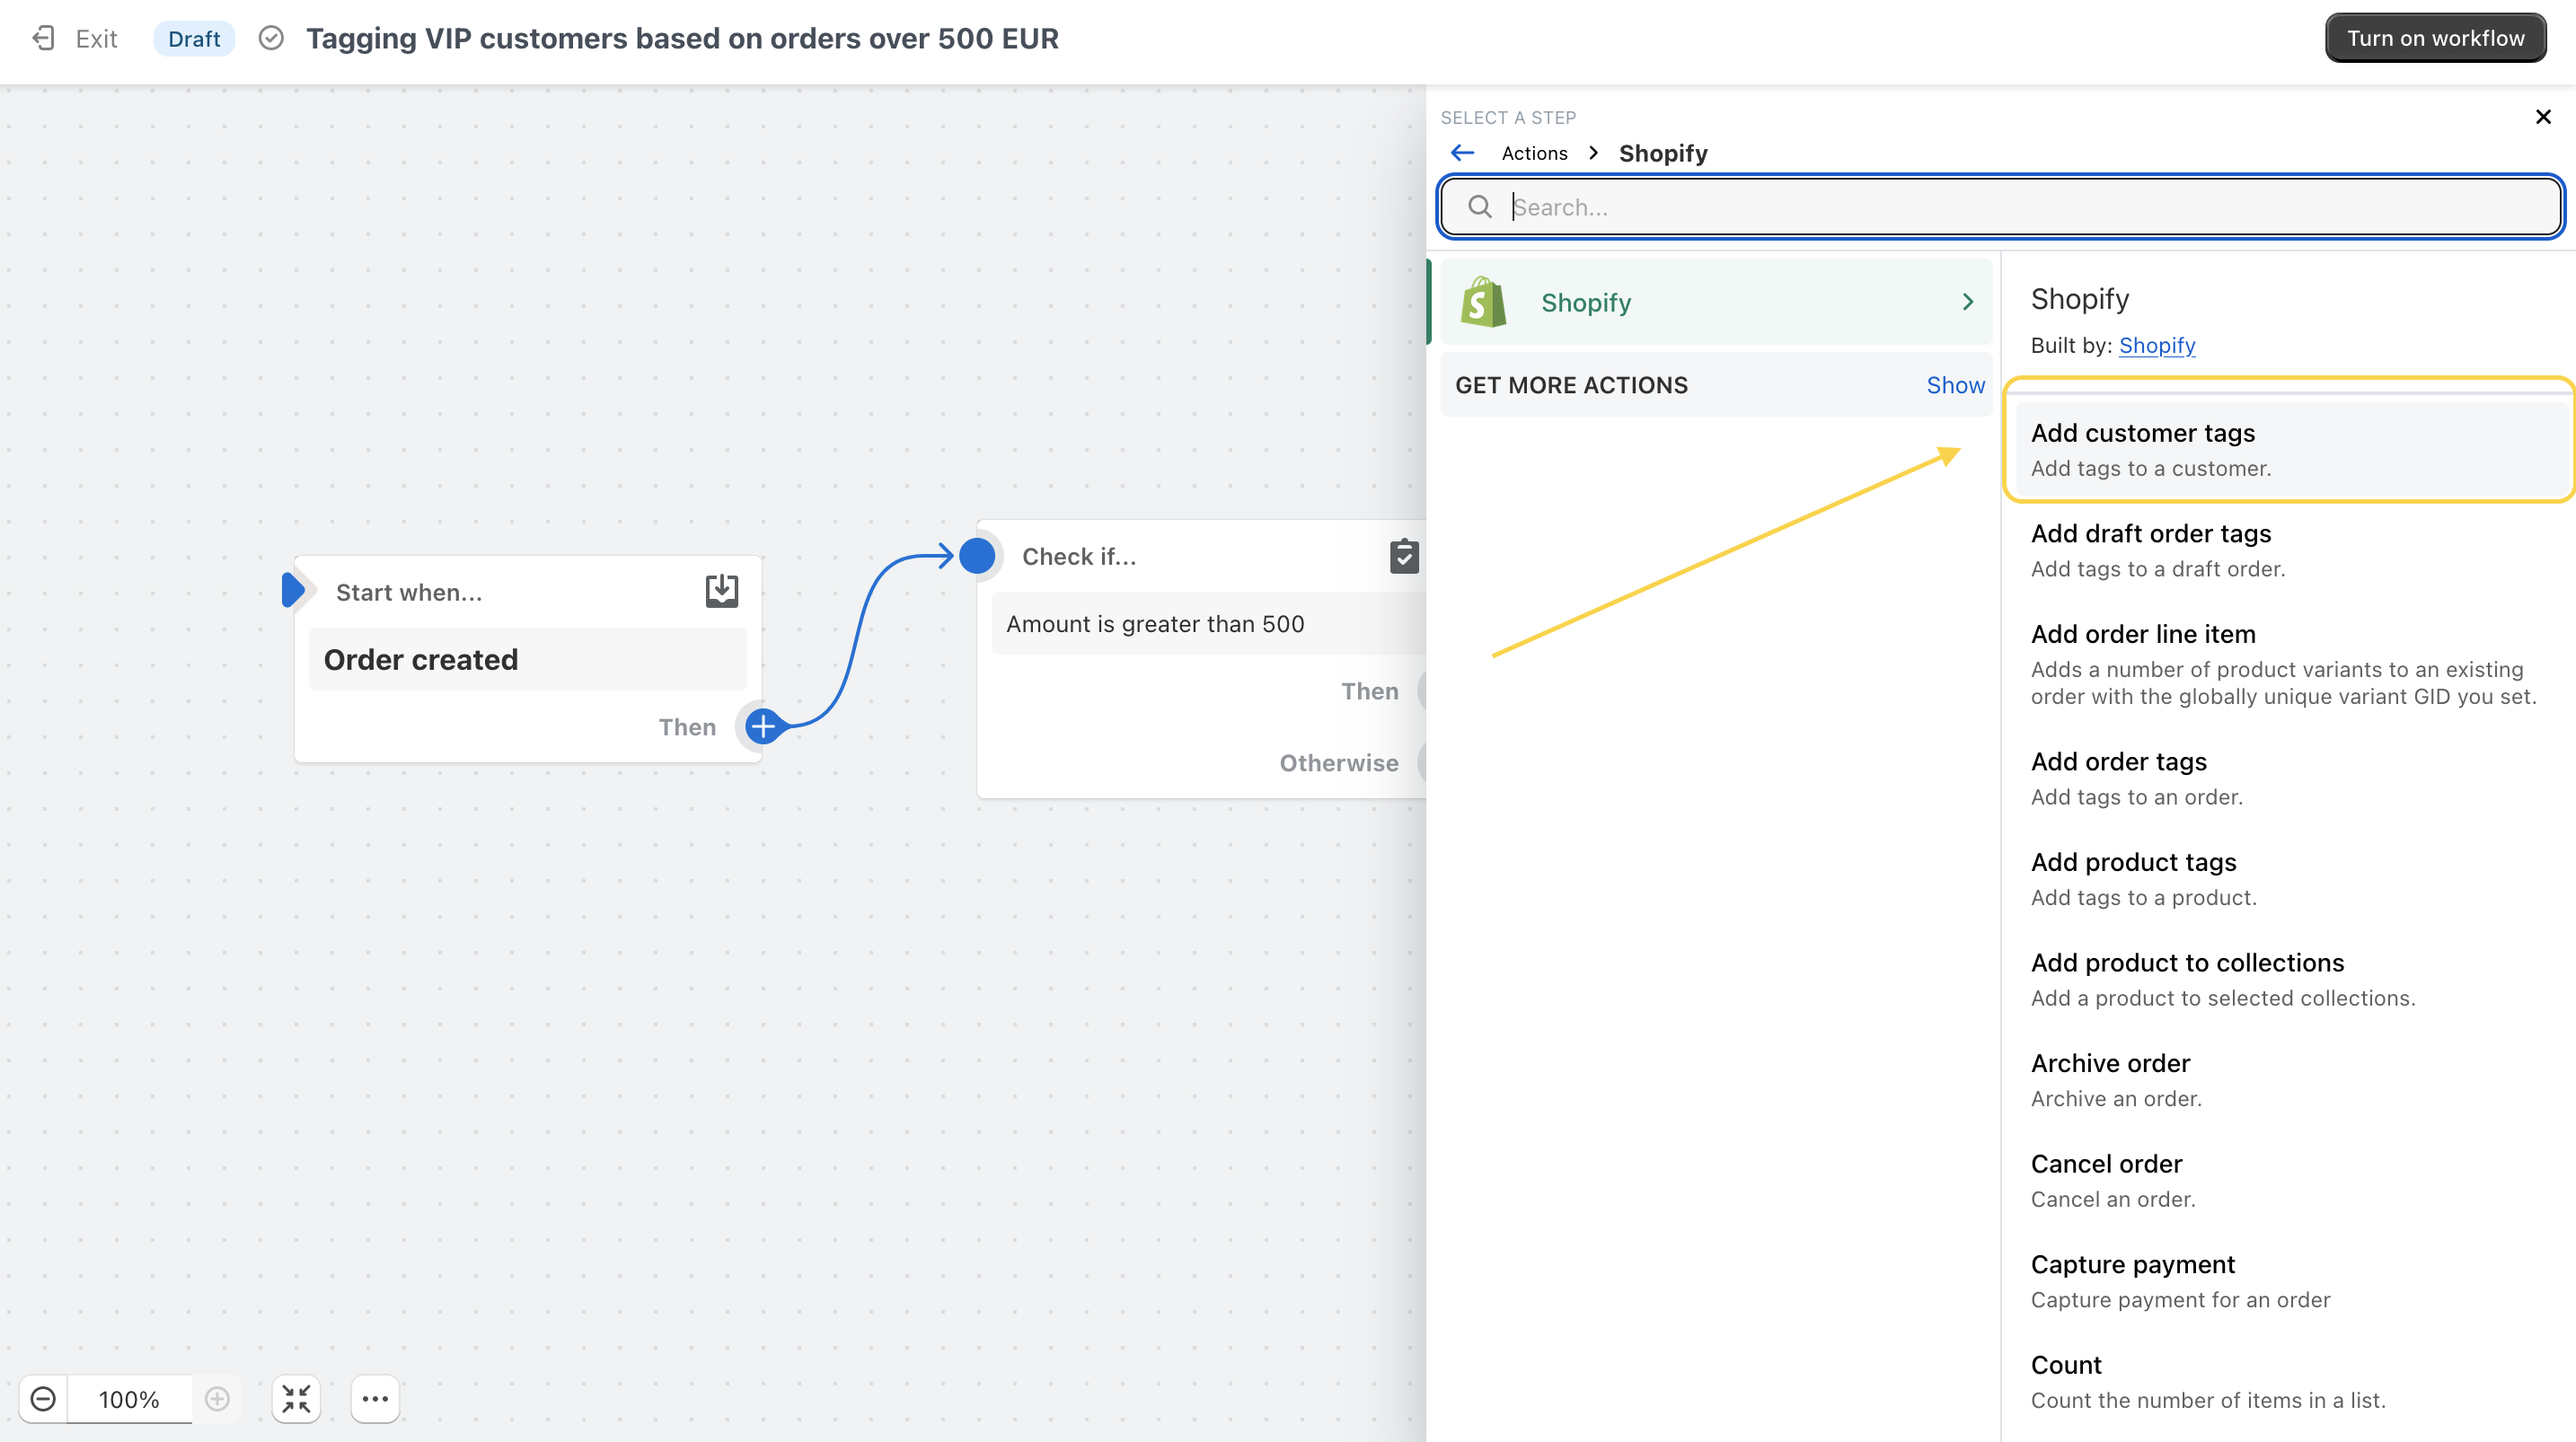
- After specifying the amount, click the plus sign next to “Then” on the condition card, then select “Action”.
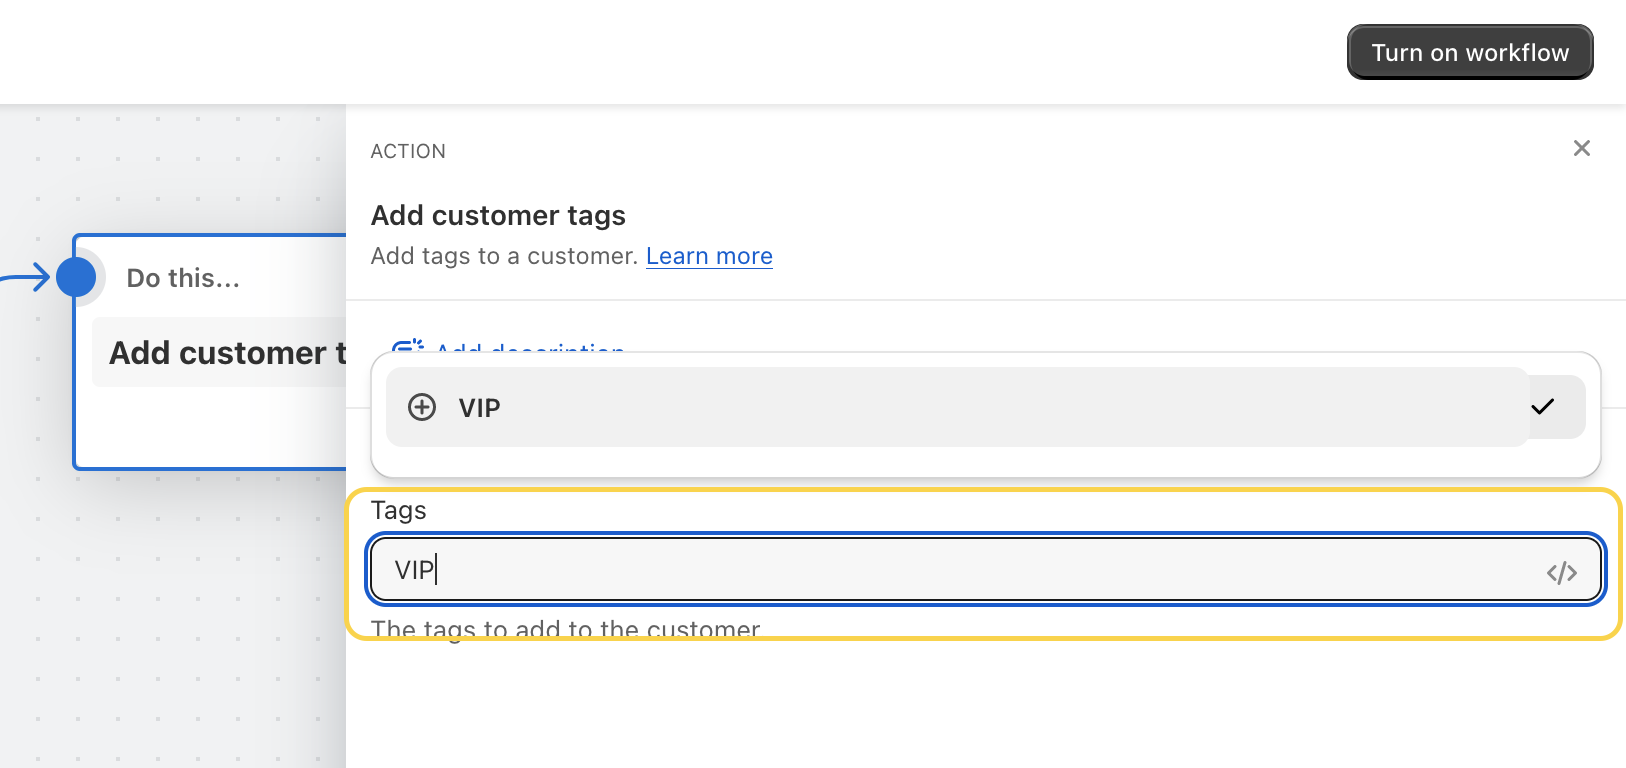
- From the available Shopify actions, choose “Add customer tags”.
- Enter “VIP” as the customer tag.
- Review your workflow, ensuring everything is correct. If it looks good, go ahead and turn on the workflow.
- And that’s it!
Running the workflow on previous orders
It’s important to note that the workflow doesn’t automatically apply to previous orders! If you want to add the “VIP” tag to customers who placed orders over 500 EUR in the past, you’ll need to trigger the workflow manually. Here’s how to do it:
- Navigate to the “Orders” section (since the workflow starts with order placement, you’ll initiate the workflow from the orders).
- Select all the orders you want to apply the workflow to.
- Click the three dots in the bottom menu, and choose “Run flow automation.”
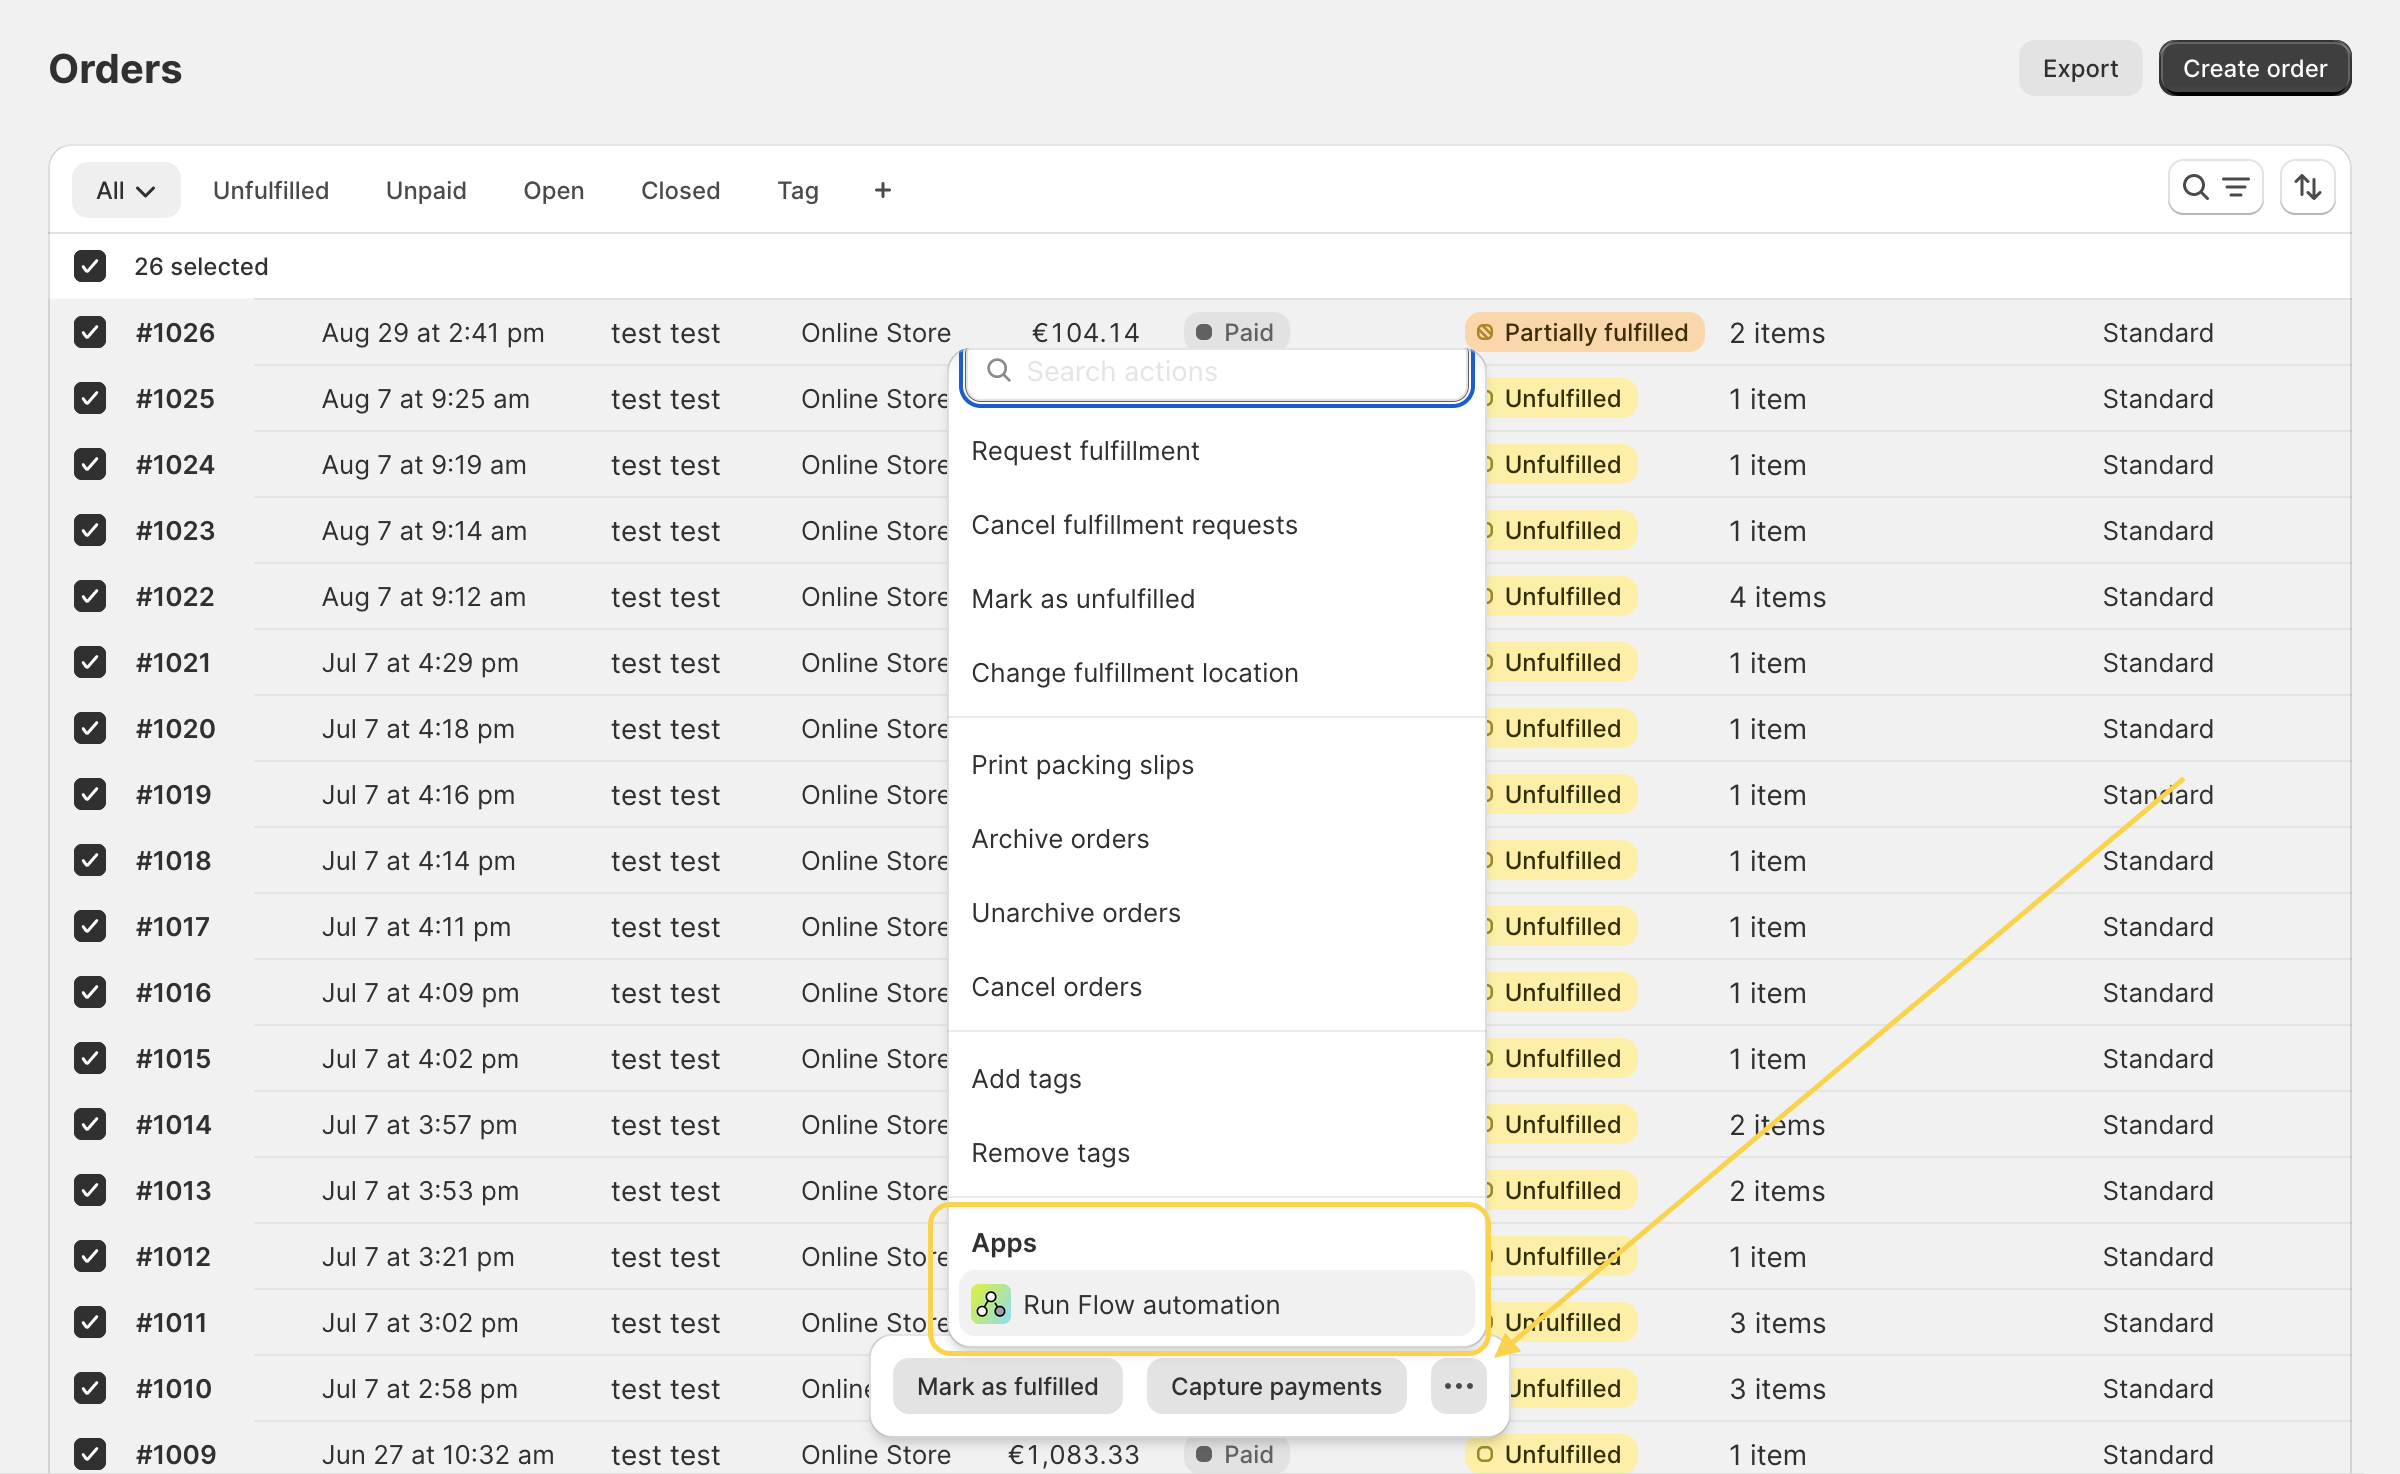
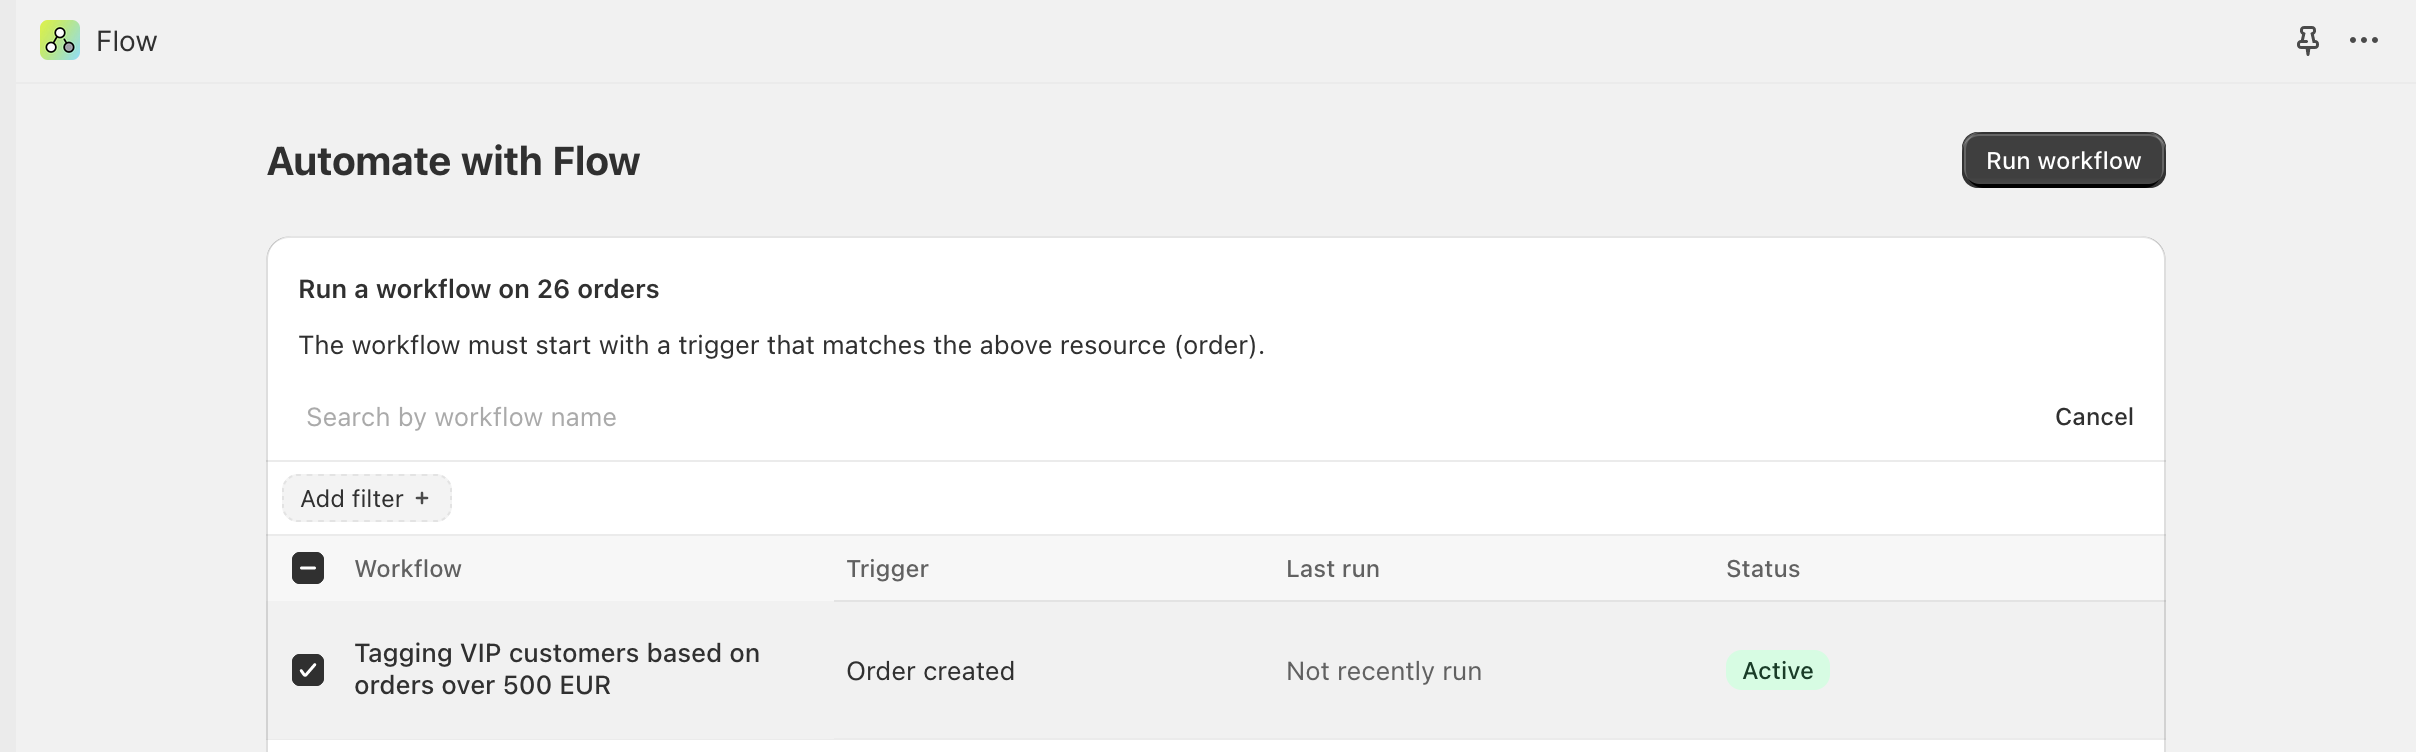
- Choose the workflow you created and click the “Run workflow” button.
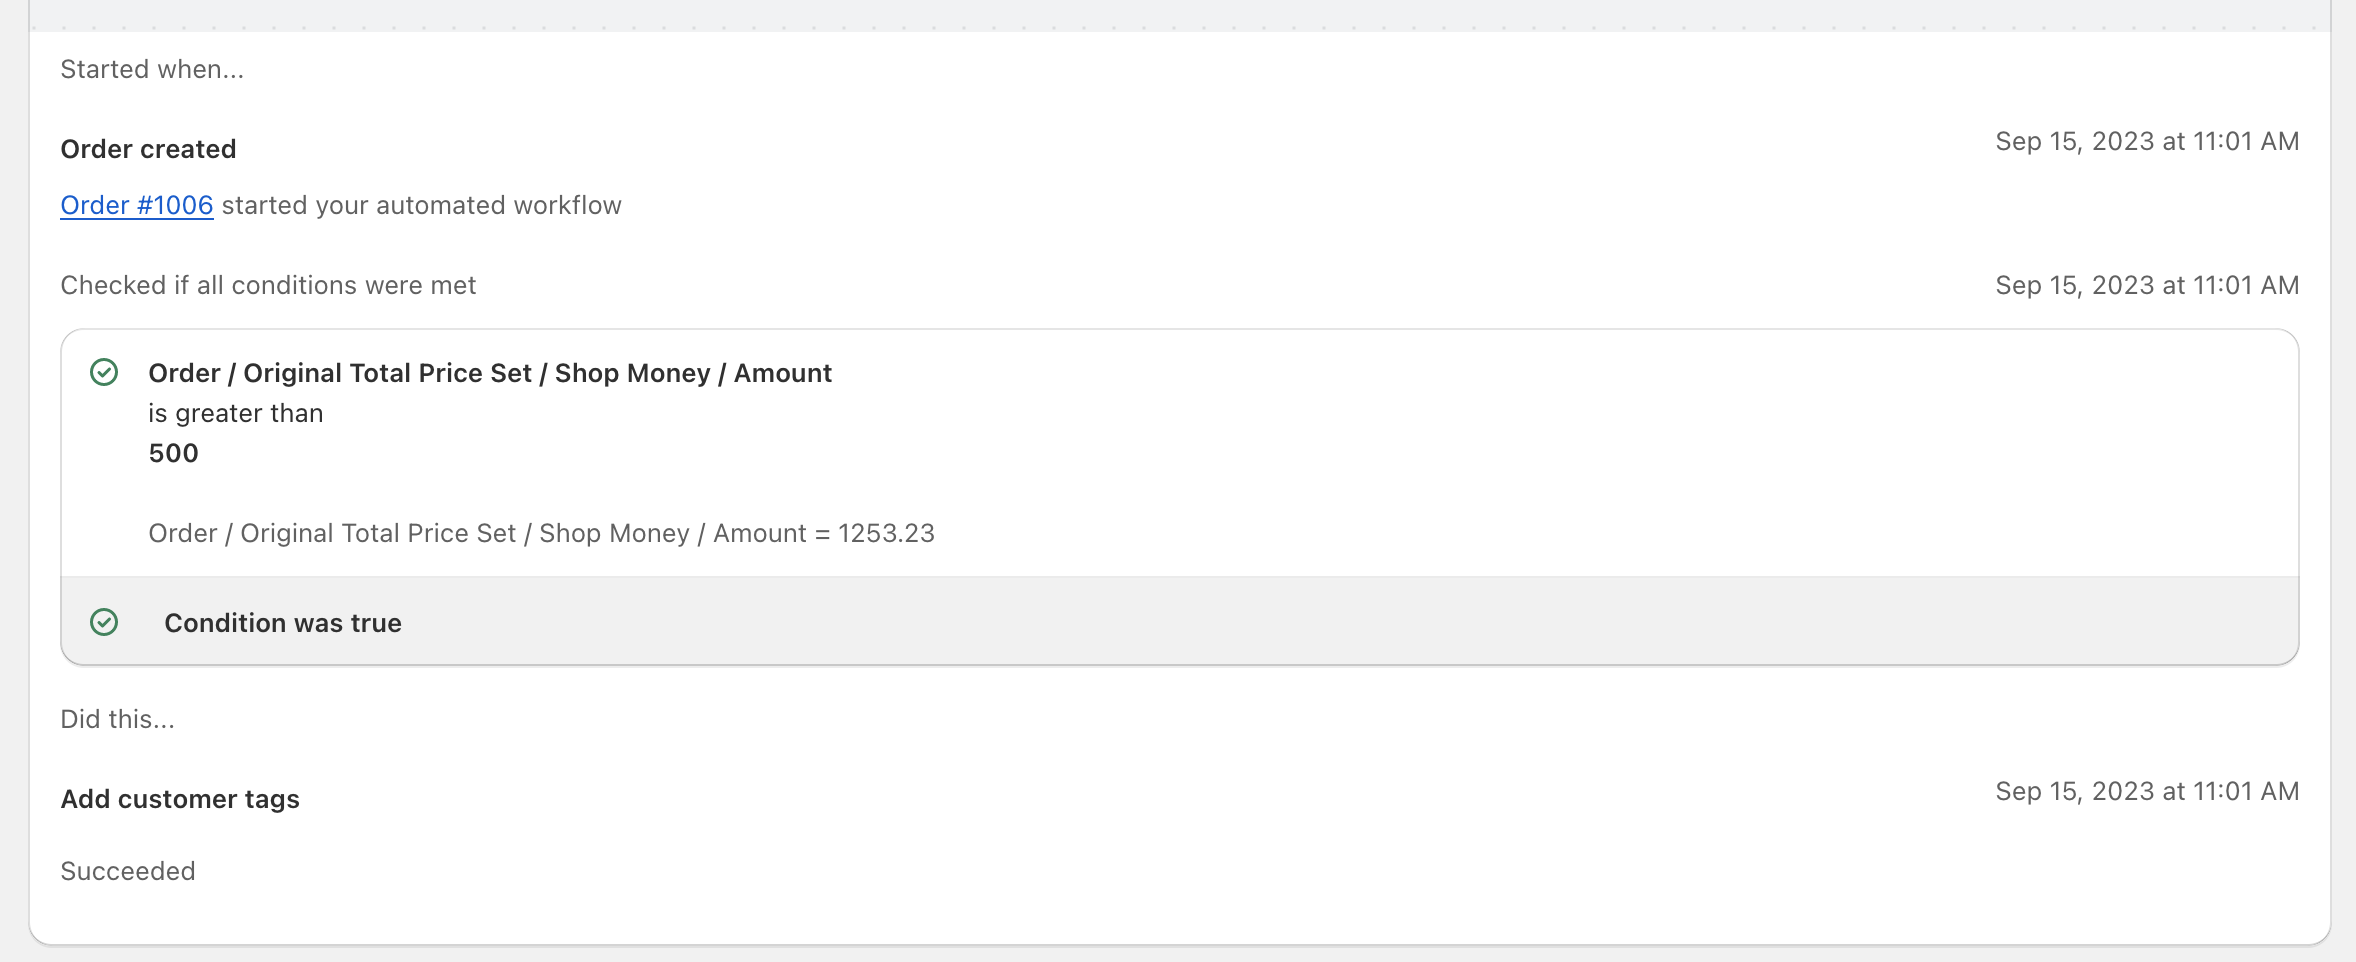
- After the flow is complete, you can review the history to see what actions, such as tagging customers in our case, have been executed.
Important Note: You can run a workflow on a maximum of 50 orders, draft orders, customers, or products at a time. If you have more items and can’t see them all on the same page in the Shopify admin, you may need to apply filters to display only the orders (or another objects) you want to work with.
And there you have it! We’ve covered everything from setting up a basic workflow to manually triggering it and checking the results. If you encounter any difficulties or have questions, don’t hesitate to reach out. We’re here to help!