How to leverage metaobject and metaobject_list theme settings types for your store?
Shopify has recently introduced two new theme setting types: metaobject and metaobject_list. These updates make it easier for theme developers, app developers, and tech-savvy merchants to create sections and blocks that use metaobjects of a specified type more easily.
This feature lets merchants use content from metaobjects more quickly and efficiently, without needing workarounds like assigning page types. It makes managing content simpler for stores with a lot of information, giving more flexibility and saving time for developers.
Let’s explore a real-world example to see how you can leverage these new theme settings, add them to your schema, and render data through the Shopify theme editor.
Example: Using Metaobject Theme Settings
Let’s explore how to use the metaobject theme settings with a simple example: adding an “Influencer of the Day” section on the homepage. This setup allows you to update the featured influencer daily with just one click, without re-entering all the information from scratch. Let’s get started.
Note: This guide assumes you’re already familiar with the basics of metaobjects. If not, check out our detailed article, How to leverage metaobjects for your Shopify store?, where we explain what metaobjects are, how to create definitions, and how to add entries.
Create a metaobject definition and add entries
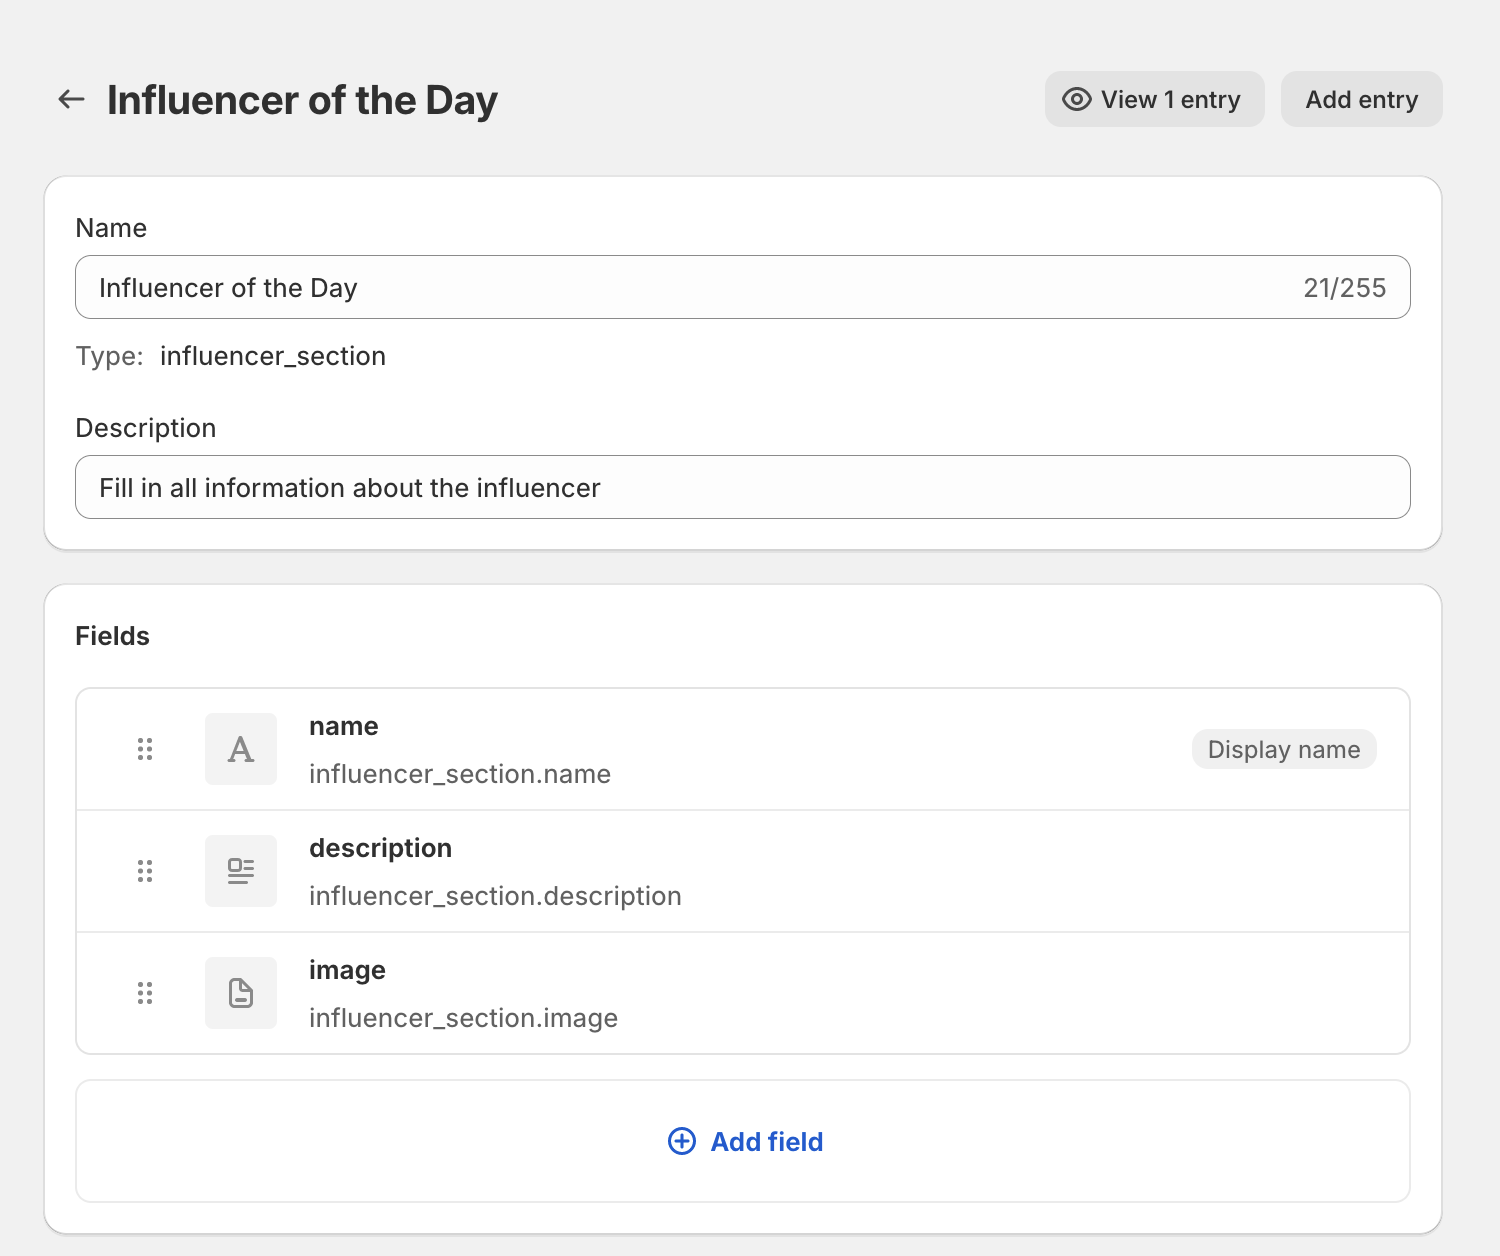
In this example, we’ll create a metaobject definition with the type influencer_section. You’ll need this type name in your code, so it’s important to name it clearly to ensure its purpose is easily understood.
Our metaobject definition is straightforward and includes the following fields:
- Name: Single line text
- Description: Rich text
- Image: File

Feel free to add additional fields based on your needs. For this example, we’ll use a predefined section from the Dawn theme to demonstrate how it works. If you need a more complex section, you may need to develop a new one or modify an existing section to meet your requirements.
After setting up the metaobject definition, start adding your entries.
Add your metaobject type to a section settings
In this example, we’ll use the existing image-with-text section and simply add an extra setting to its schema. If you’re comfortable with Git, consider creating a repository (e.g., on GitHub) to track any changes you make to the code.
    {% schema %}
    {
      "name": "t:sections.image-with-text.name",
      "class": "section",
      "disabled_on": {
        "groups": ["header", "footer"]
      },
      "settings": [
        {
          "id": "influencer", // Your own id
          "label": "Influencer of the Day", // Your own label
          "type": "metaobject", // Keep it as it is or change to `metaobject_list` if needed.
          "metaobject_type": "influencer_section" // It needs to match the type you selected when creating a new metaobject definition!
        },
        {
          "type": "image_picker",
          "id": "image",
          "label": "t:sections.image-with-text.settings.image.label"
        },
        {....
    {% endschema %}
Important note: The code snippet above is an example. Make sure to update the metaobject_type to match the type of your metaobject.
Connect the metaobject fields in the section settings
Once you’ve added the code snippet to the schema of your chosen section (or a new one), you can connect the metaobject fields to the appropriate areas in the section. In this example, we’ll display an image-with-text section on the homepage.
- Open Customize in your Shopify admin.
- Ensure you’re editing your homepage (or any other template you wish).
- Add an
image-with-textsection and position it wherever you’d like on the page. -
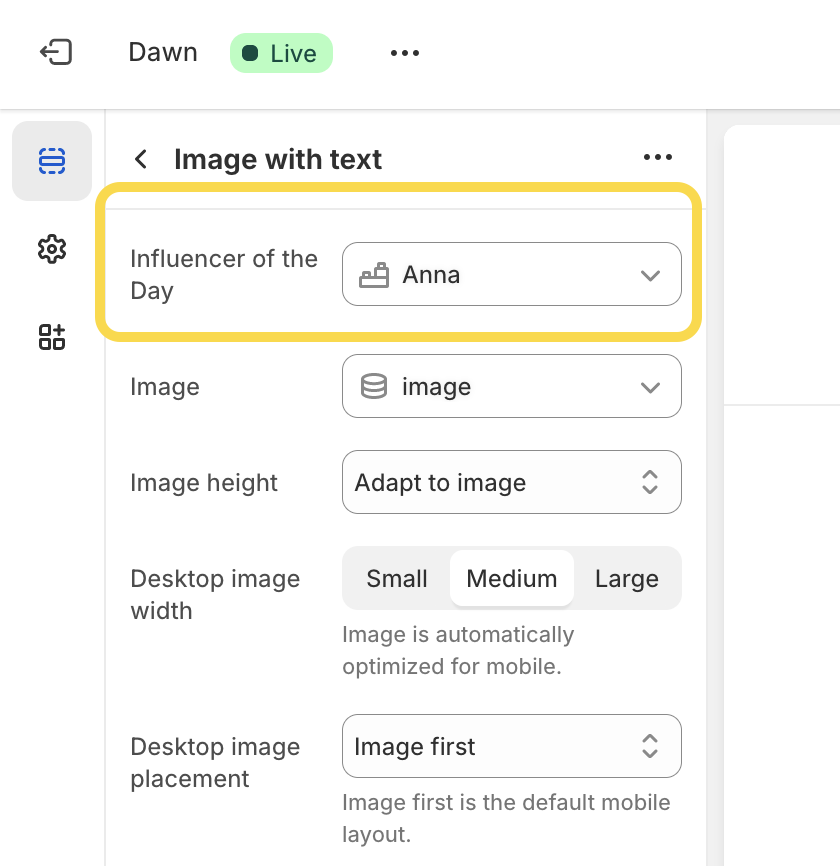
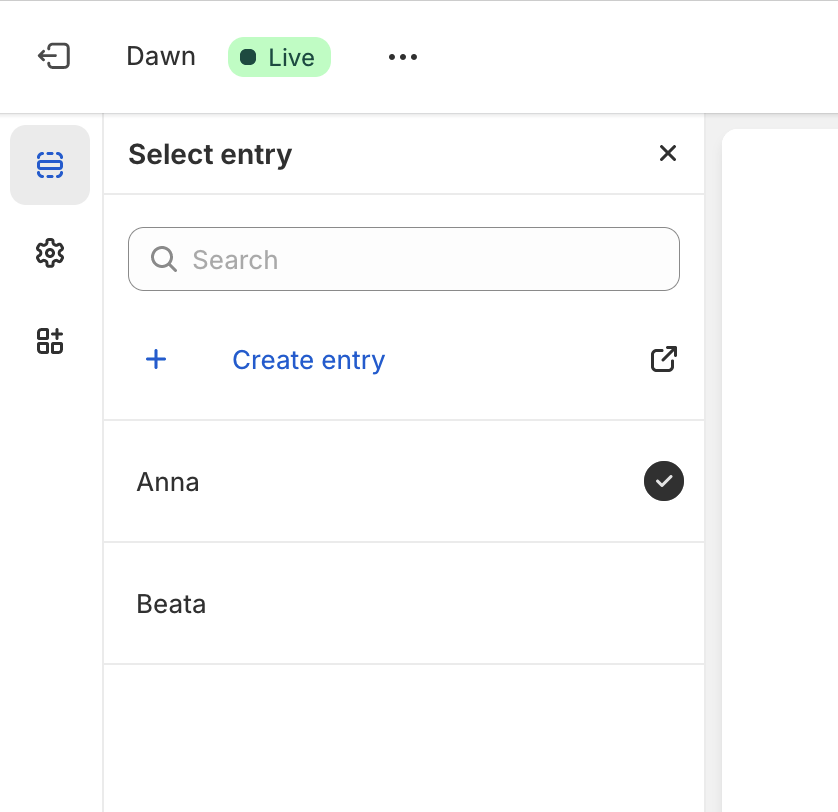
In the section settings, you’ll see the newly added metaobject setting. Select an entry (“Anna” in our case).

- This will enable a new dynamic source option for relevant settings and blocks within the section. You can now navigate to fields like Image, click the Dynamic Source icon, and select a field from the metaobject (e.g., the image field). This feature applies to both the section and its blocks, allowing you to assign metaobject definition fields—such as image, title, or description—as dynamic sources.
- If the definition and fields are set up correctly, the data will appear as expected.
- Save your changes.
-
To update the metaobject entry being rendered, simply replace the metaobject entry via the dropdown menu, and all connected fields will update automatically.

-
Your
image-with-textsection should look like on the screenshot below.
Note: In our example, we’ve included a Shop Now button. You can easily add a button as well to direct customers to an influencer’s collection, another collection, or any page on your store.
Limitations of metaobjects and metaobject_list theme setting types
There are a few limitations to keep in mind when using the metaobject and metaobject_listsettings:
- Only one
metaobject_typecan be defined in the setting’s schema. - For theme developers publishing themes to the Shopify Theme Store, only standard definitions are allowed; custom definitions cannot be used. For example, a standard definition like
product_review`is permitted. - When referencing a custom
metaobject_type, the definition must exist in the shop and be available to the storefront. If either condition isn’t met, the setting will display an error in the theme editor. To resolve this, ensure that themetaobject_typein the schema matches the type specified when creating the metaobject definition.
We hope this guide has helped you understand the newly added metaobject and metaobject_list theme setting types. If you have any questions or run into issues, don’t hesitate to reach out to us!
