Setting up a Shopify “coming soon” page with a welcome discount flow for early subscribers
Are you building a Shopify store and want to collect potential customer emails while offering them a welcome discount code? This guide will walk you through setting up a “Coming soon” page and creating an email flow to send discount codes to subscribers.
Important Notes: Your store must be on a paid Shopify plan to display a “Coming soon” page. If you’re using a development store, the default Shopify “Coming soon” page will be displayed, even if you create a custom one.
To create the page and set up the flow, you need to meet these prerequisites:
- Verify your sender email:
- Go to Settings -> Notifications -> Enter the email address you want to use for customer communication -> Click “Resend Verification.”
- Verify the email from your inbox.

- Authenticate your domain:
- Set up CNAME records and DMARC to ensure proper email delivery. For more information please refer to Shopify’s official documentation.
- Set up your payment gateway:
- If your country is eligible for Shopify Payments, we recommended to use it.
- Install necessary apps to your store:
- Ensure you’ve installed the Flow app and Shopify Email, both free apps from Shopify.
- Password-protect your store:
- Of course, make sure your store is password-protected to display the “Coming soon” page (it’s turned on by default when you open a store).
If you’re unsure how Shopify workflows work, feel free to check out one of our previous articles, Automate Ecommerce Tasks with Shopify Flow: A Workflow Setup Example, for more detailed information on setting up workflows.
How to create a “coming soon” page?
By default, Shopify templates include a “Password” page template, which we will use for the “Coming soon” page. Depending on your theme, you can add additional sections and blocks to this page, as well as develop custom sections that align with your brand and layout.
Steps to customize the “coming soon” (password) page:
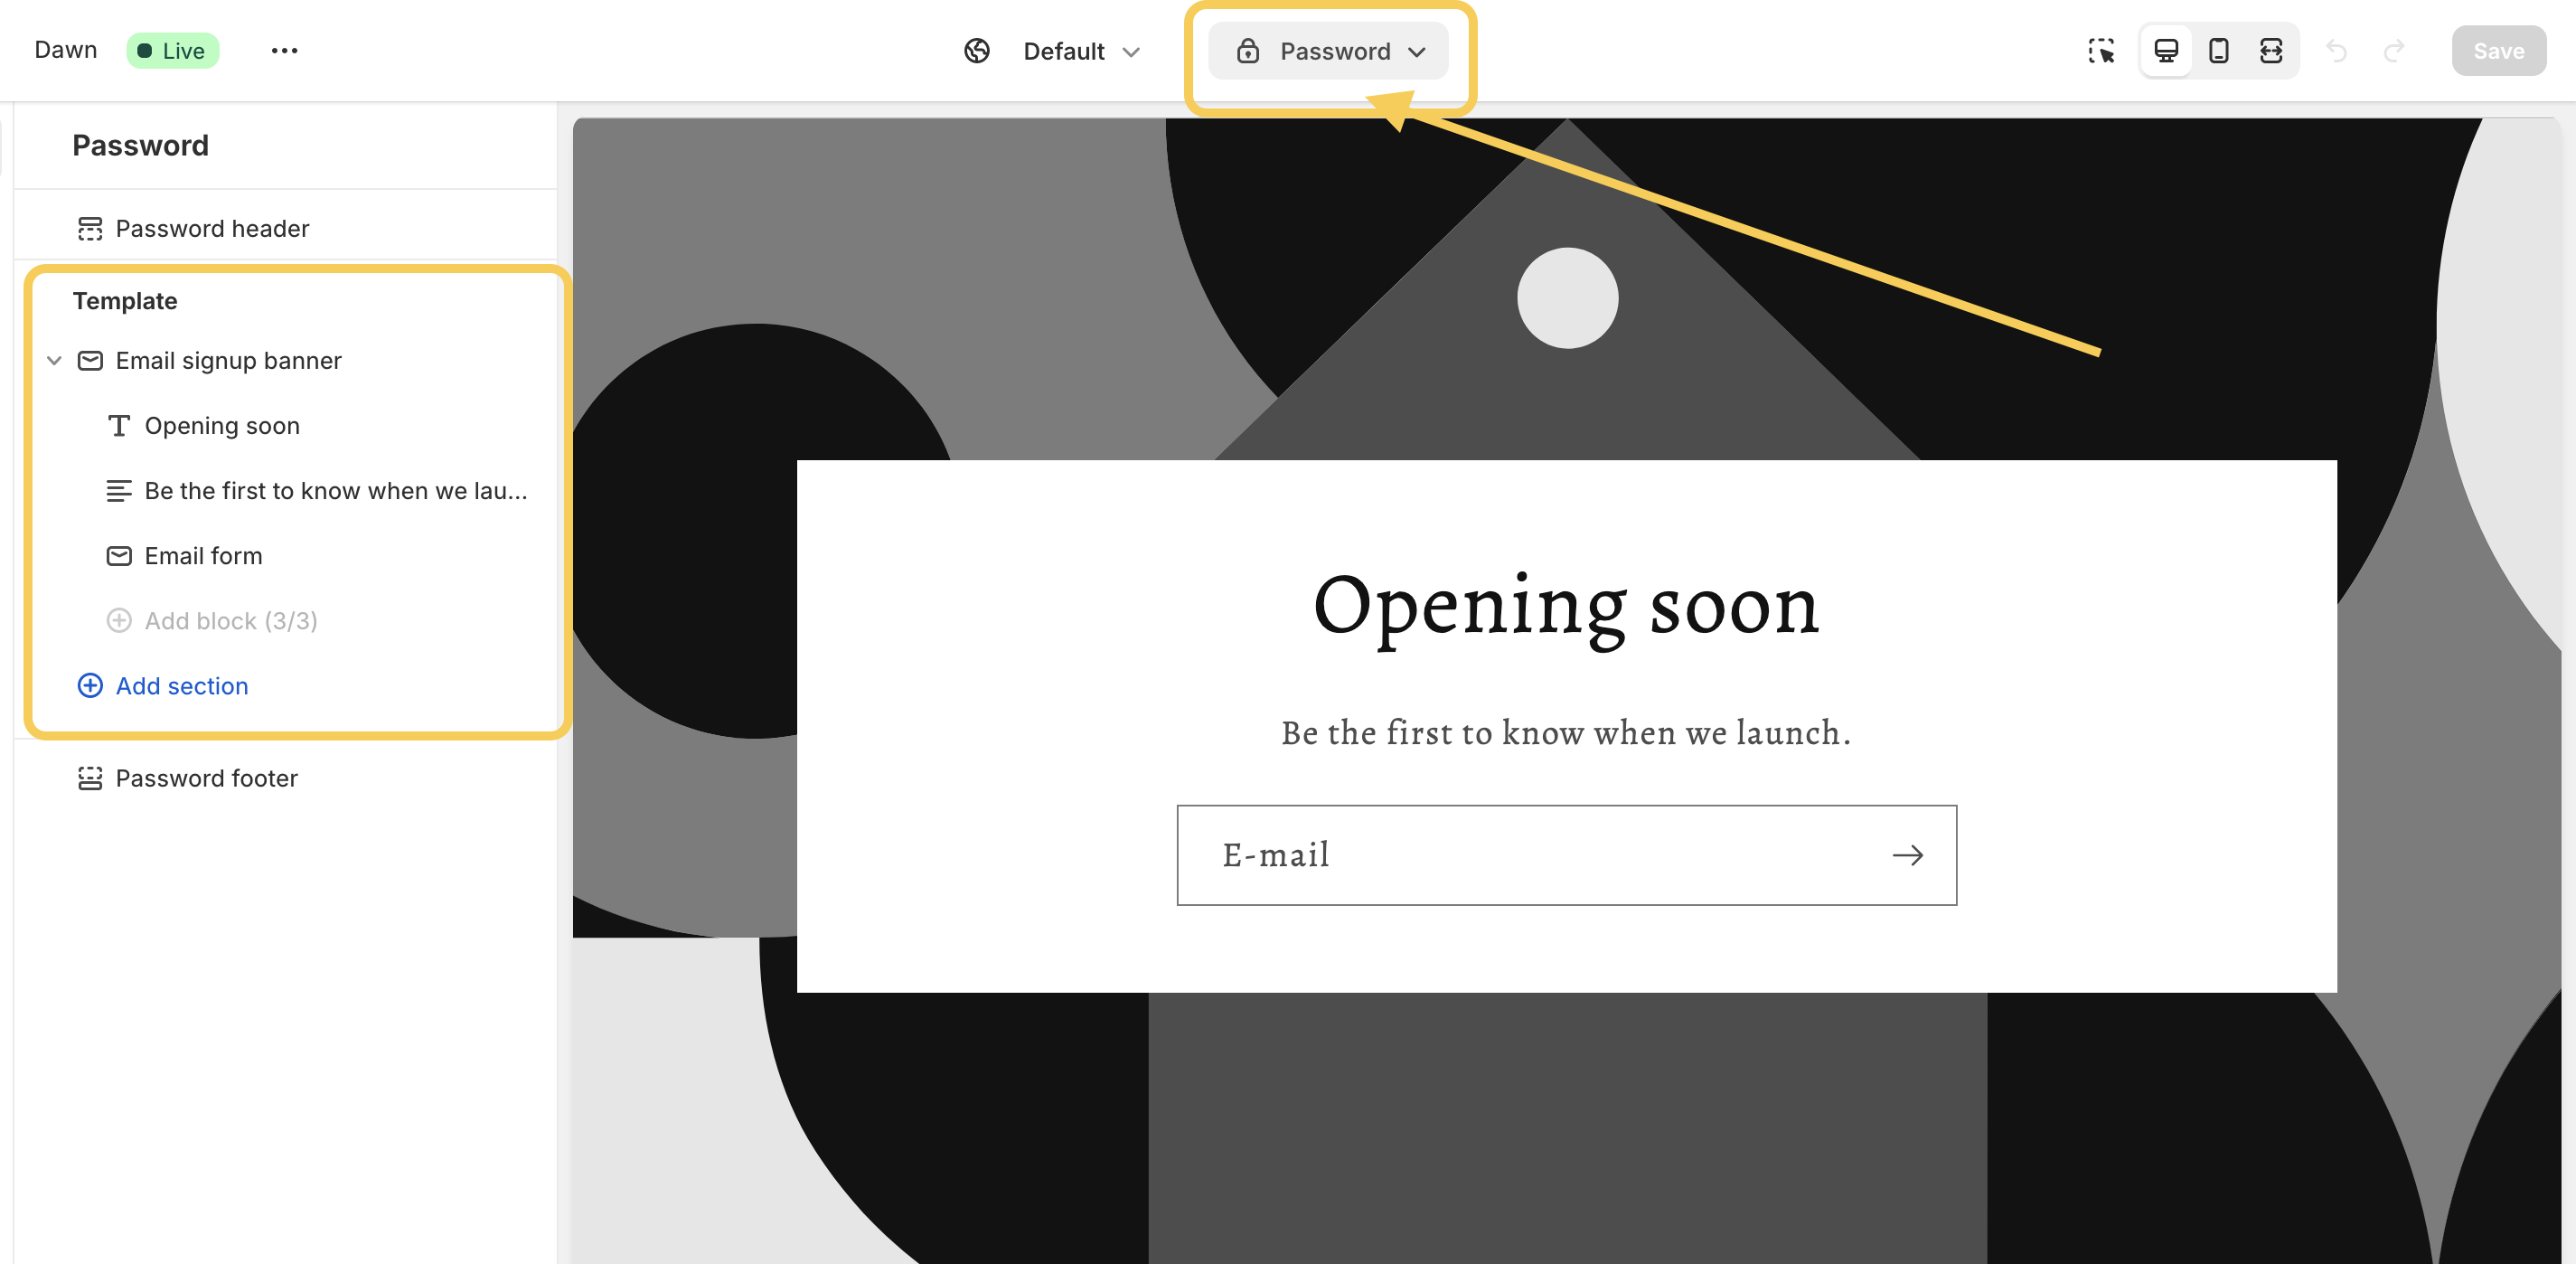
- Navigate to Online Store -> Click “Customize” next to the theme you’re working on (likely the published one).
-
In the upper dropdown menu, select the “Password” template.

- The default password page template will appear. The email sign-up options may vary depending on the theme.
- You can add additional sections available in your theme to this template or develop custom sections to provide more information to your customers, ensuring it aligns with your brand and specific needs.
- Save your changes once you’re satisfied with the layout.
How to set up a welcome discount code flow for subscribers?
To simplify the process, create a discount code applicable to the entire order, limited to one use per customer.
How to create a welcome discount code?
- Go to the Discounts section in your Shopify dashboard.
-
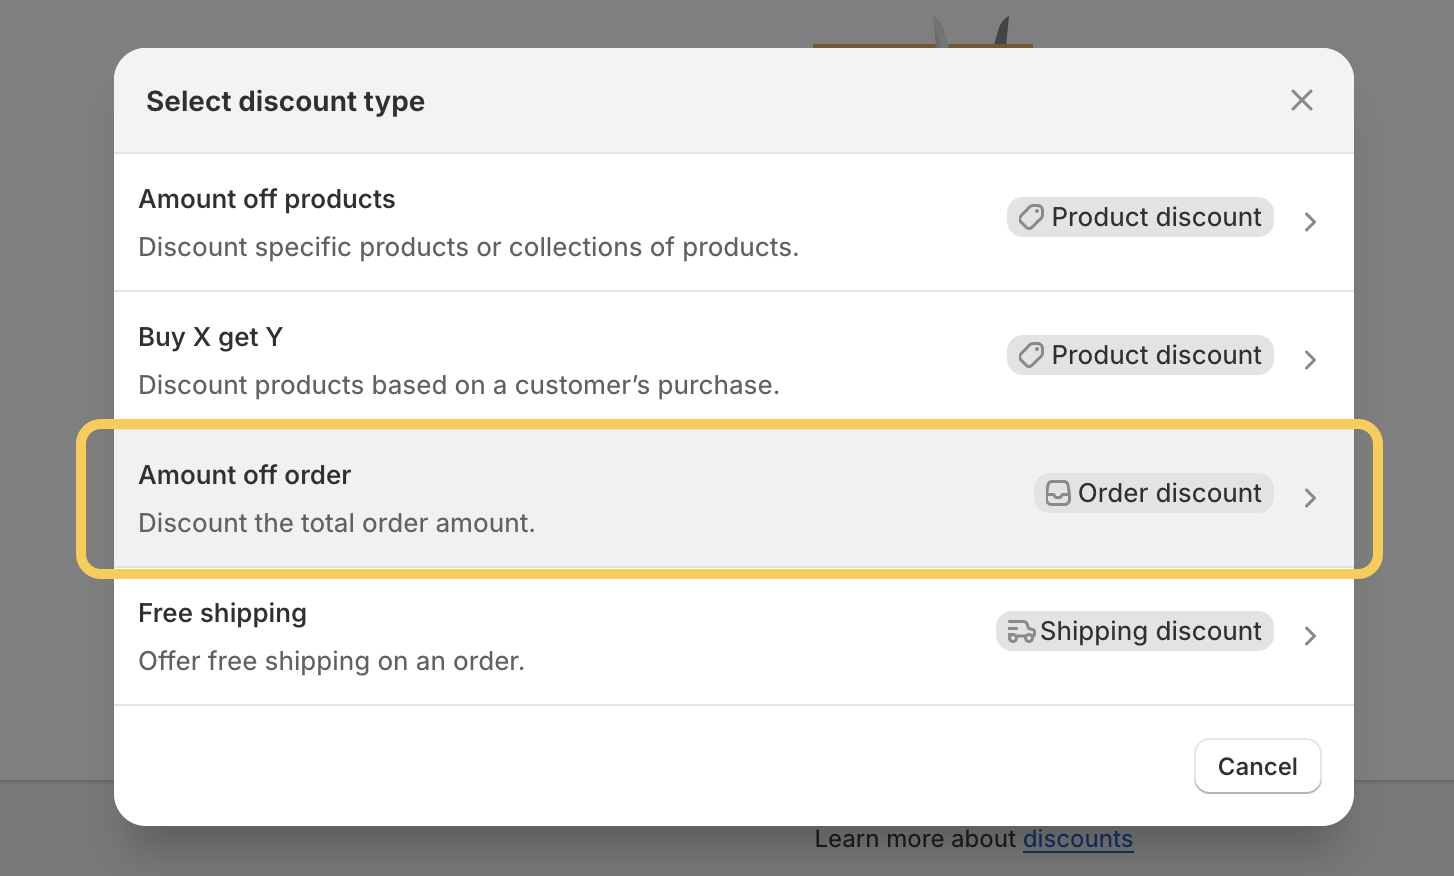
Click “Create Discount” and select “Amount off Order”.

- Set up the discount code:
- Create a manual discount code (e.g., WELCOME10).
- Set the discount value (e.g., 10% off).
- Decide if a minimum purchase is required.
- In the customer eligibility section, select the “Email Subscribers” segment.
- Under “Maximum Discount Uses”, choose “Limit to one use per customer”.
- Leave the “Combinations” section as is.
- Review and save the discount code.
Set up the email flow
-
Open the Flow app.

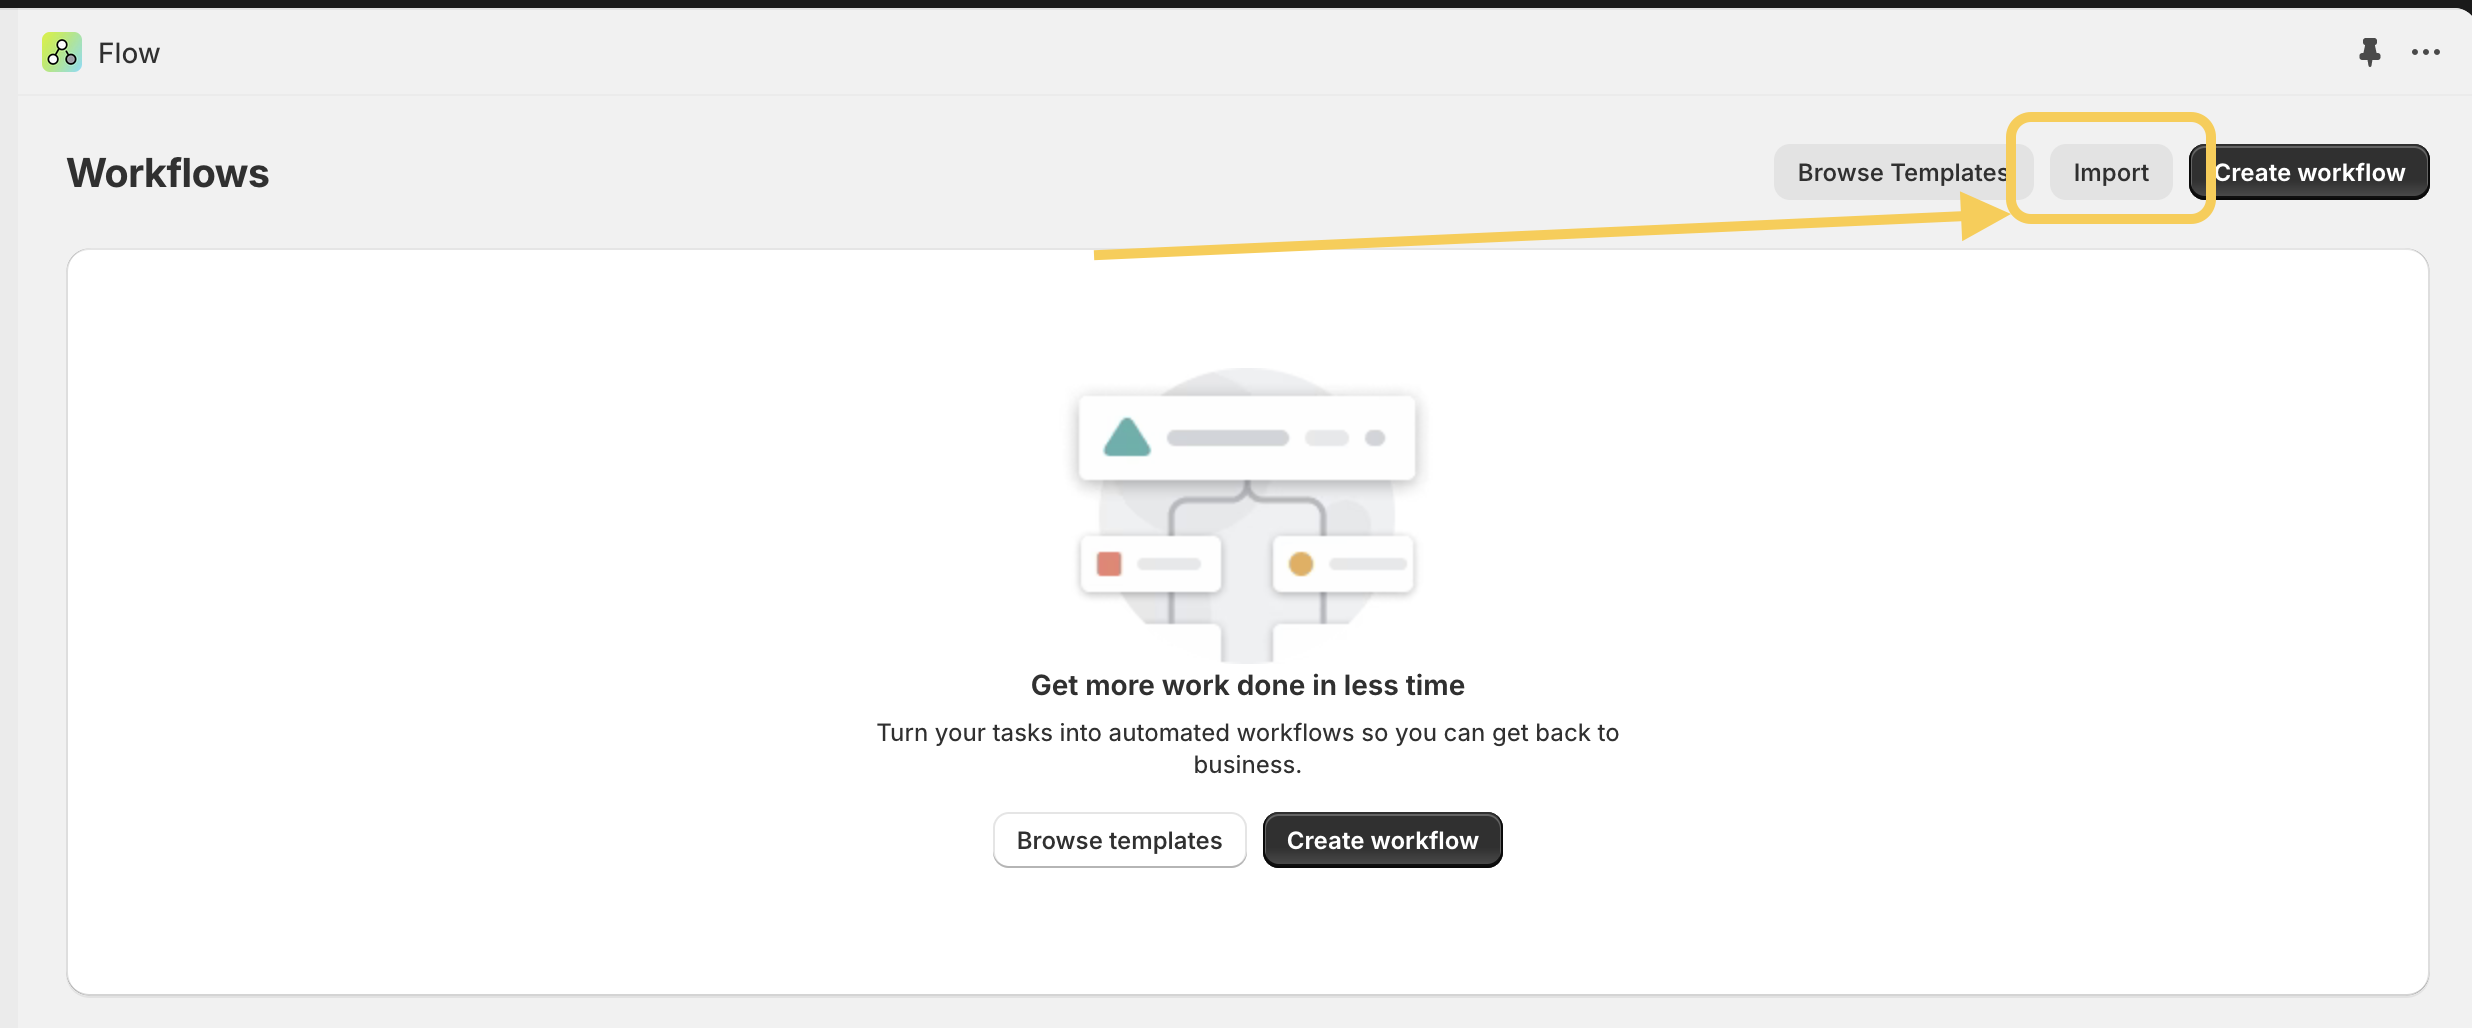
- Click “Import” and import this predefined flow file (or find the template in the app).
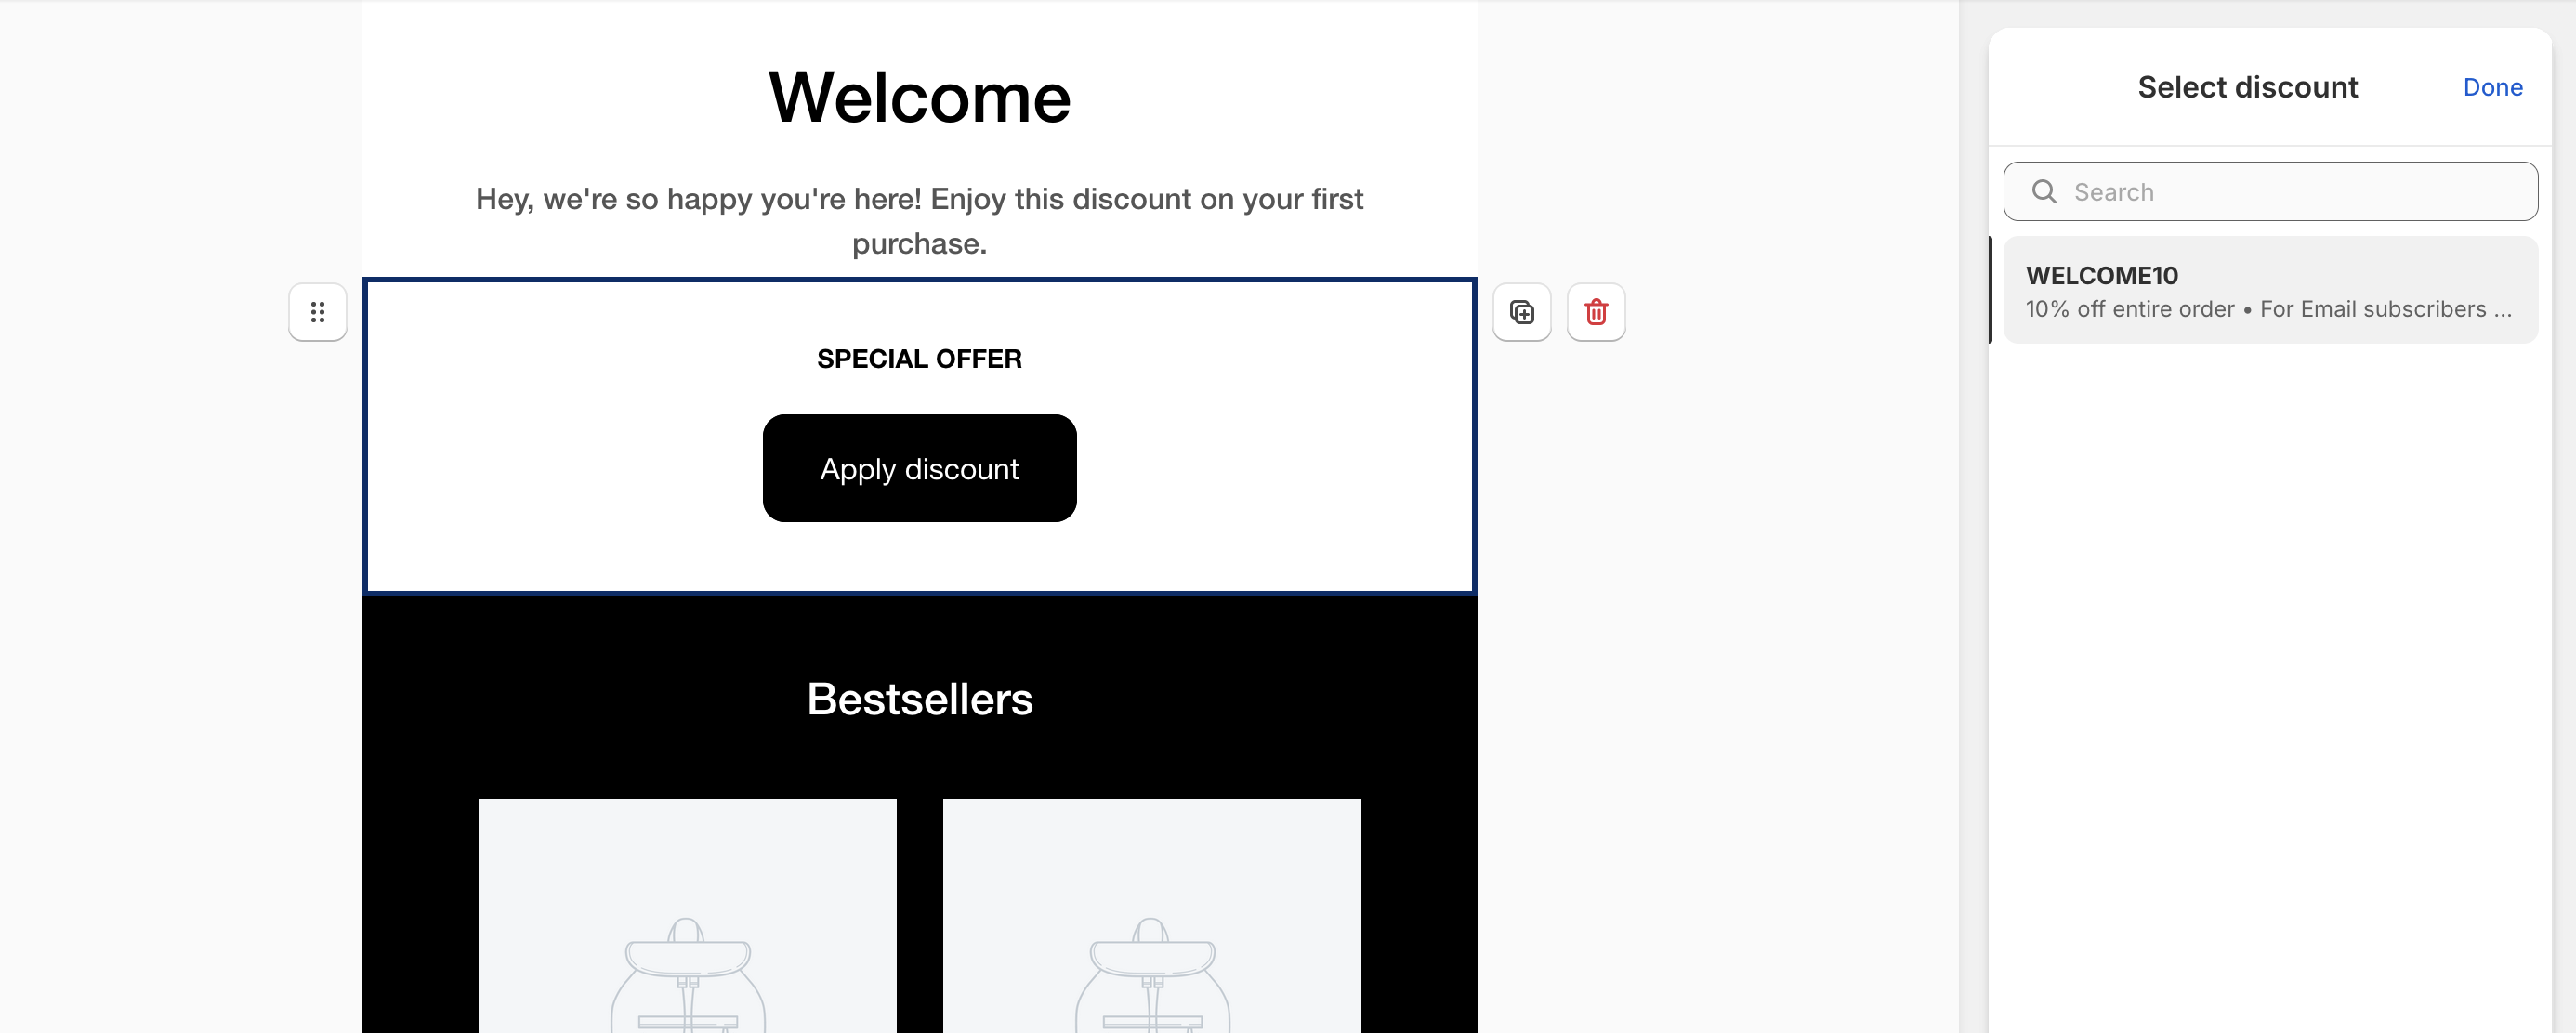
- Edit the email template to include your logo, font, colors, subject line, etc.

- Add the discount code block to the email.
- Save your changes.
- Don’t forget to test the flow.
- You can also review the flow’s log to confirm that it has executed successfully.

I hope this tutorial helps you successfully set up your “coming soon” page on Shopify and the welcome discount email for your early subscribers. If you have any questions, feel free to reach out to us!
