Automate Shopify forms responses and alerts with the new metaobject entry trigger
Shopify has recently introduced a powerful new feature in the Shopify Flow app: the metaobject entry trigger. This trigger initiates a workflow whenever a new metaobject entry is created, making it especially useful for automating form responses to your customers and internal form submission alerts.
Since Shopify Forms saves each form submission as a metaobject entry, you can now set up workflows to notify internal teams (even at different email addresses than your store’s main contact email address!), and send automatic form responses to customers.
Interesting update: Since the August 2025 updates, Shopify Forms now support translations. You can localize the form content directly in the app — either automatically or manually.
Let’s dive into how to easily create a workflow that sends an internal notification as well as an email to your customers using the Metaobject entry created trigger.
New to metaobjects? Check out our previous article, How to leverage metaobjects for your Shopify store?, to learn the basics.
Sending an internal email after a form has been submitted
Imagine you want to notify a specific internal department whenever a new form submission arrives. By default, the Shopify Forms app only sends notifications to the store’s primary email address if enabled during form setup.
However, it doesn’t support adding additional recipient email addresses (such as a sales team email). This is where the Metaobject entry created trigger in Shopify Flow can be useful.
How to set up internal notifications using Shopify Flow?
Note: If you don’t want to set it up on your own, you can download the form submission internal alert workflow here. You can easily import the worklow to your store when creating a new workflow in the Flow app.
The set up is very easy, let’s follow these steps:
- Start by creating a new form in the Forms app. Choose either a pop-up or inline form and add any required fields you want to collect from customers. Don’t forget to add the form to the storefront.
- After setting up the form, open the Shopify Flow app.
- Click the Create workflow button, then choose Select a trigger.
-
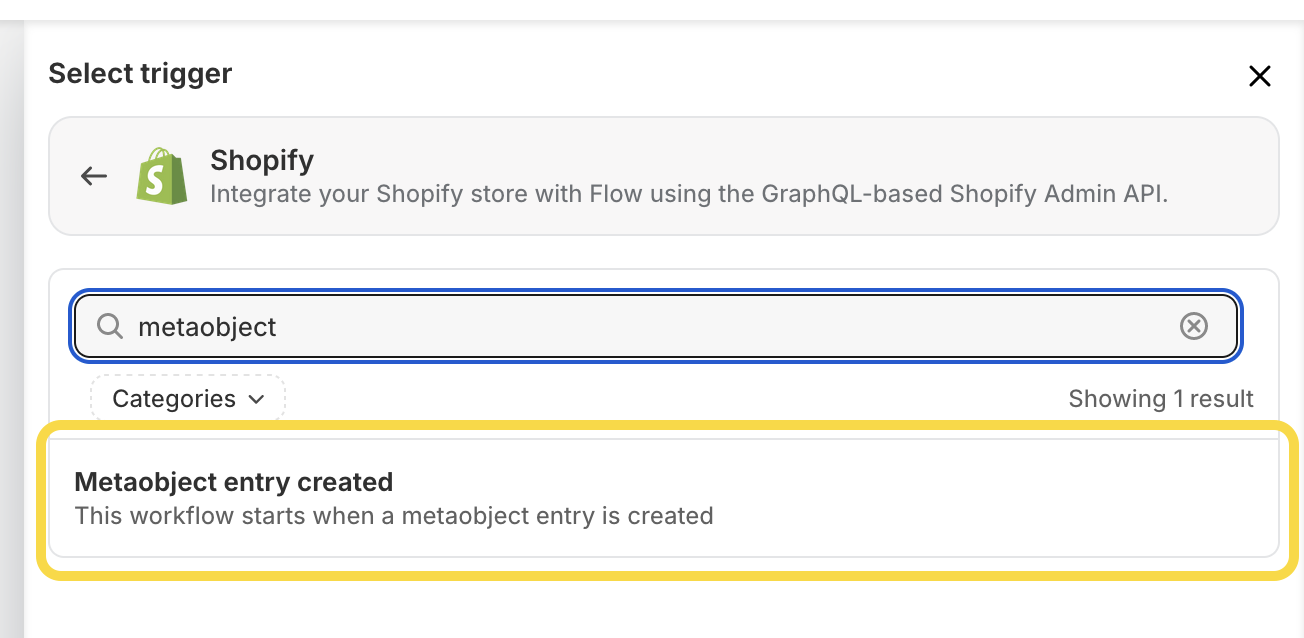
Search for Metaobject, and select the Metaobject entry created trigger.
-
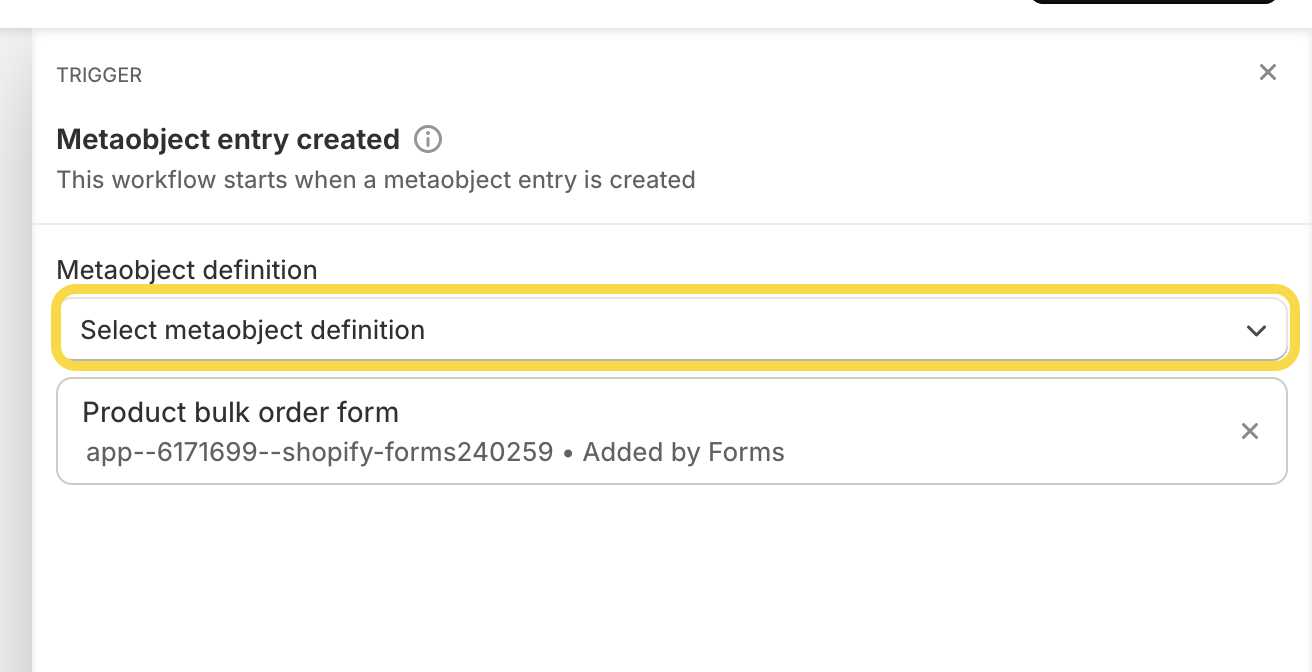
In the Metaobject definition dropdown menu, select your metaobject (e.g., “Product bulk order form” as in our case).
-
In the Metaobject entry trigger card, click Then at the bottom right.

-
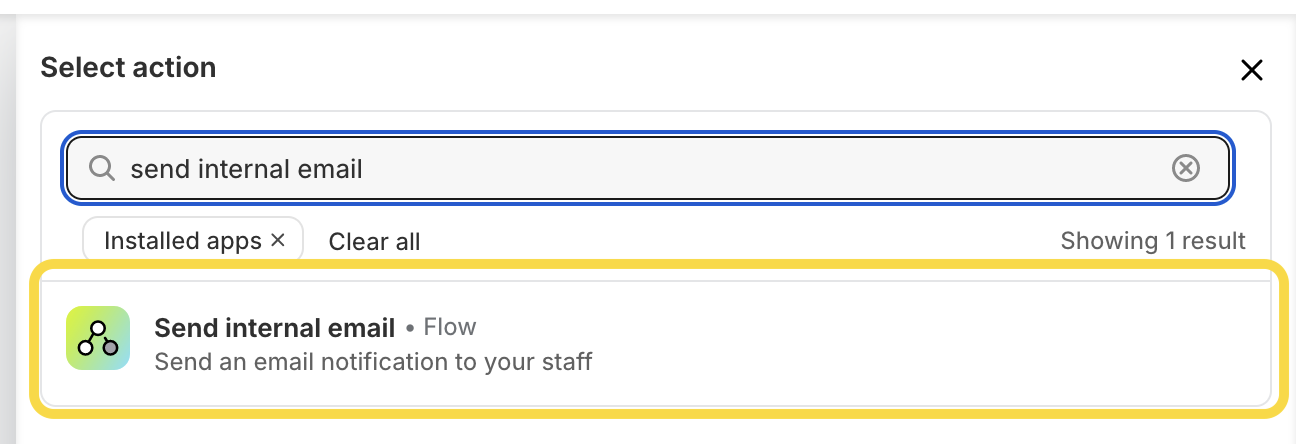
Choose Action and search for Send internal email.
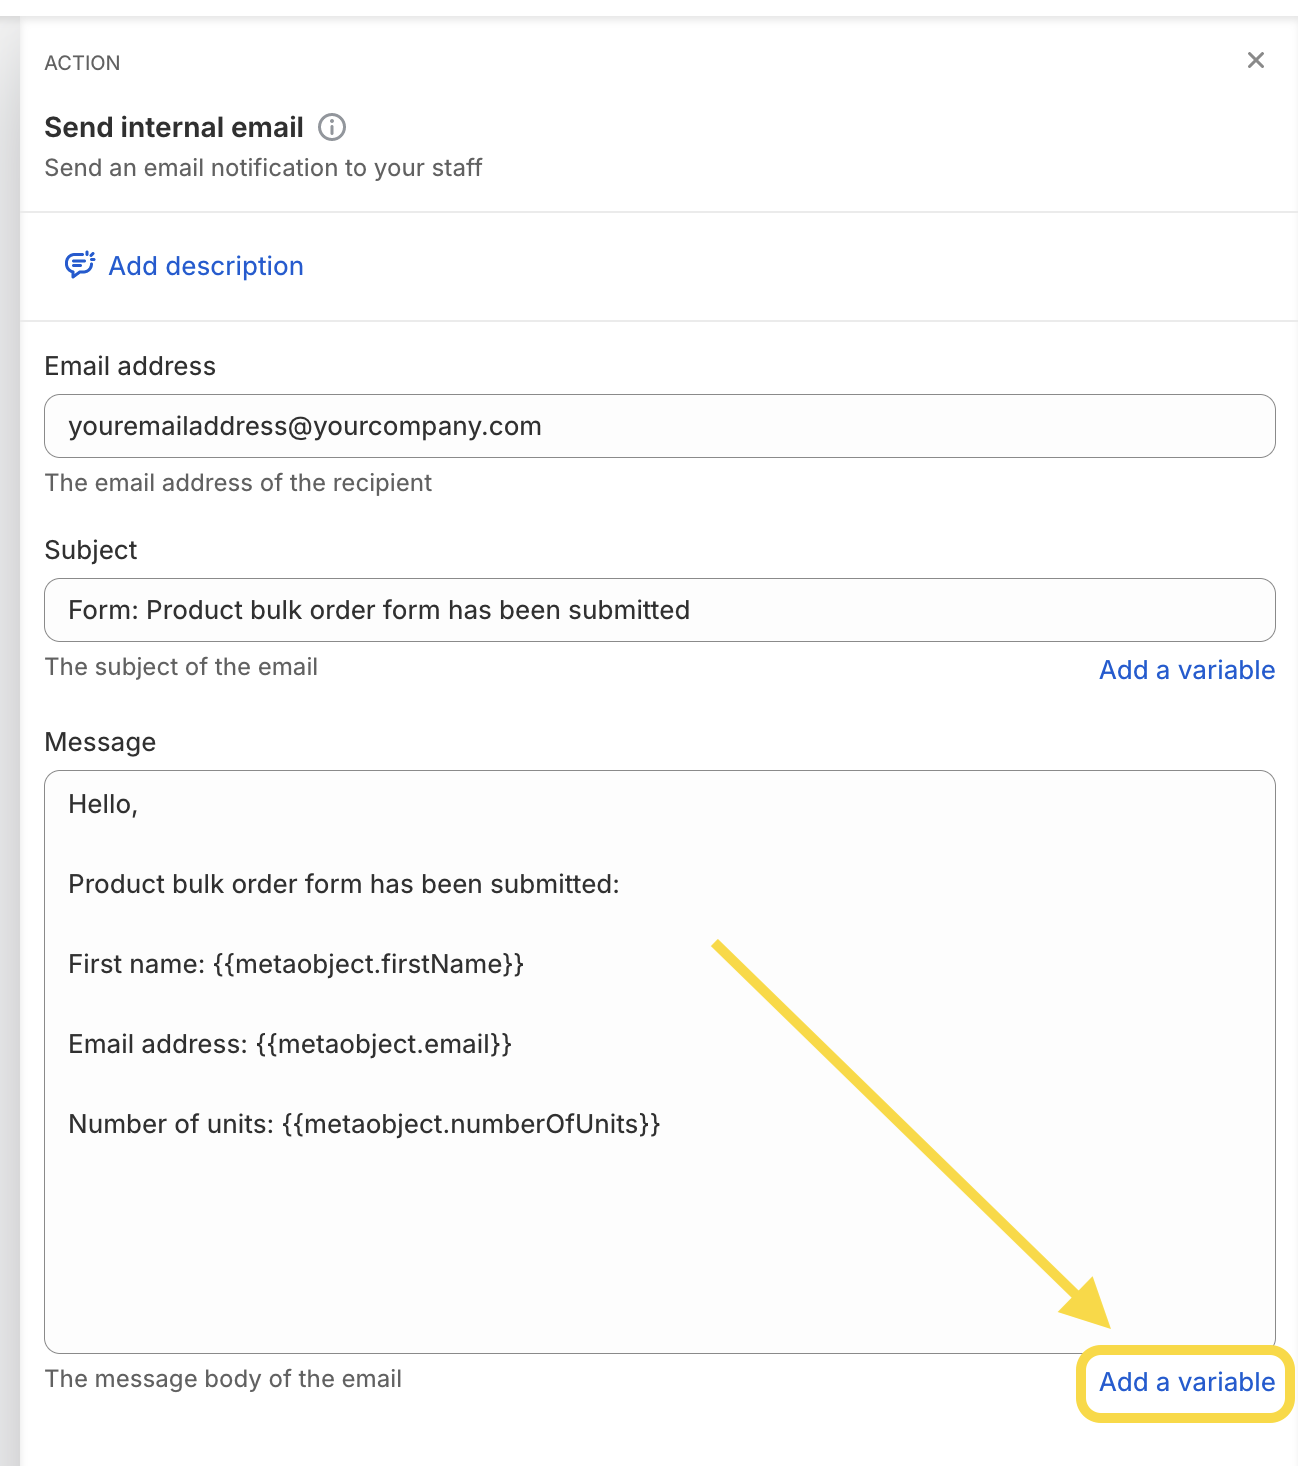
- Enter the email address to receive notifications, along with the subject and message.
-
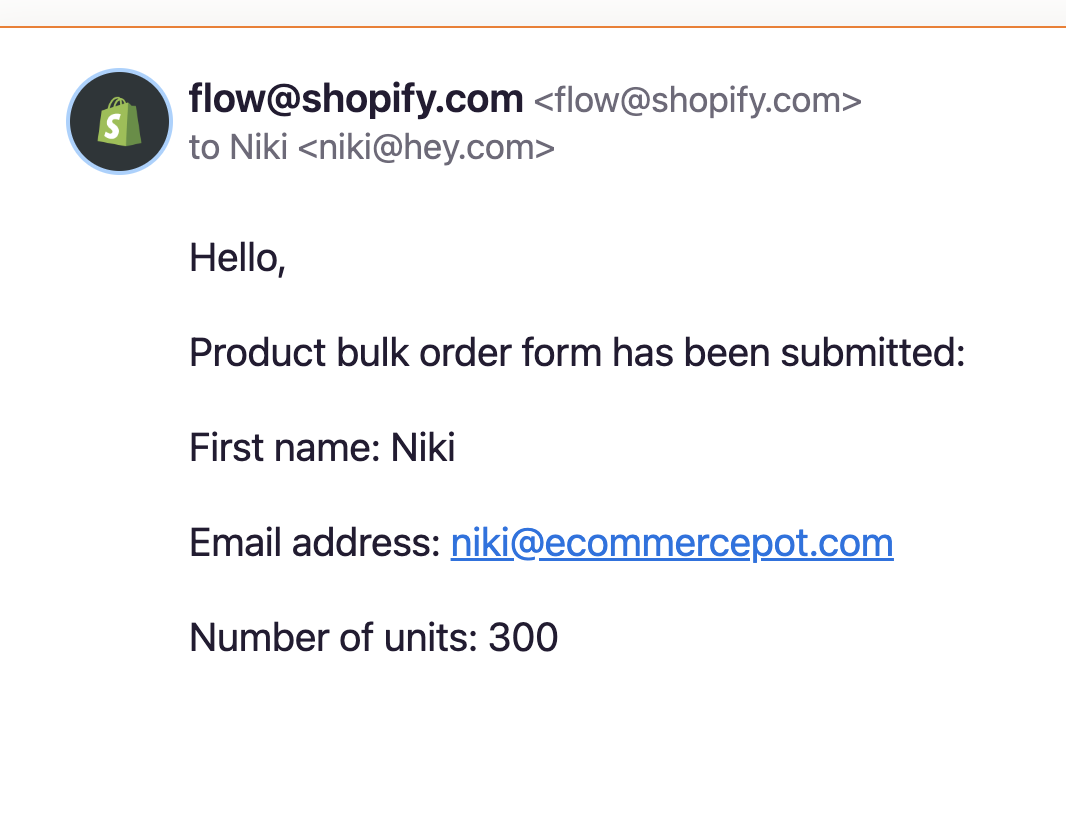
You can use variables from the form, such as the customer’s email, name, and other fields specified in the metaobject.
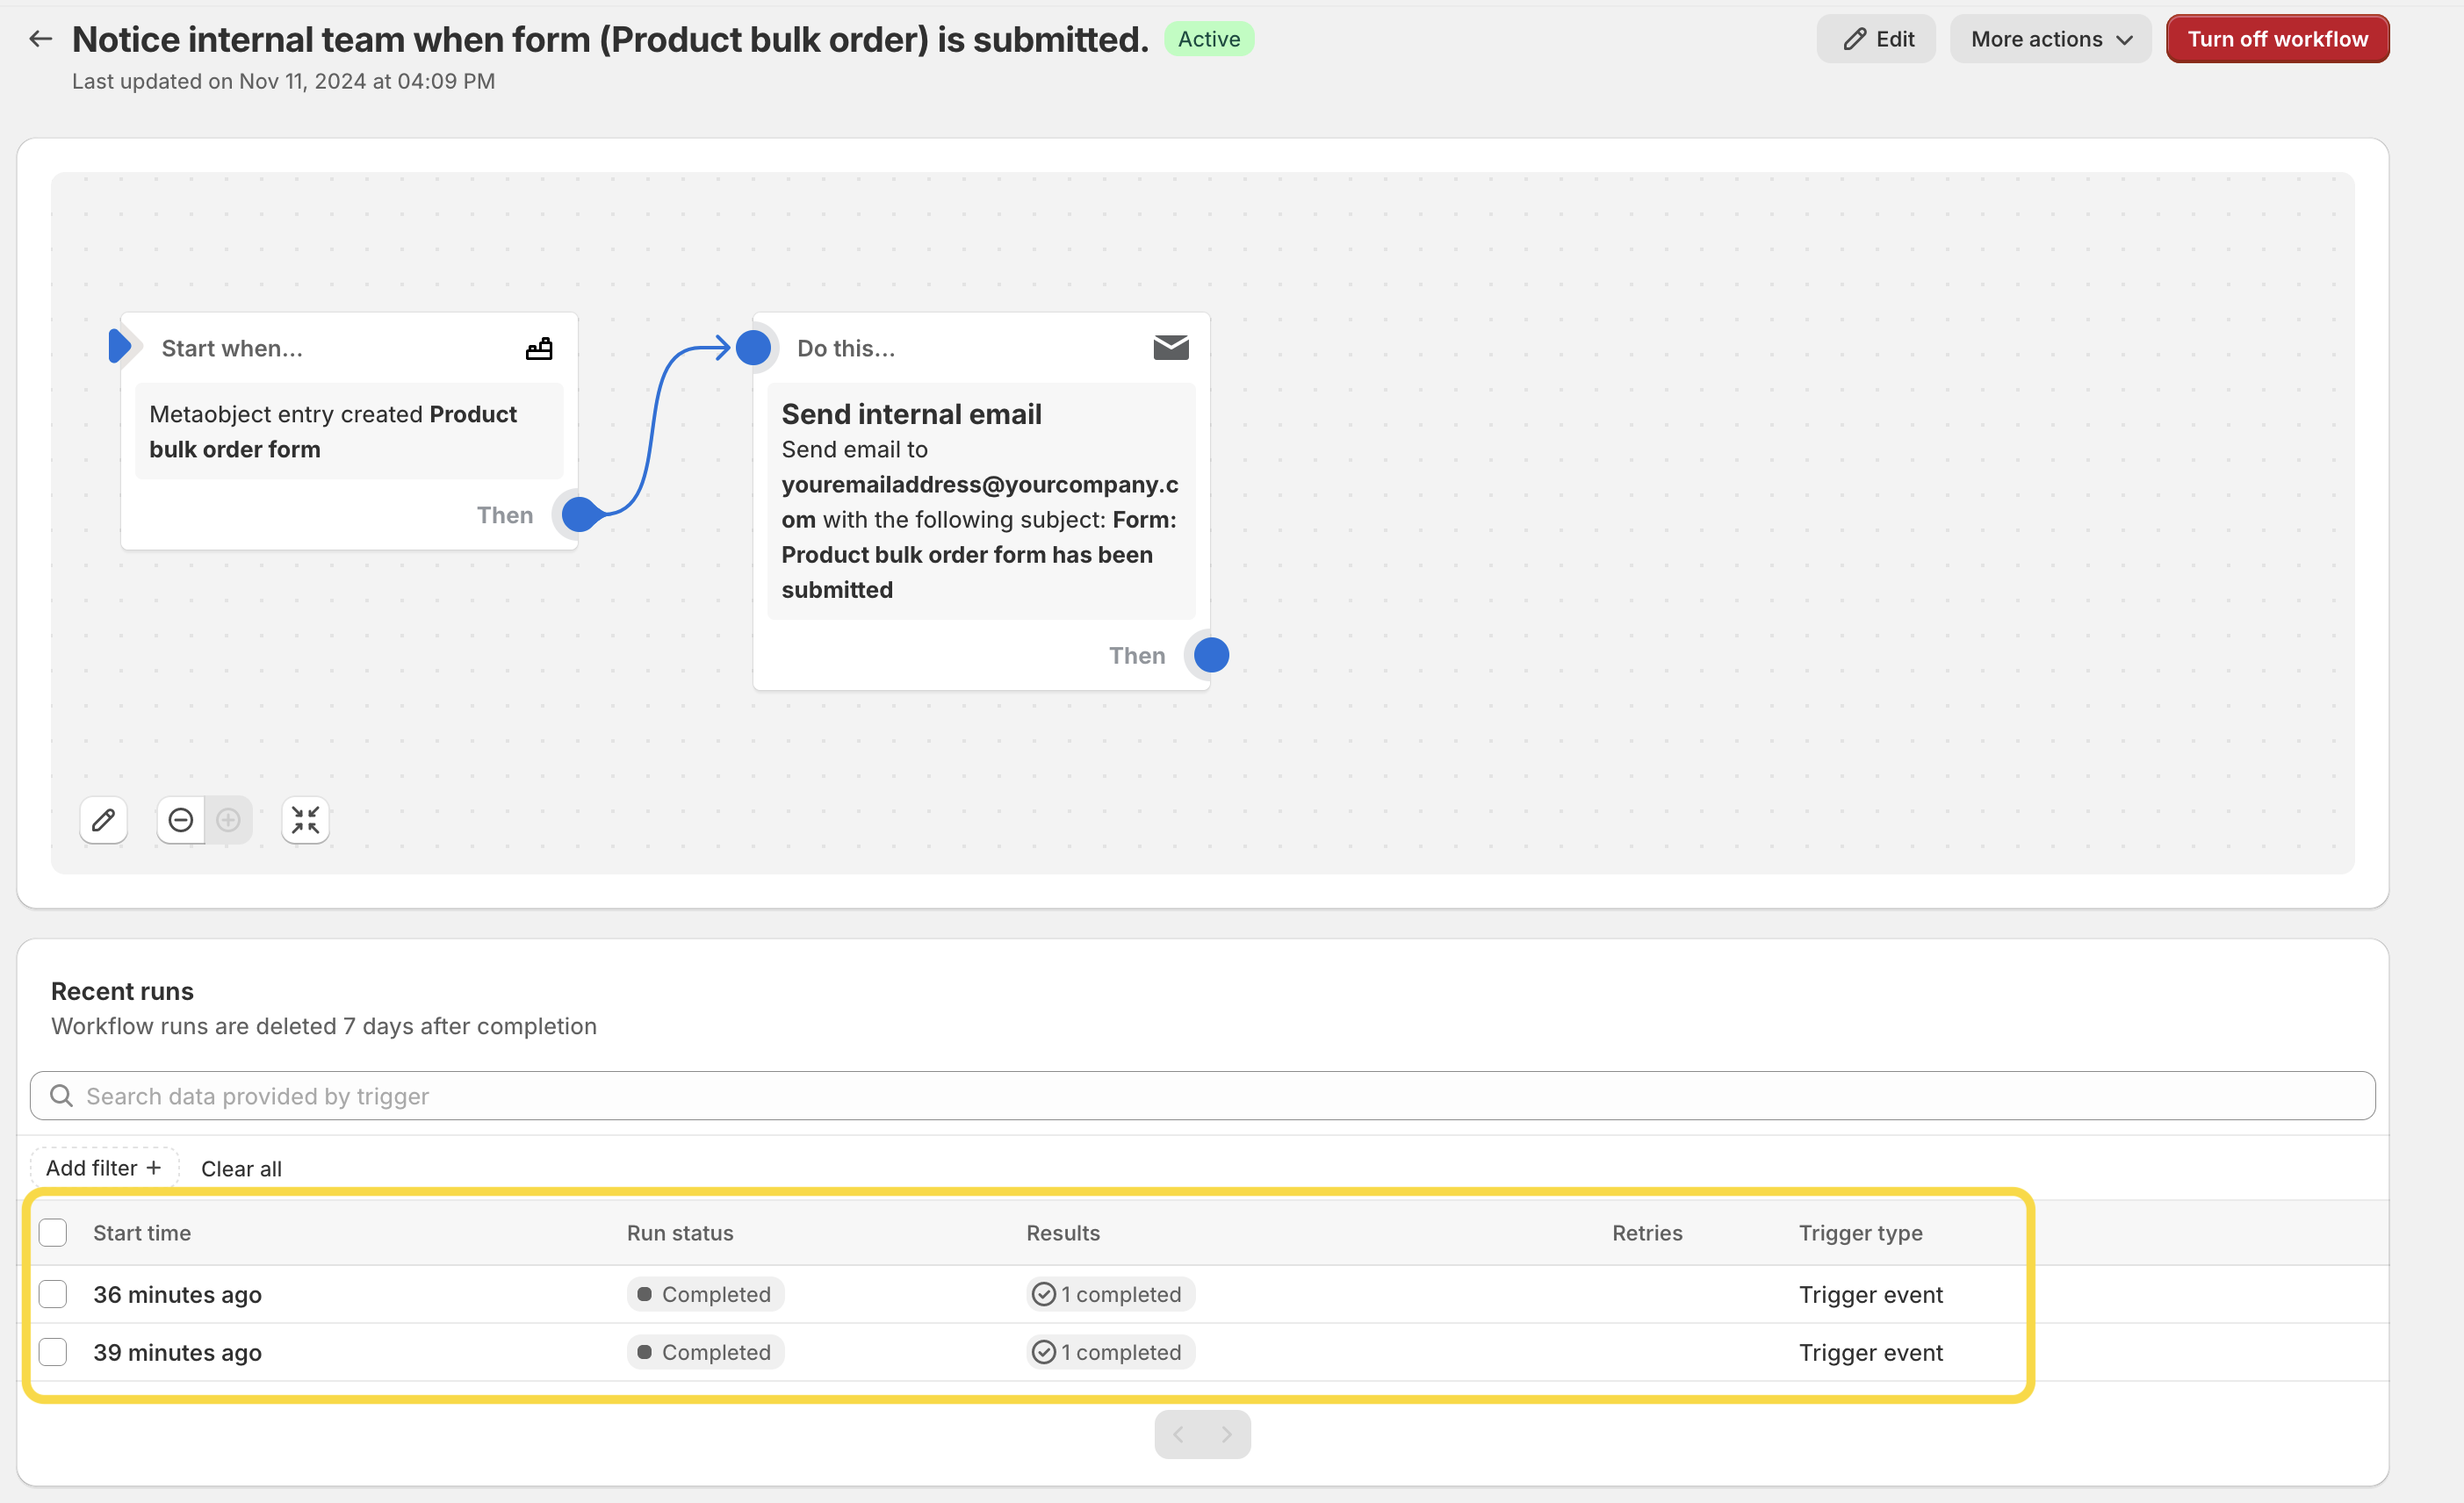
- Turn on your workflow and test it to ensure everything is working properly.
-
Under the flow, there’s a Recent runs section. Any errors will be displayed here, allowing you to troubleshoot issues.
-
You can adjust the email content at any time, adding more fields or additional details for the recipient.
Sending a submission notification to your customers
Once customers submit a form, you’ll likely want to send them a thank-you email as confirmation of their submission. To do this, we’ll use the same flow trigger. We’ll create a separate workflow, though you could also add the Send marketing email action to the workflow we set up previously.
How to set up a form submission notification to your customers?
Setting this up is just as straightforward as the steps above. The instructions below assume you’ve already created a form.
Note: If you don’t want to set it up on your own, you can download the customer form submission email workflow here. You can easily import the worklow to your store when creating a new workflow in the Flow app.
The set up is very easy, let’s follow these steps:
- After setting up the form, open the Shopify Flow app.
- Click the Create workflow button, then choose Select a trigger.
-
Search for Metaobject, and select the Metaobject entry created trigger.

-
In the Metaobject definition dropdown menu, select your metaobject (e.g., “Product bulk order form” as in our case).

-
In the Metaobject entry trigger card, click Then at the bottom right and select Condition.

-
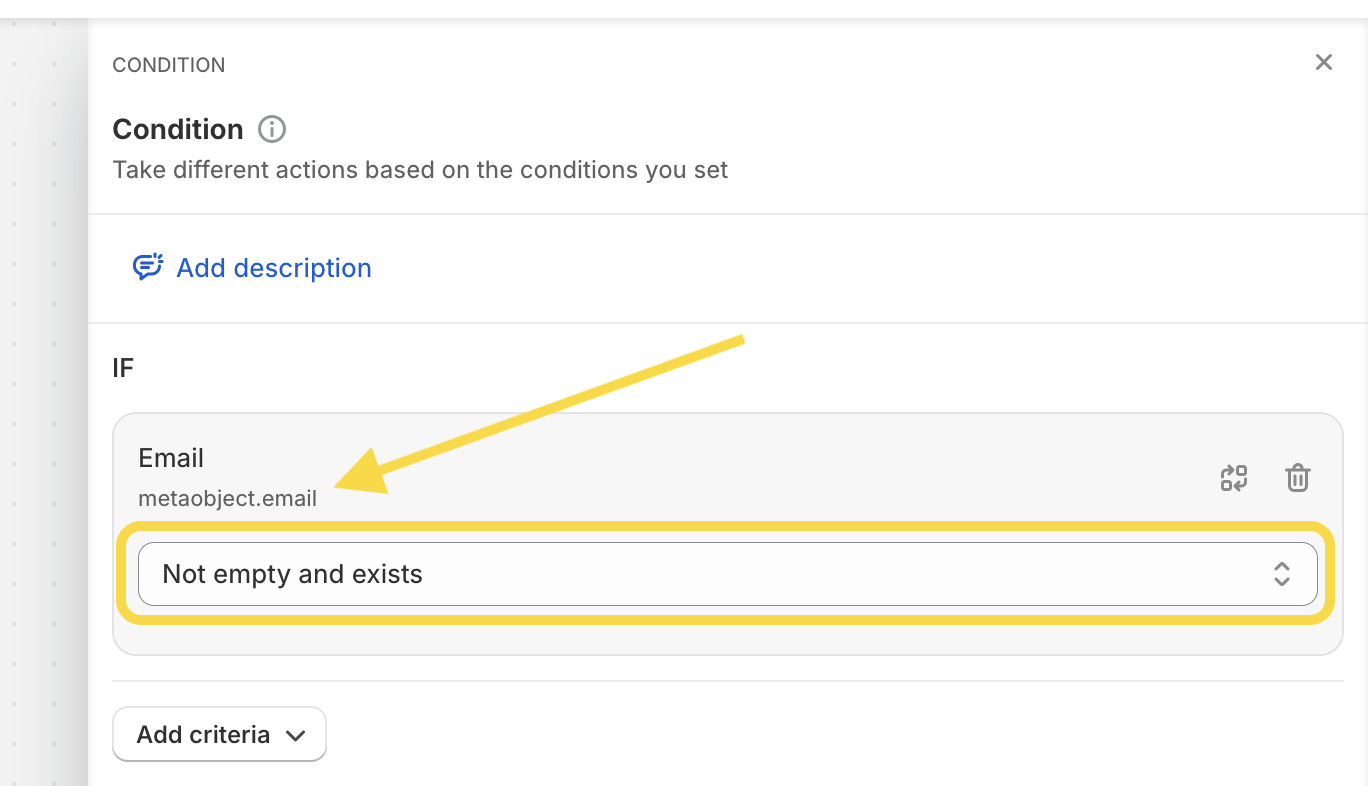
Click Add a variable -> Metaobject -> Email. Set the condition to “Not empty and exists”.
-
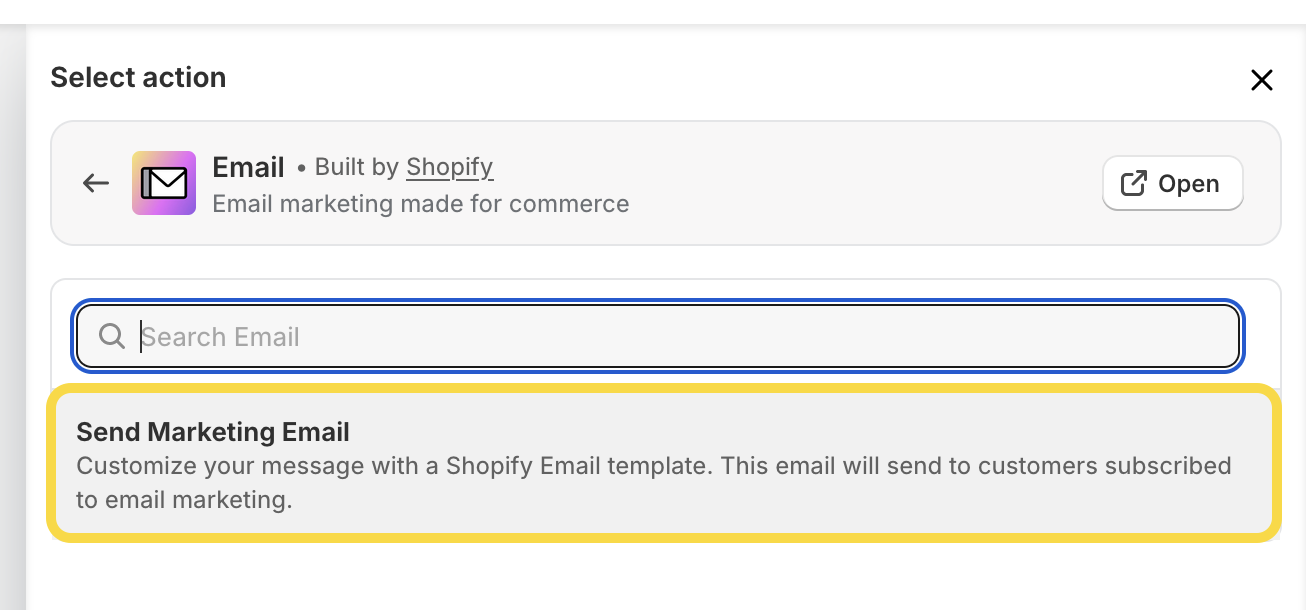
Then click the button Then in the condition card and choose Action and search for Send Marketing email.
-
The Shopify Email app will now guide you through configuring the email. Choose a template and customize the email in the editor, as you would for a newsletter or any other email. Don’t forget to save your changes!
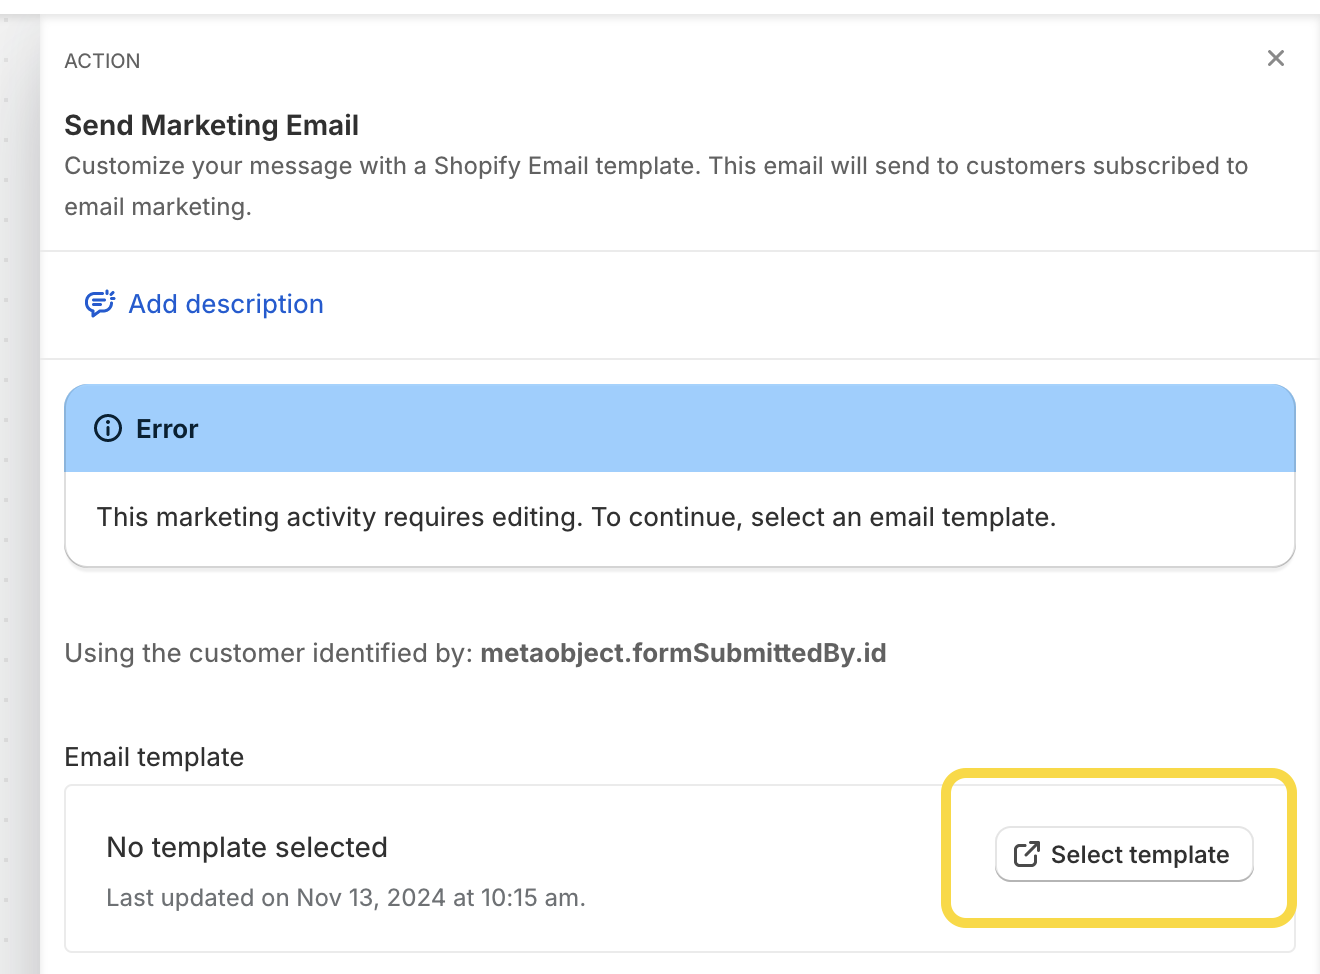
- Note: Emails will only be sent to customers who are subscribed to email marketing. By default, anyone who submits a Shopify form is automatically tagged as “subscribed,” but make sure to update the Consent Disclaimer in the form settings to meet your country’s privacy requirements.
If you wish to run both automations, here is a workflow that includes sending internal notifications as well as emails to your customers after a form has been submitted.
And that’s it! We hope these instructions help you make the most of these new triggers, streamlining your workflows and saving your valuable time!
