
How to set up social sign-in for customer accounts: Facebook (step-by-step guide)
Shopify now allows merchants to enable social sign-in for customer accounts using Facebook and Google. This feature gives customers the option to log in with their existing social credentials, creating a faster, more convenient, and familiar experience. You can enable one or multiple social sign-in options on your store, such as both Facebook and Google.
To get started, you’ll need a developer account for the provider (in this case, Facebook) to connect your store’s customer accounts with social sign-in. Regarding privacy, the only customer data shared with Shopify during the login process is the customer’s email address.
In this article, we’ll guide you step by step through the process of setting up Facebook sign-in, with clear instructions and screenshots to make everything easy to follow—no coding required.
How to set up Facebook sign-in for customer accounts on Shopify?
1. Access the “Sign in with Facebook” page in your Shopify Admin
- In your Shopify admin, navigate to Settings → Customer accounts.
-
Under the Authentication section, click Manage.
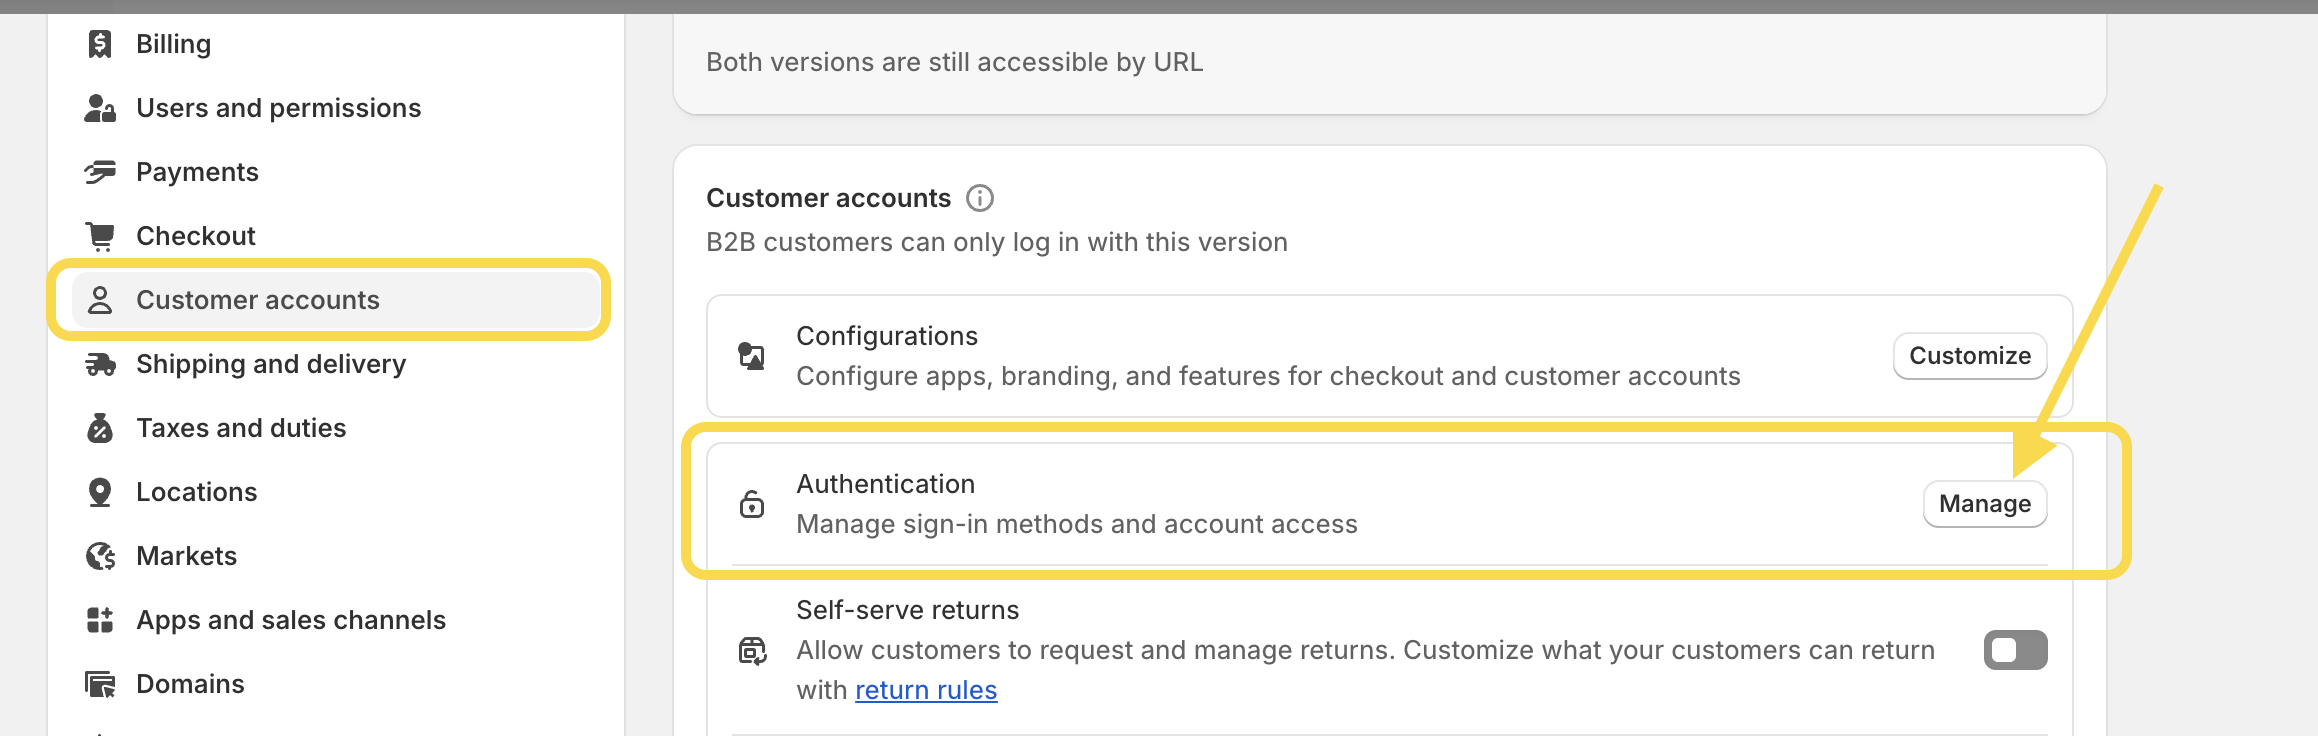
-
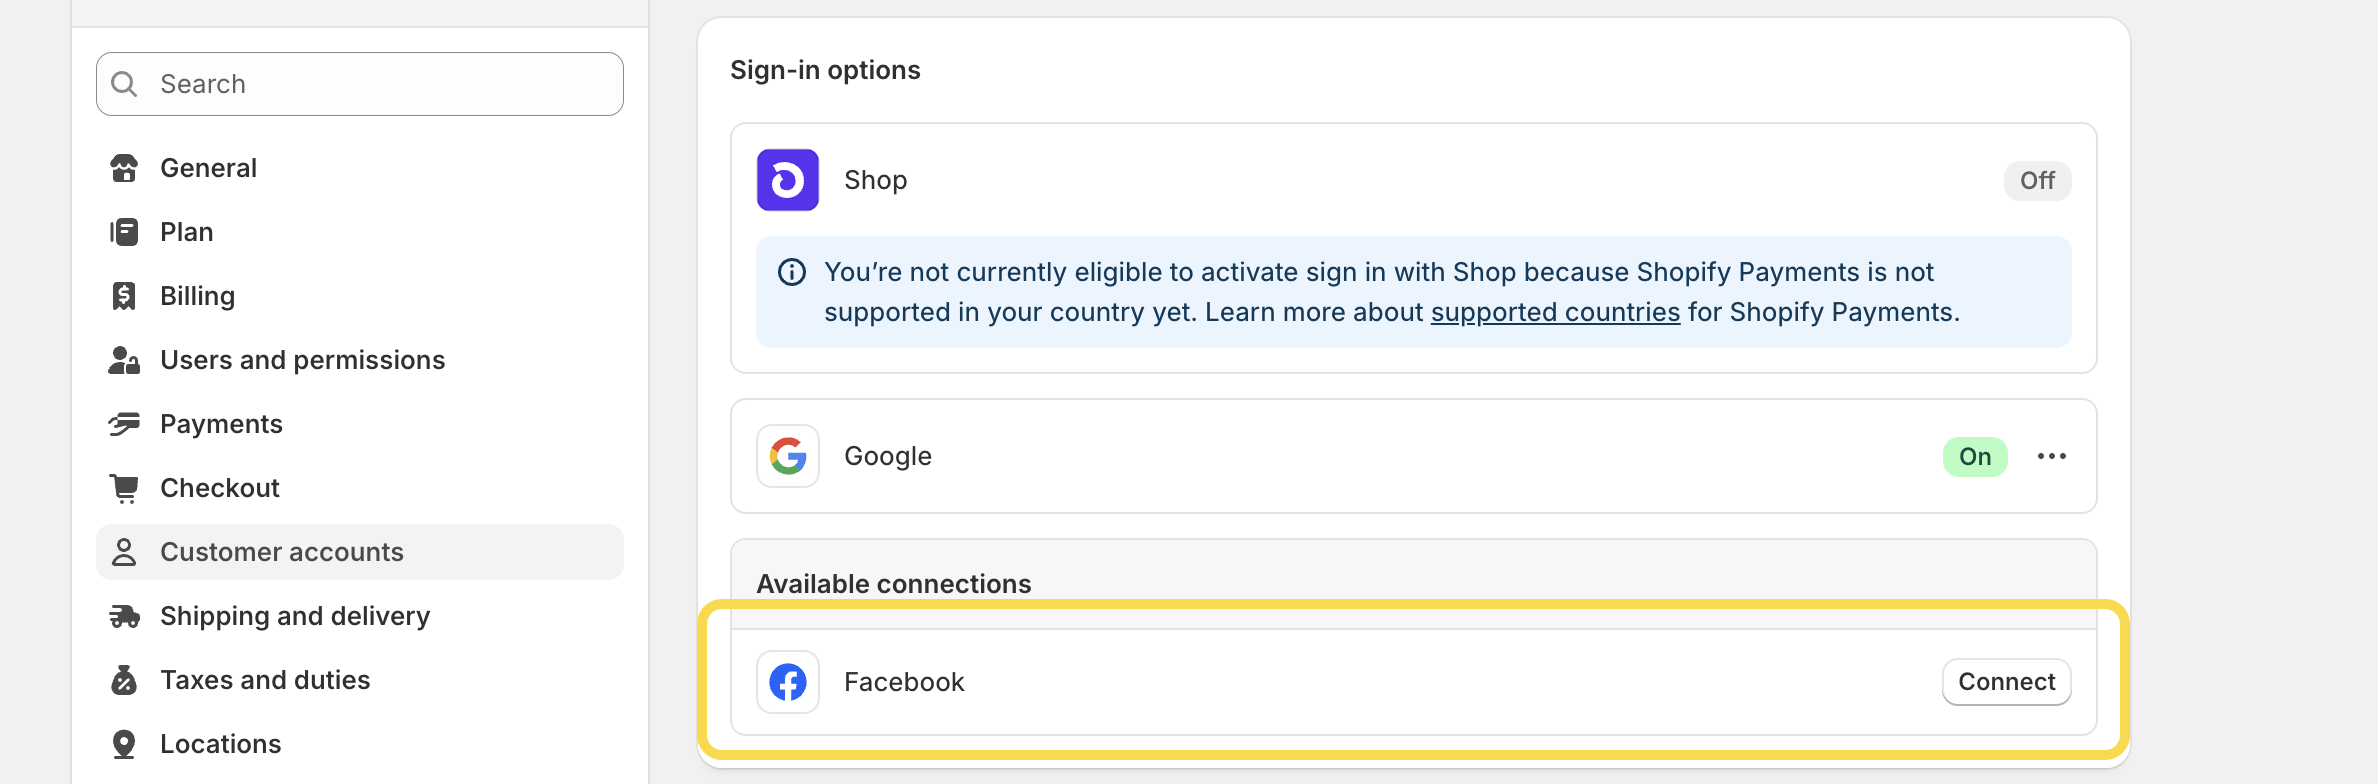
Find Facebook and click Connect to open the Sign in with Facebook setup page.
2. Create an app in your Meta for Developers dashboard
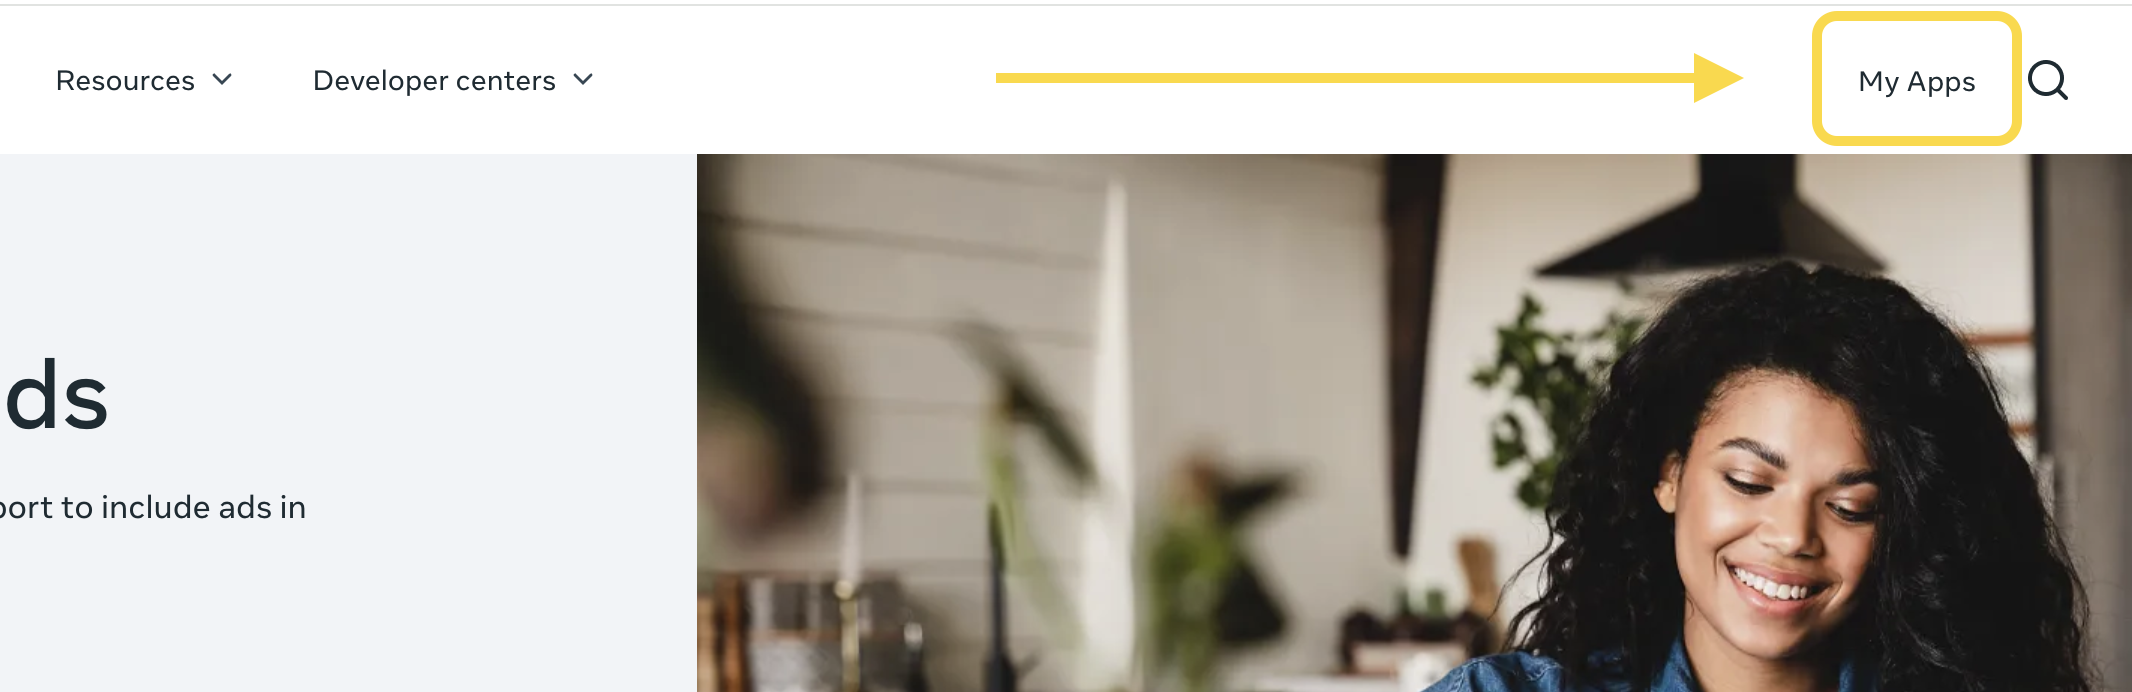
- In a separate browser tab, go to Meta for Developers.
- If you’re not signed in by default, click Login in the upper-right corner and enter your Meta credentials. If you don’t have a Meta account, you’ll need to create one first.
-
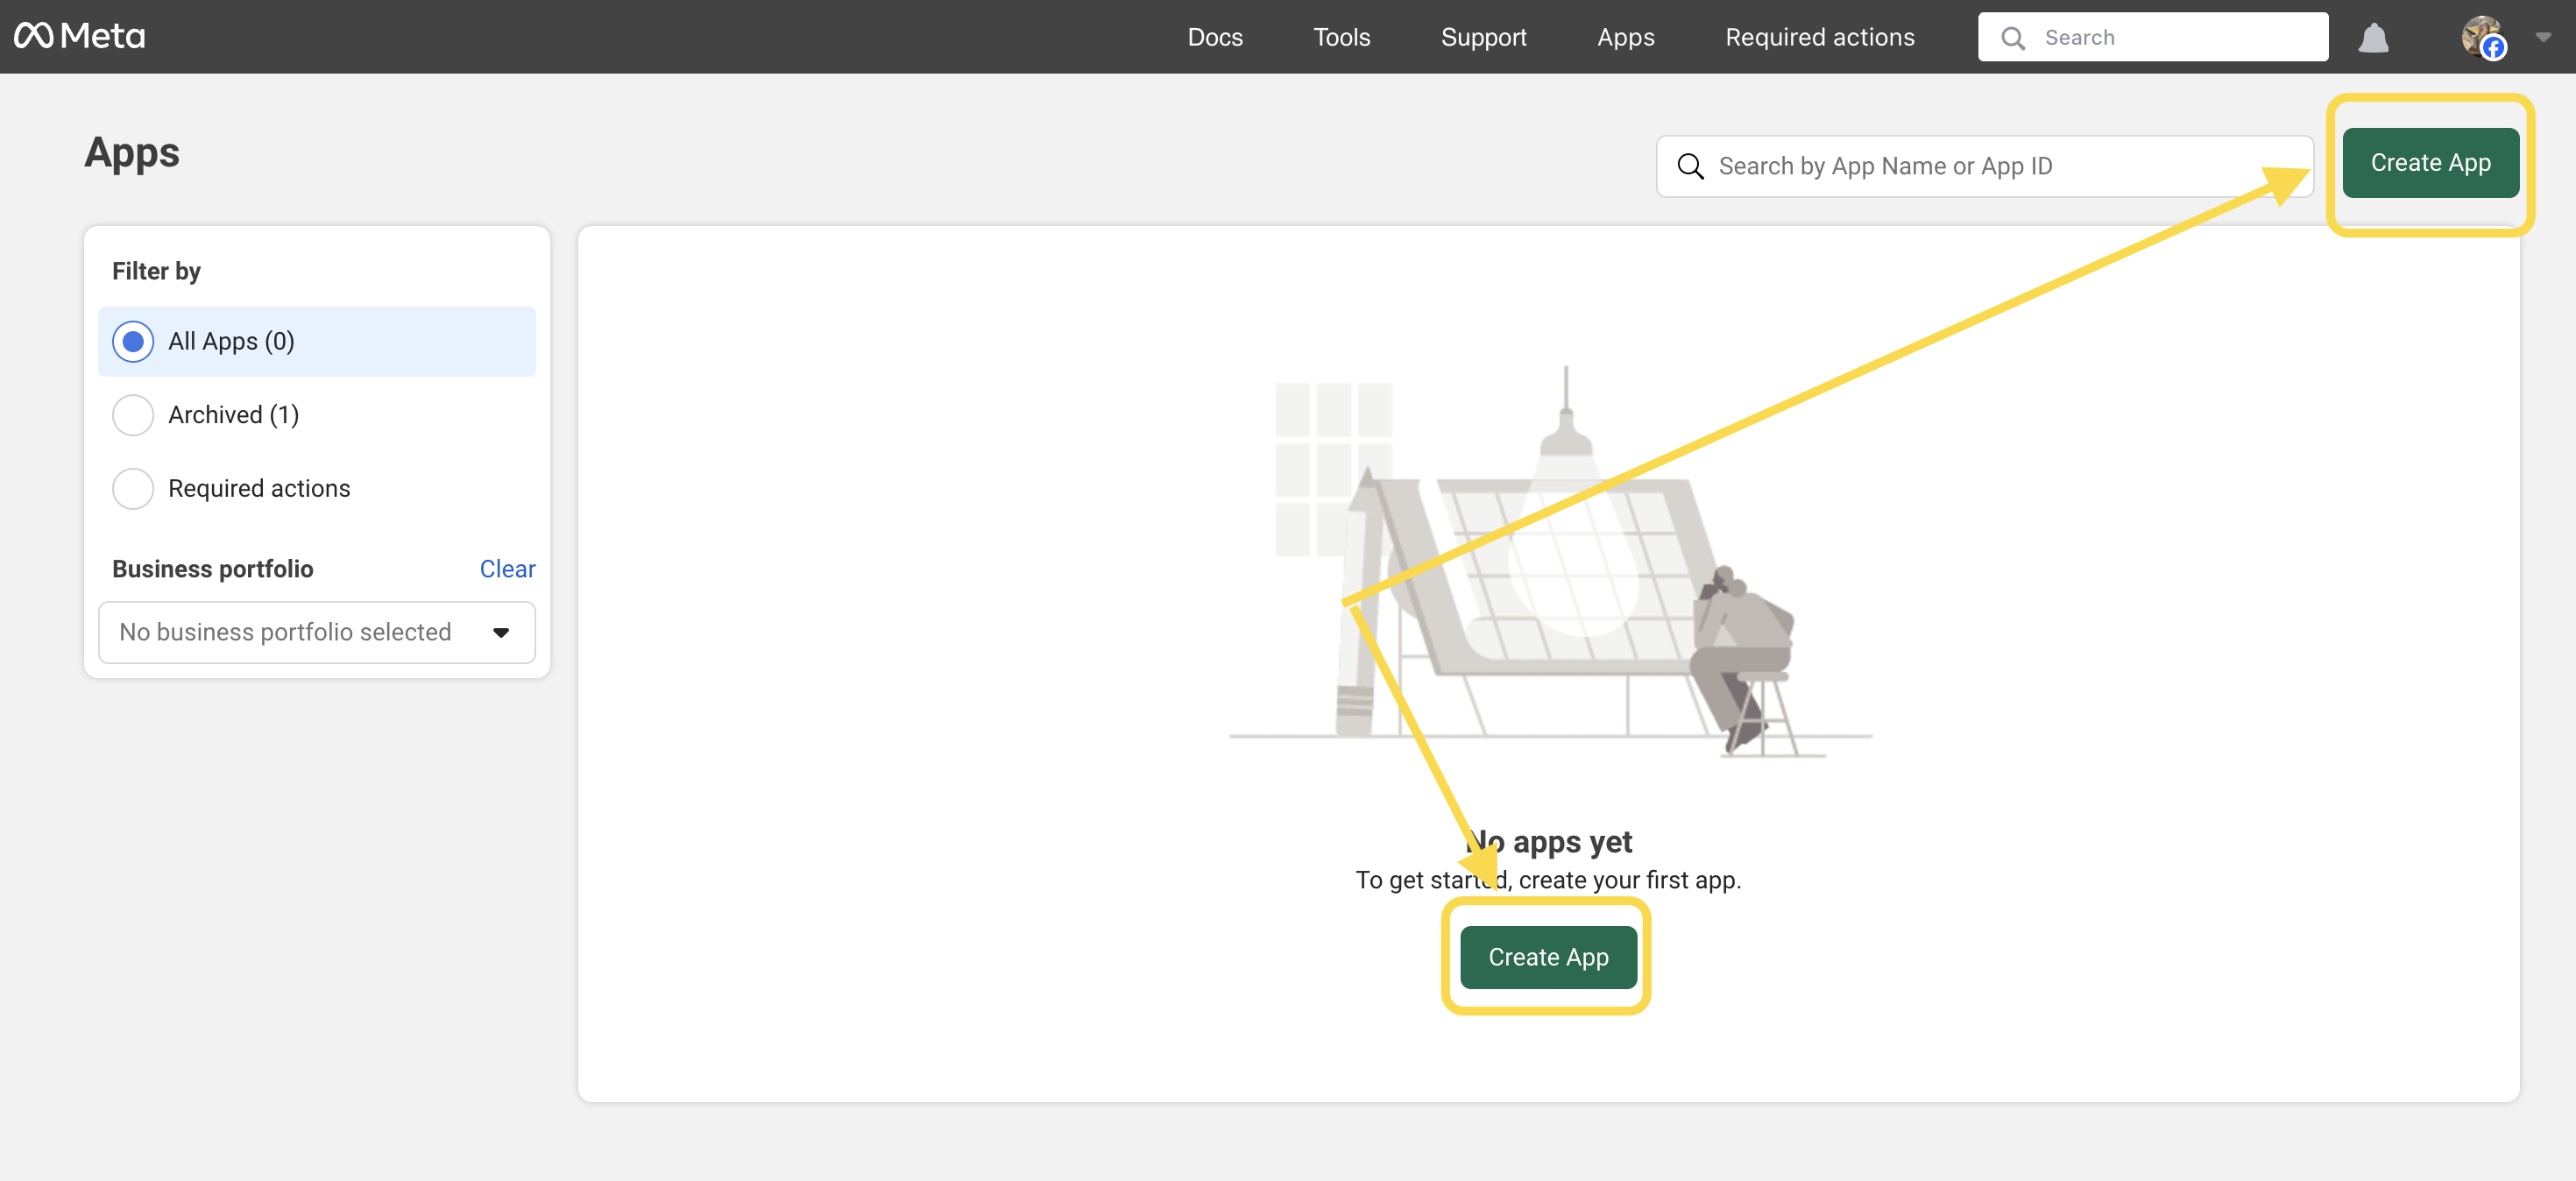
Then, in the upper-right corner, click Apps.
-
Then, click the green button Create App.
-
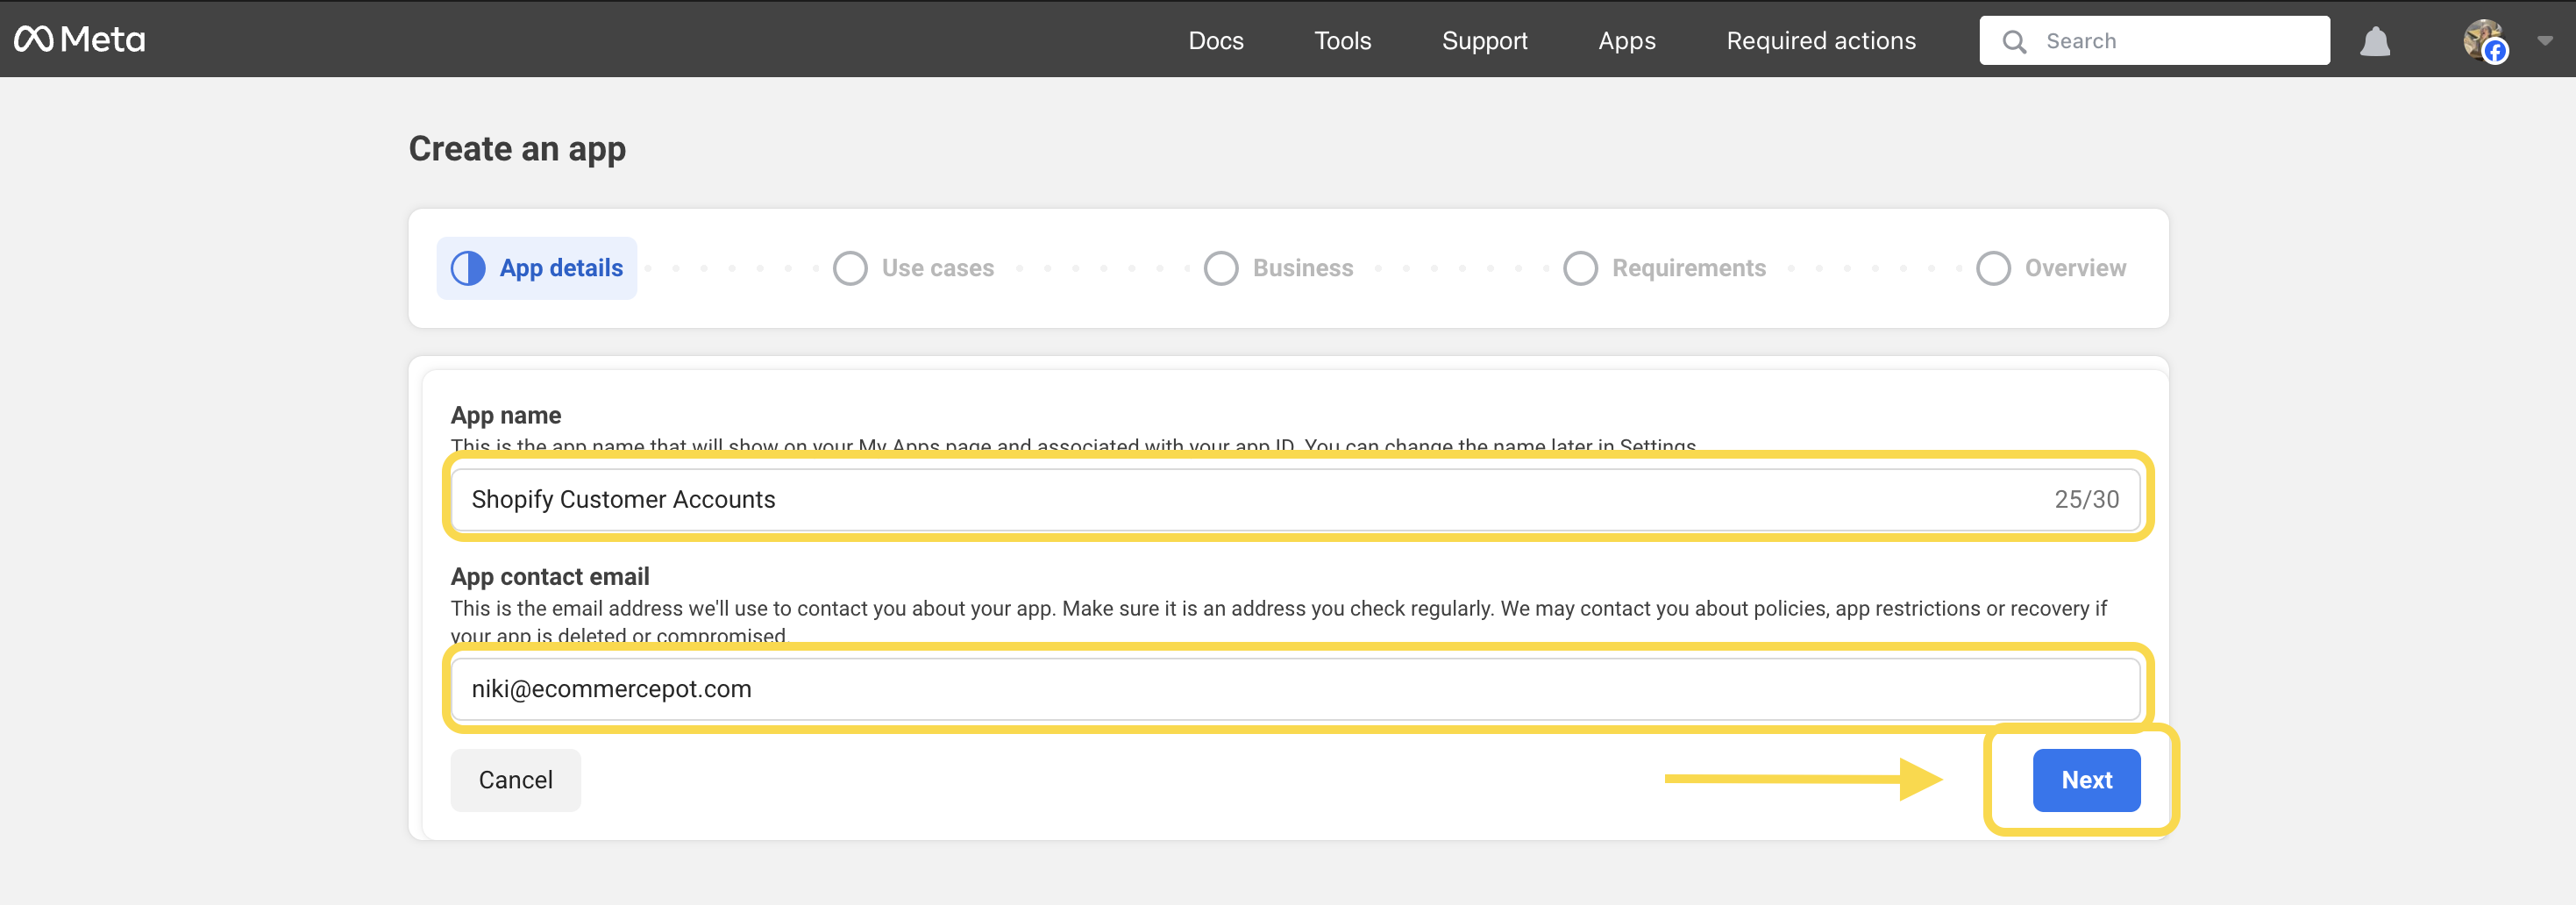
Fill in the App name and the App contact email fields. Click the button Next.
-
Next, in the Add use cases page, select Authenticate and request data from users with Facebook Login. Then scroll down and click the blue button Next.

-
On the next page – Which business portfolio do you want to connect to this app? -, select a business portfolio, or select I don’t want to connect a business portfolio yet., and then click Next.

-
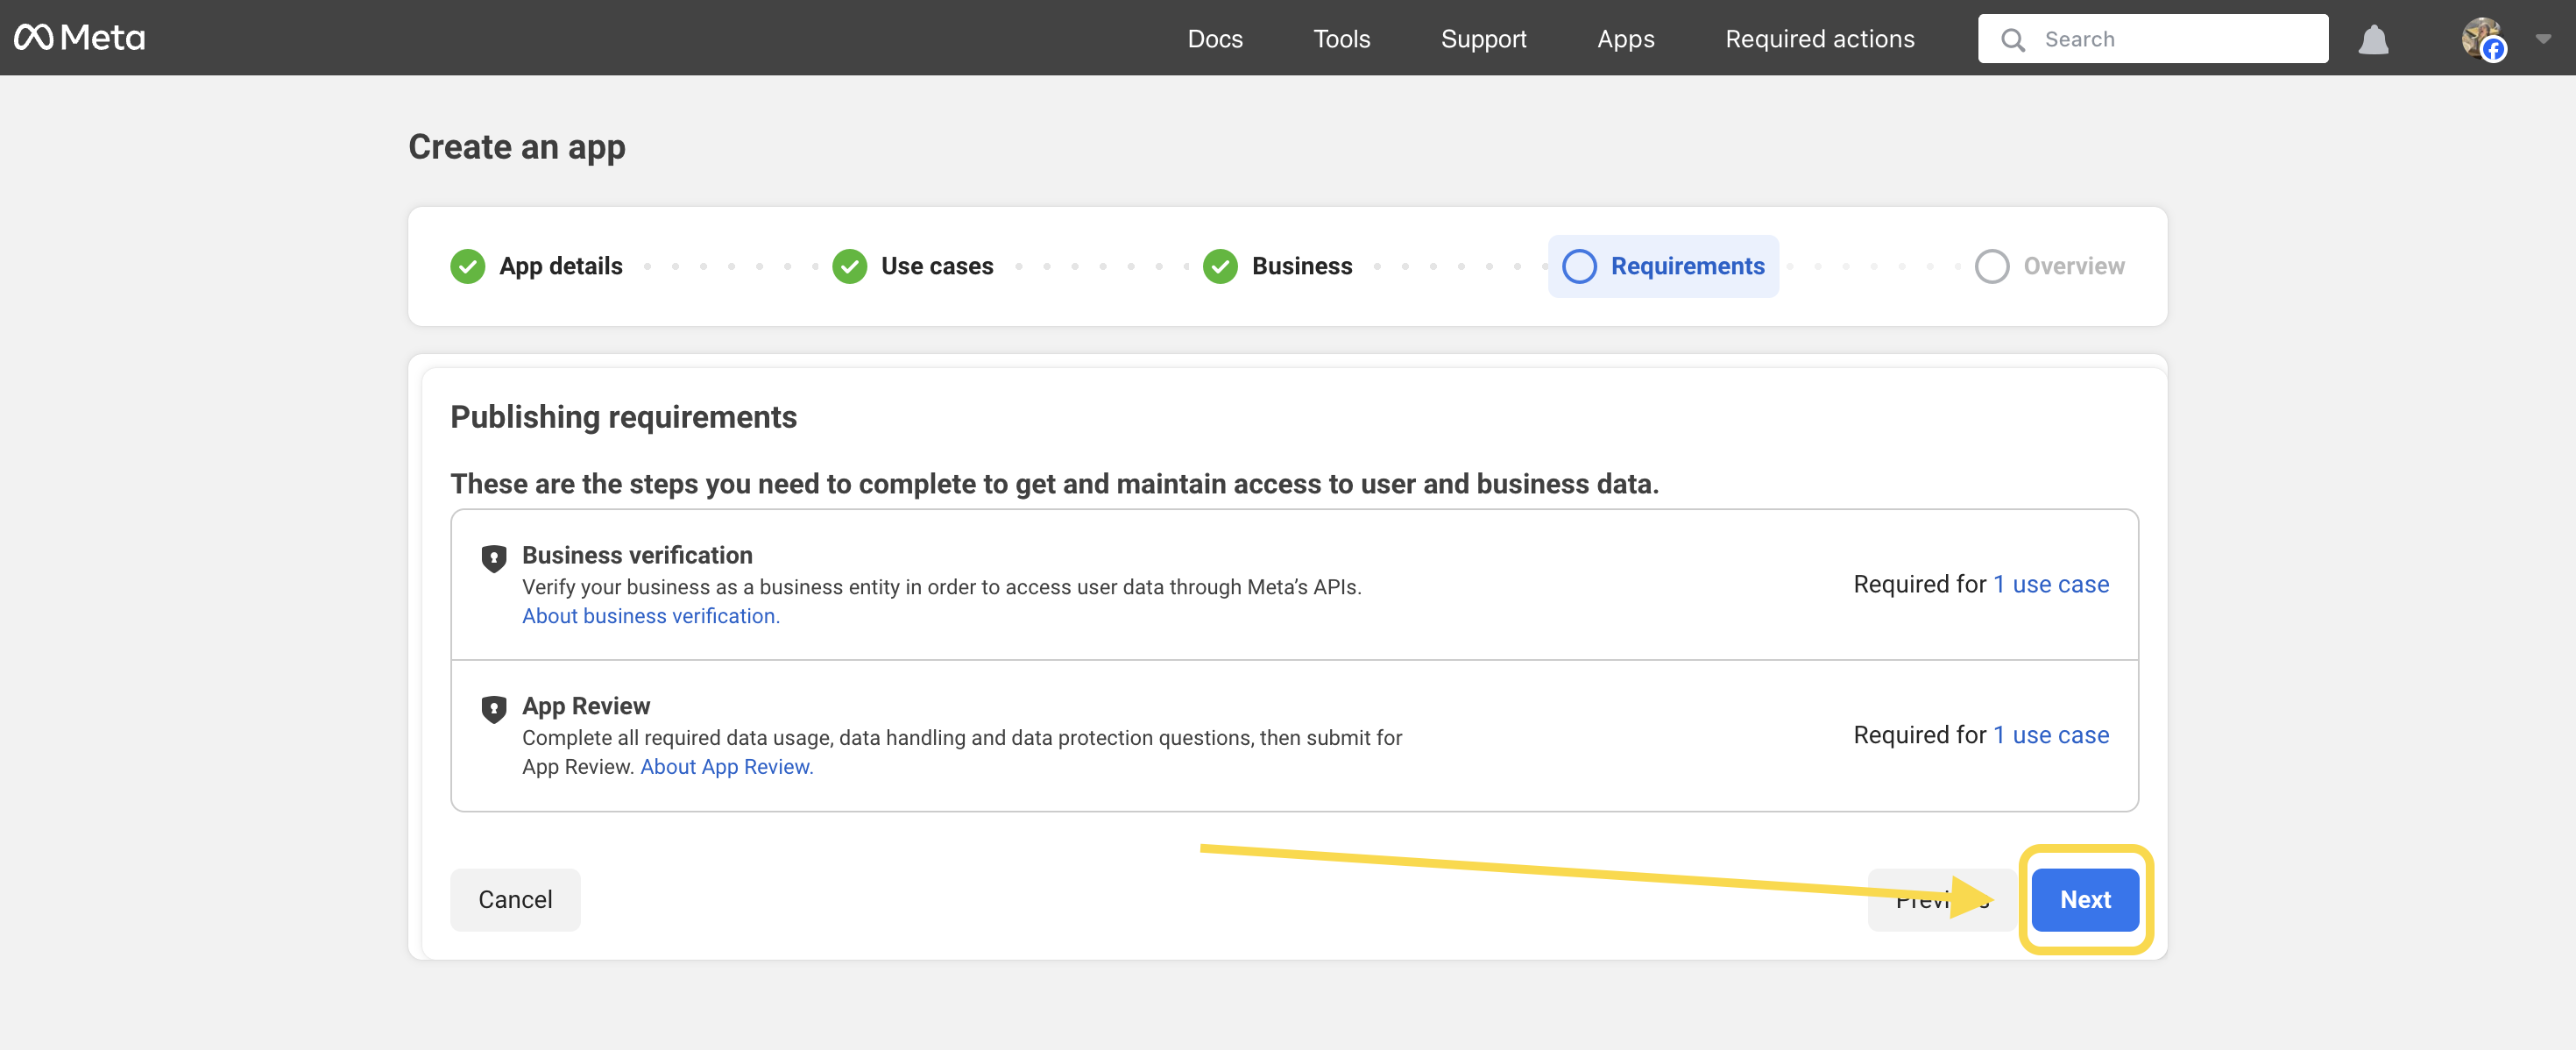
Review the Publishing requirements page, and then click Next.
-
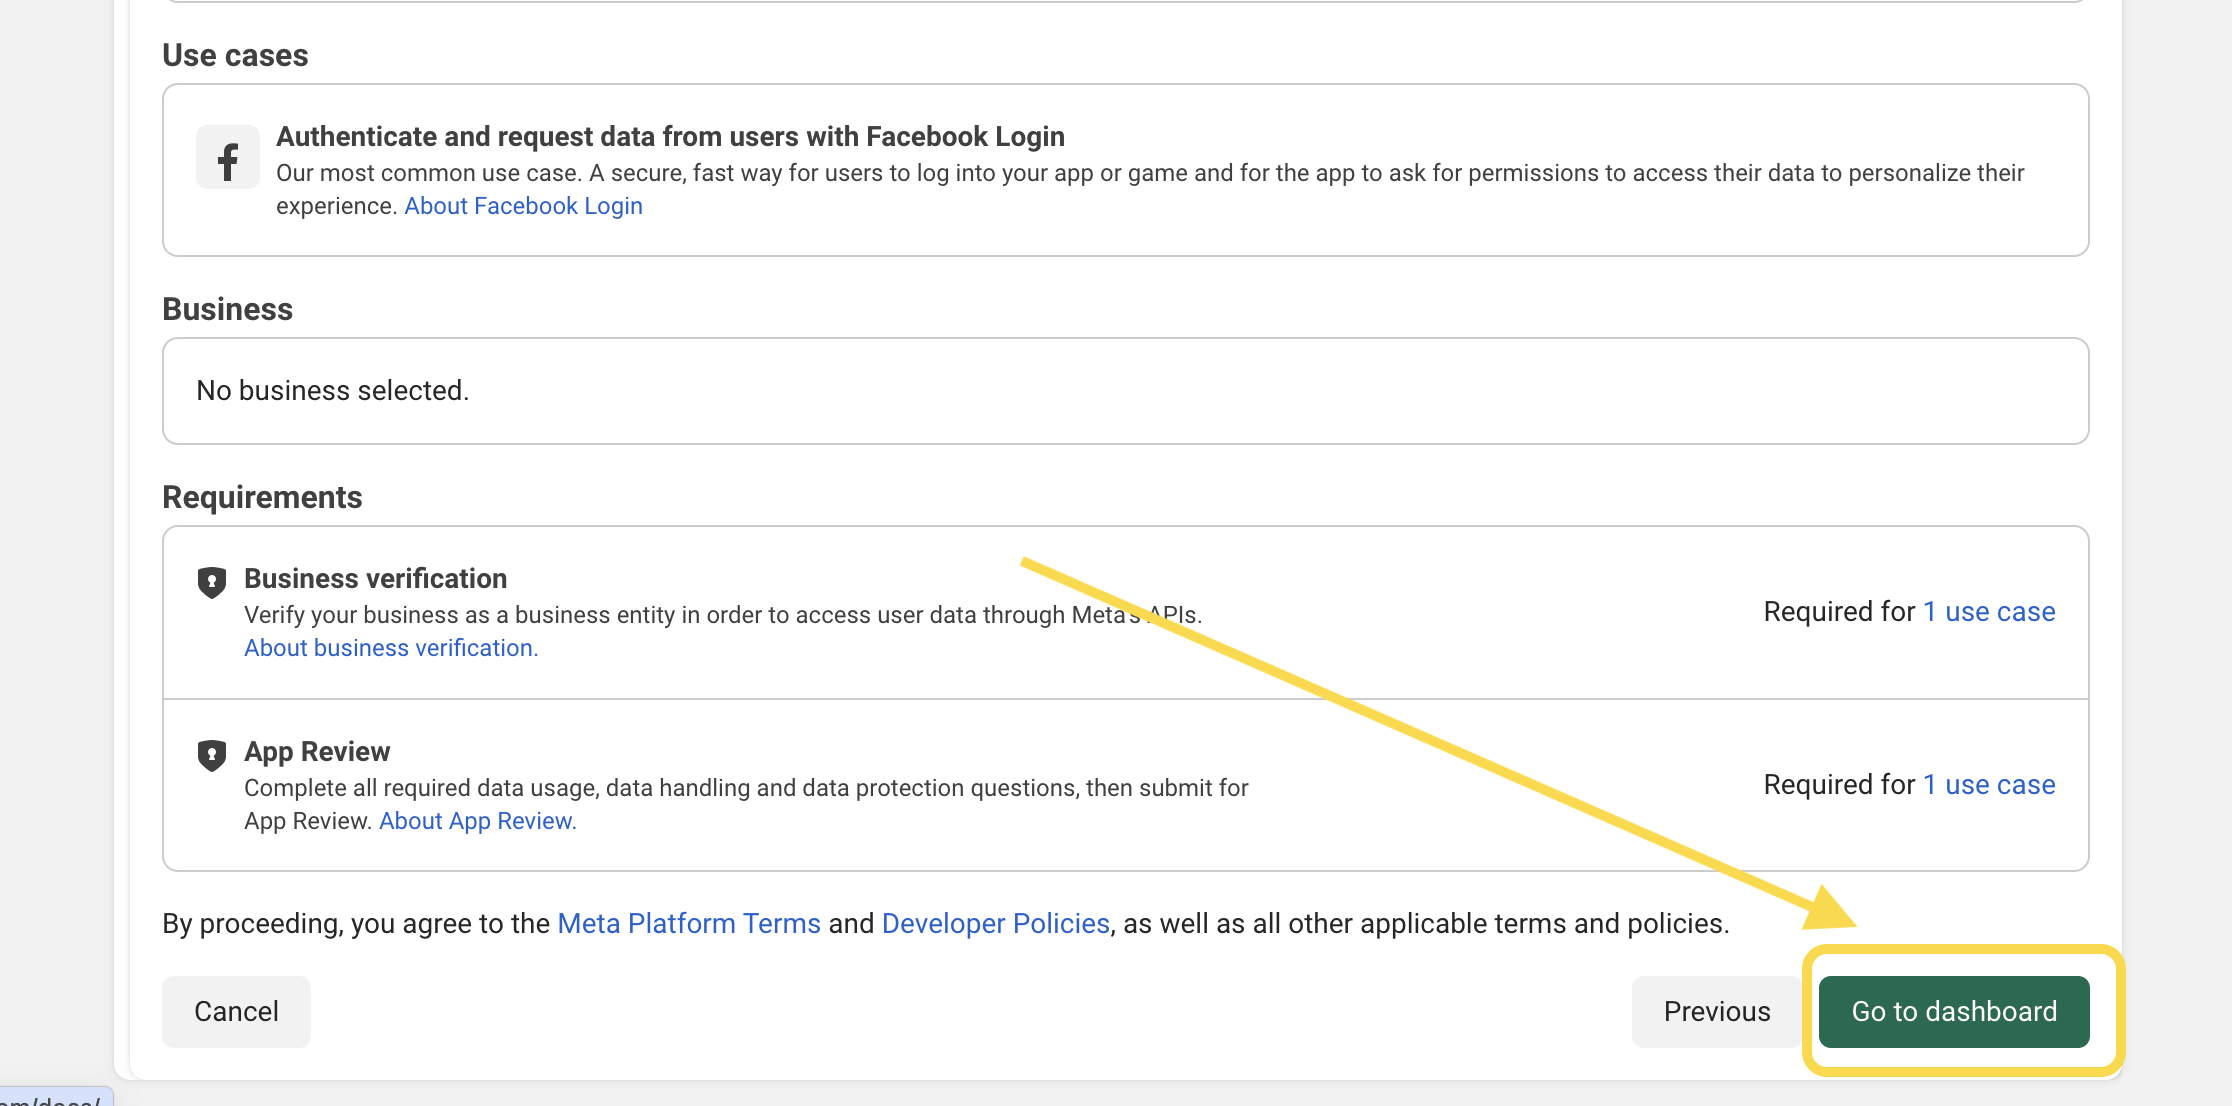
Review the Overview page. Then click the green button Go to dashboard. (For security reasons, you may be required to fill in your password.)
3. Configure your Meta app settings
-
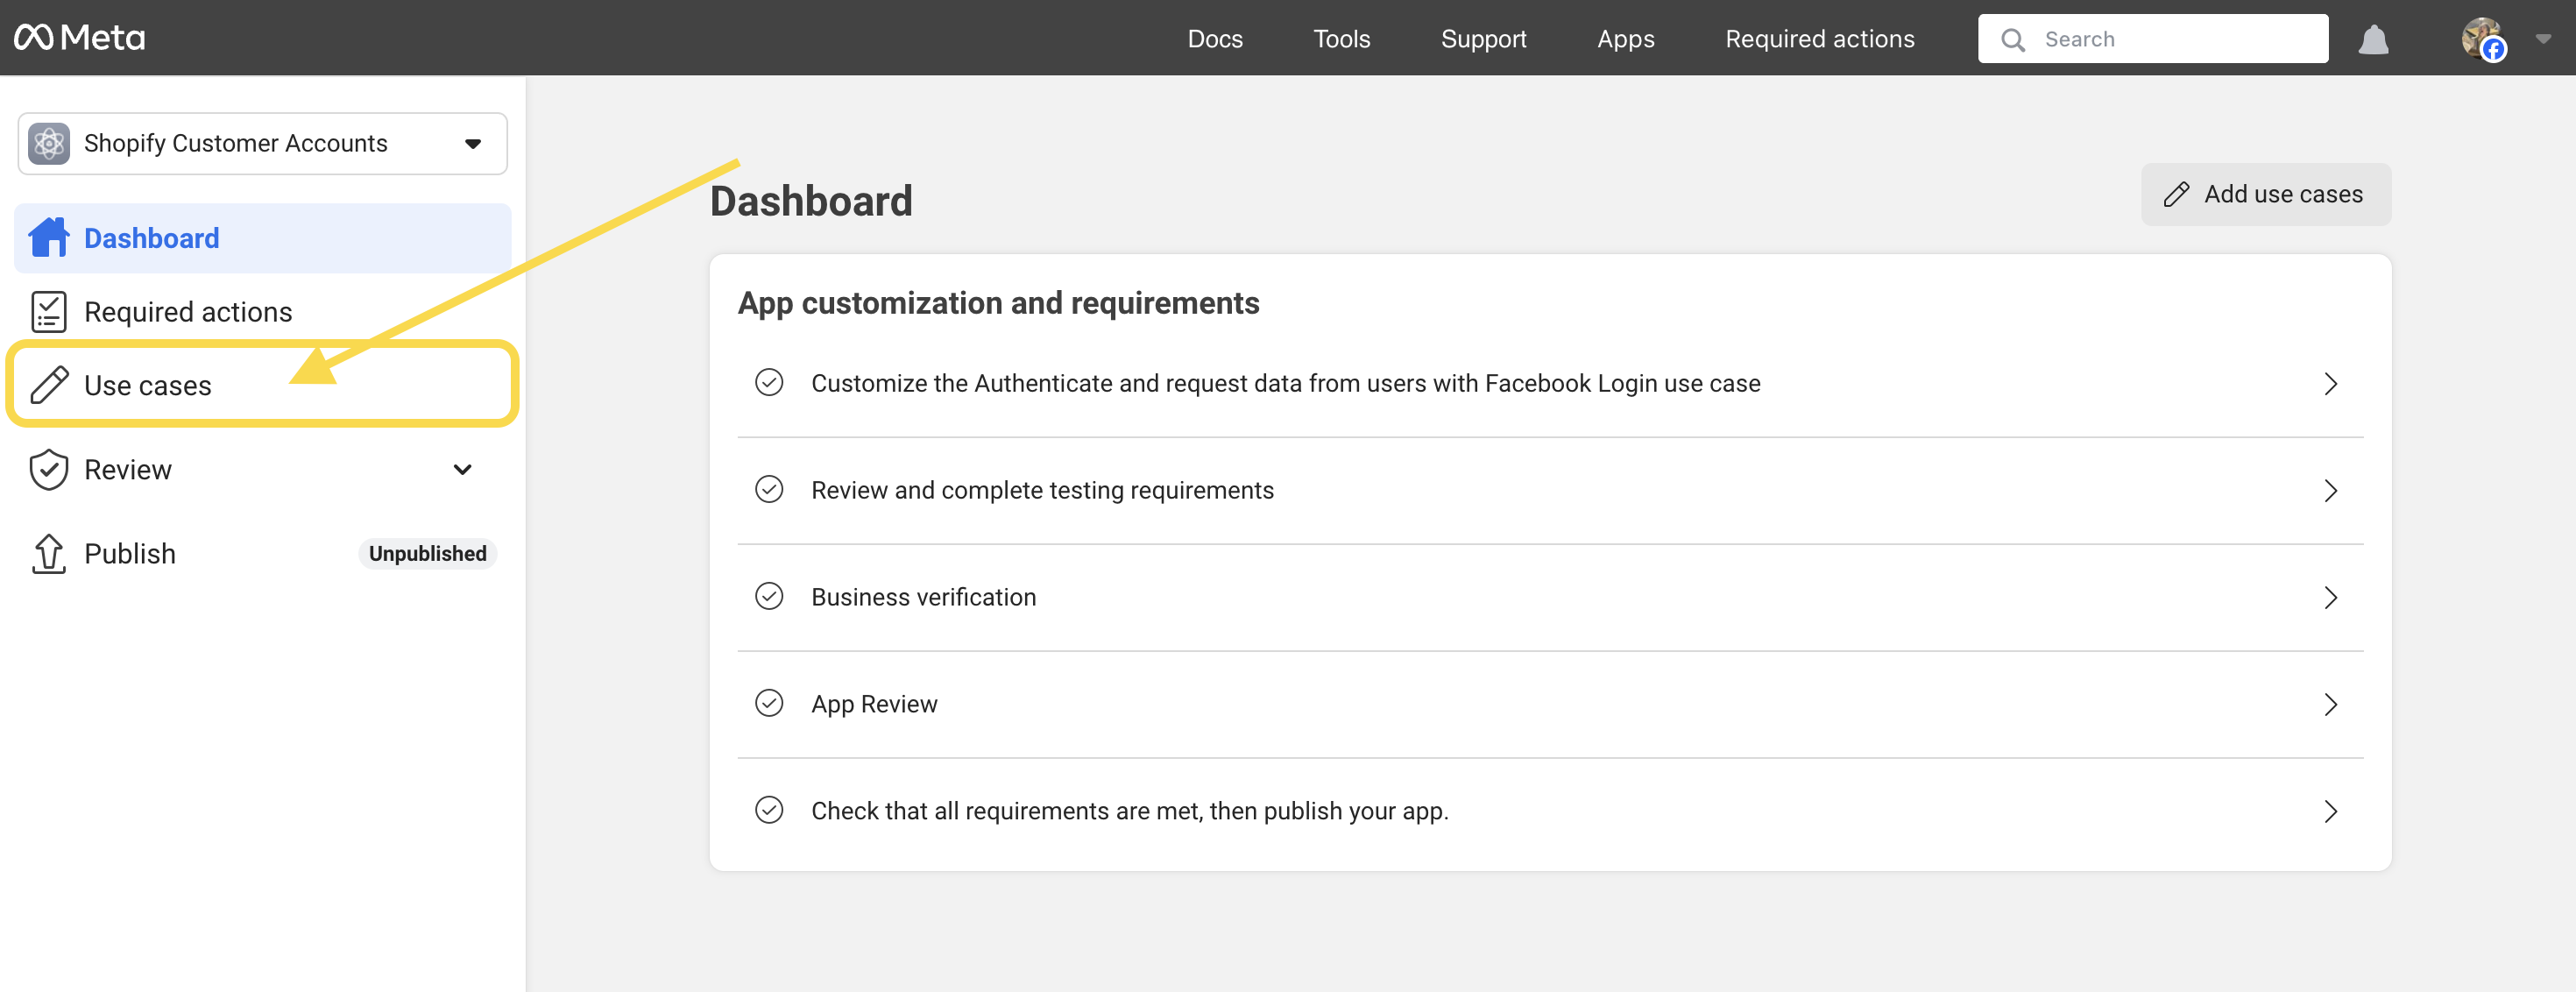
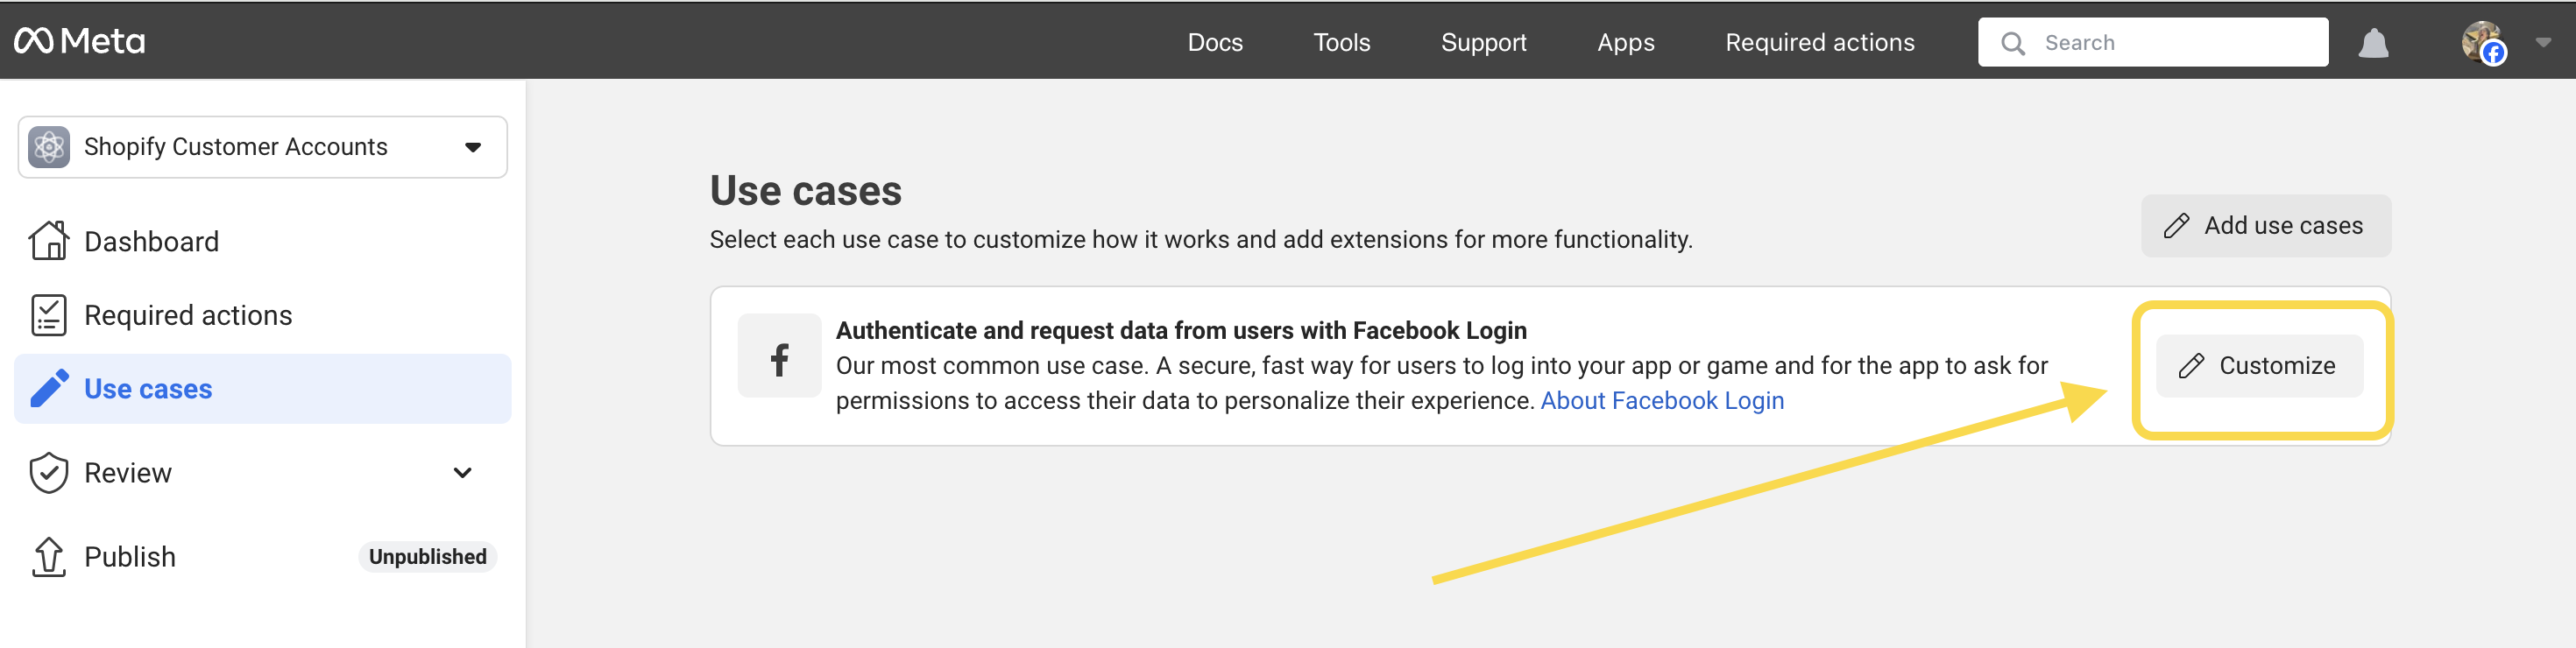
In the dashboard overview page (after you’ve created your Meta app), click Use cases in the left menu.
-
On the Use cases page, click Customize for your Authenticate and request data from users with Facebook Login use case.
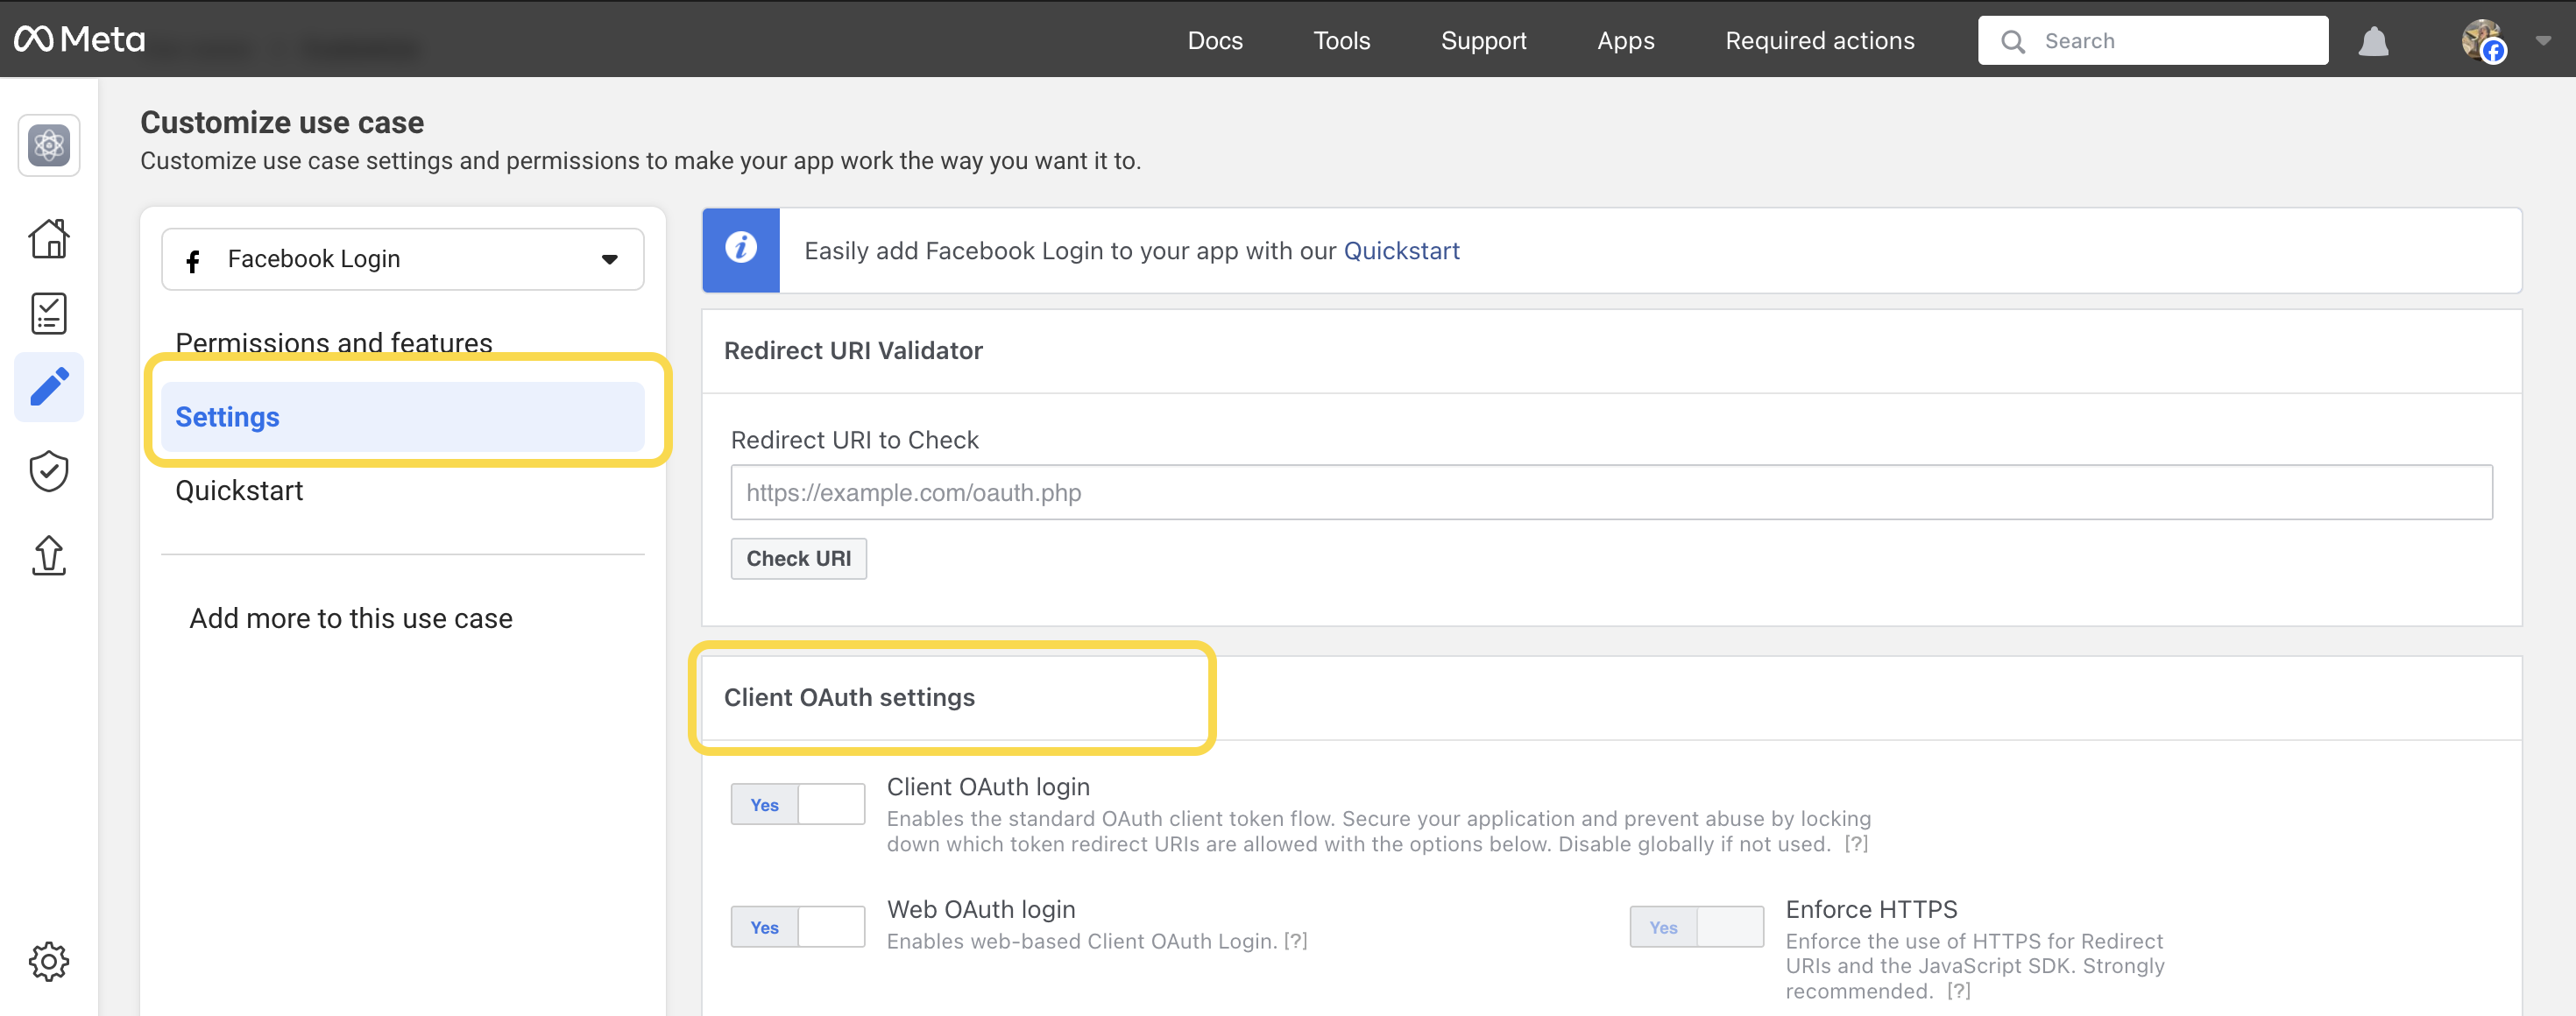
-
On the new page, in the Permissions and features section, next to email, click Add (this settings ensures that customer information is captured on sign-in).

-
Then, Click Settings from the left menu, and then scroll down to Client OAuth settings.
4. Configure the Redirect URLs
-
In your Shopify admin, on the Sign in with Facebook page, copy the redirect URL from the Redirect URLs section.

-
In your Meta for Developers dashboard, on the Settings page in, paste the redirect URL in the Valid OAuth Redirect URIs field.
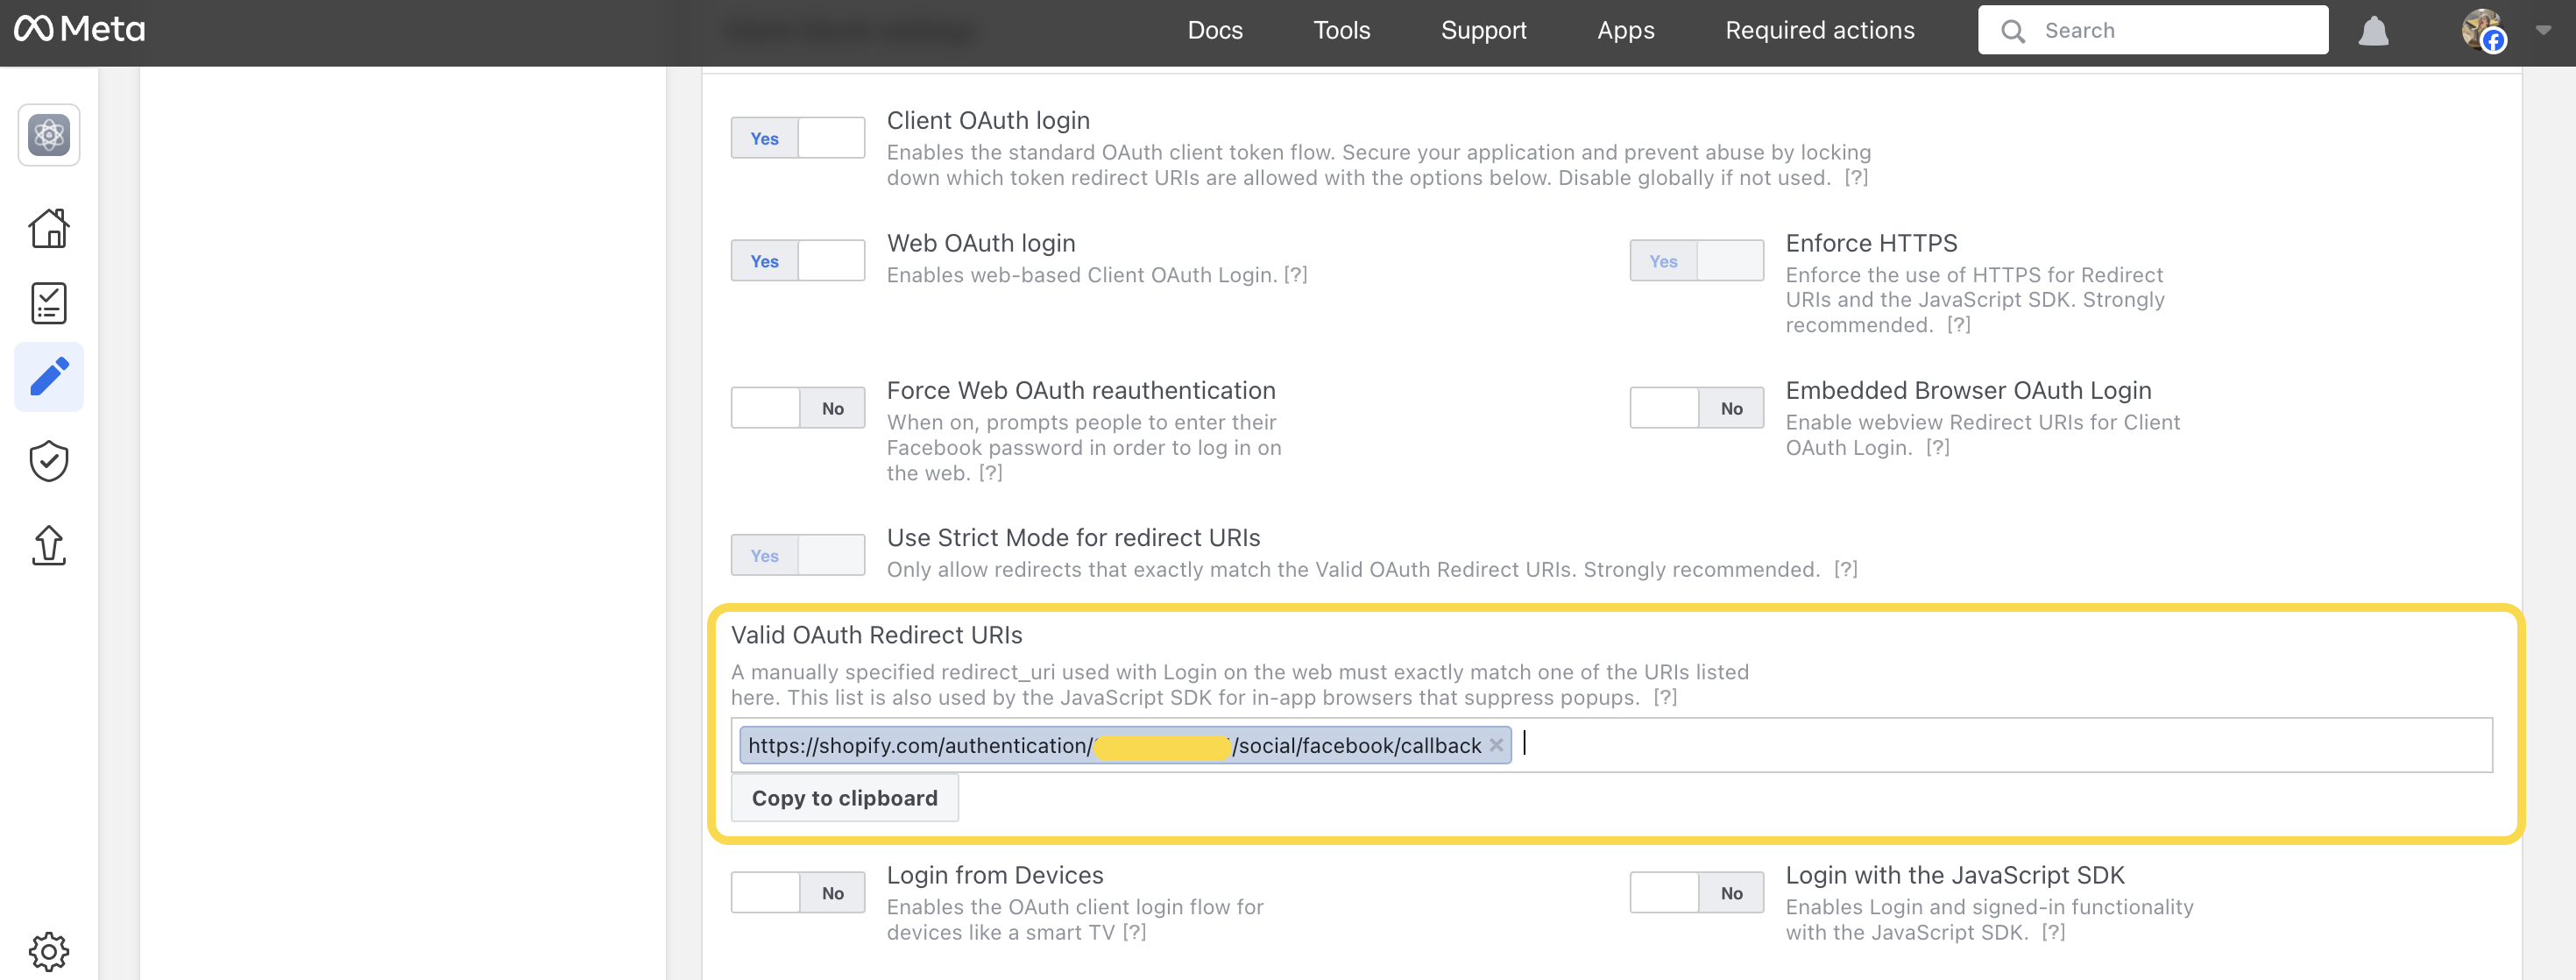
-
If you there is more than one redirect URL in the Redirect URLs section in your Shopify admin, add additional redirect URLs in the same way.
4. Configure the Deauthorize URLs
-
In your Shopify admin, on the Sign in with Facebook page, copy the first Deauthorize callback URL from the Deauthorize URLs section.
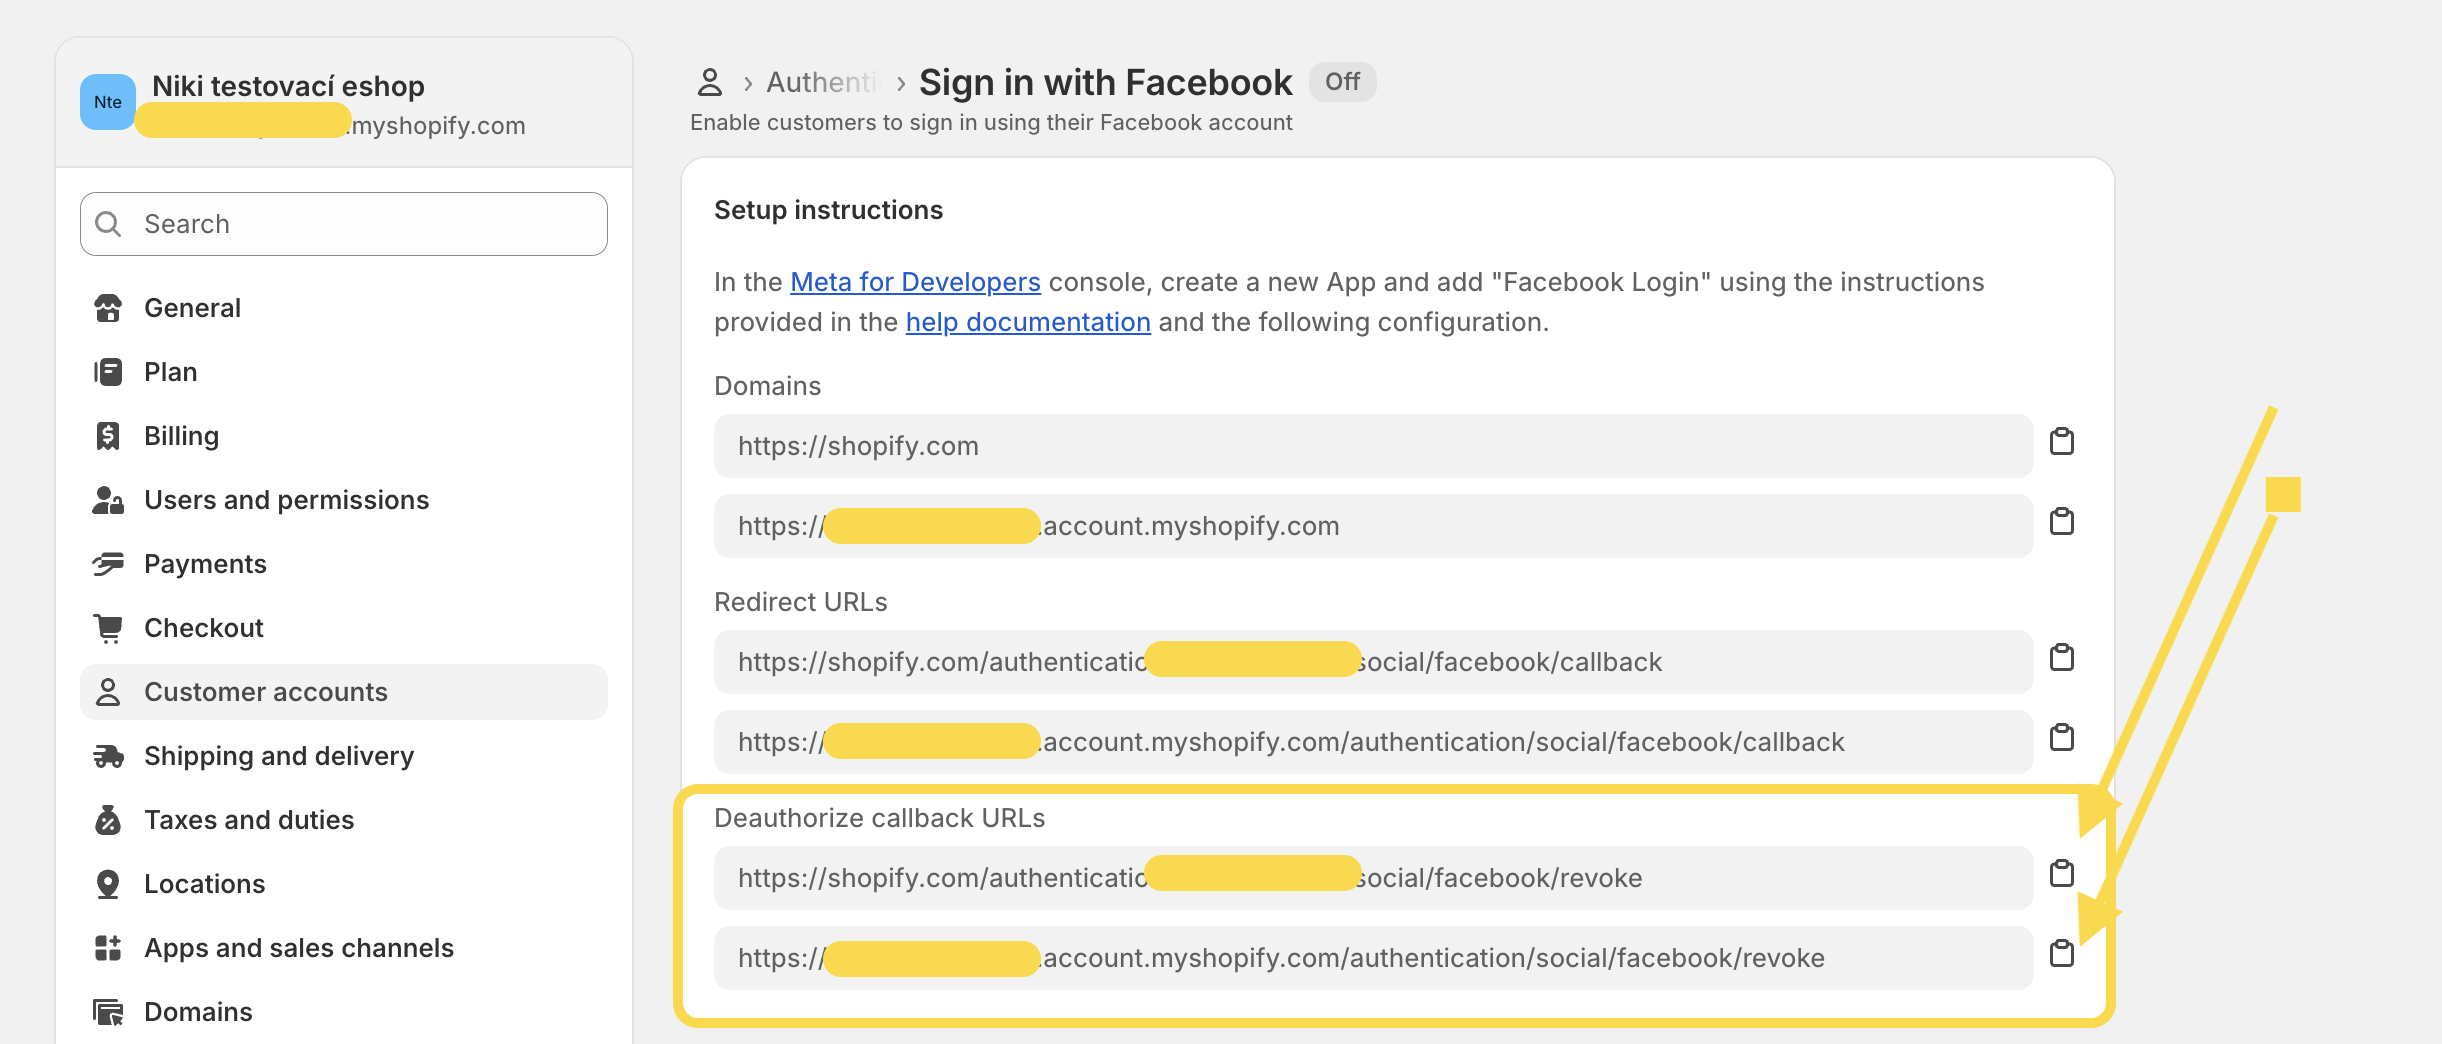
-
In your Meta for Developers dashboard, on the Settings page, paste the URL in the Deauthorize callback URL field.
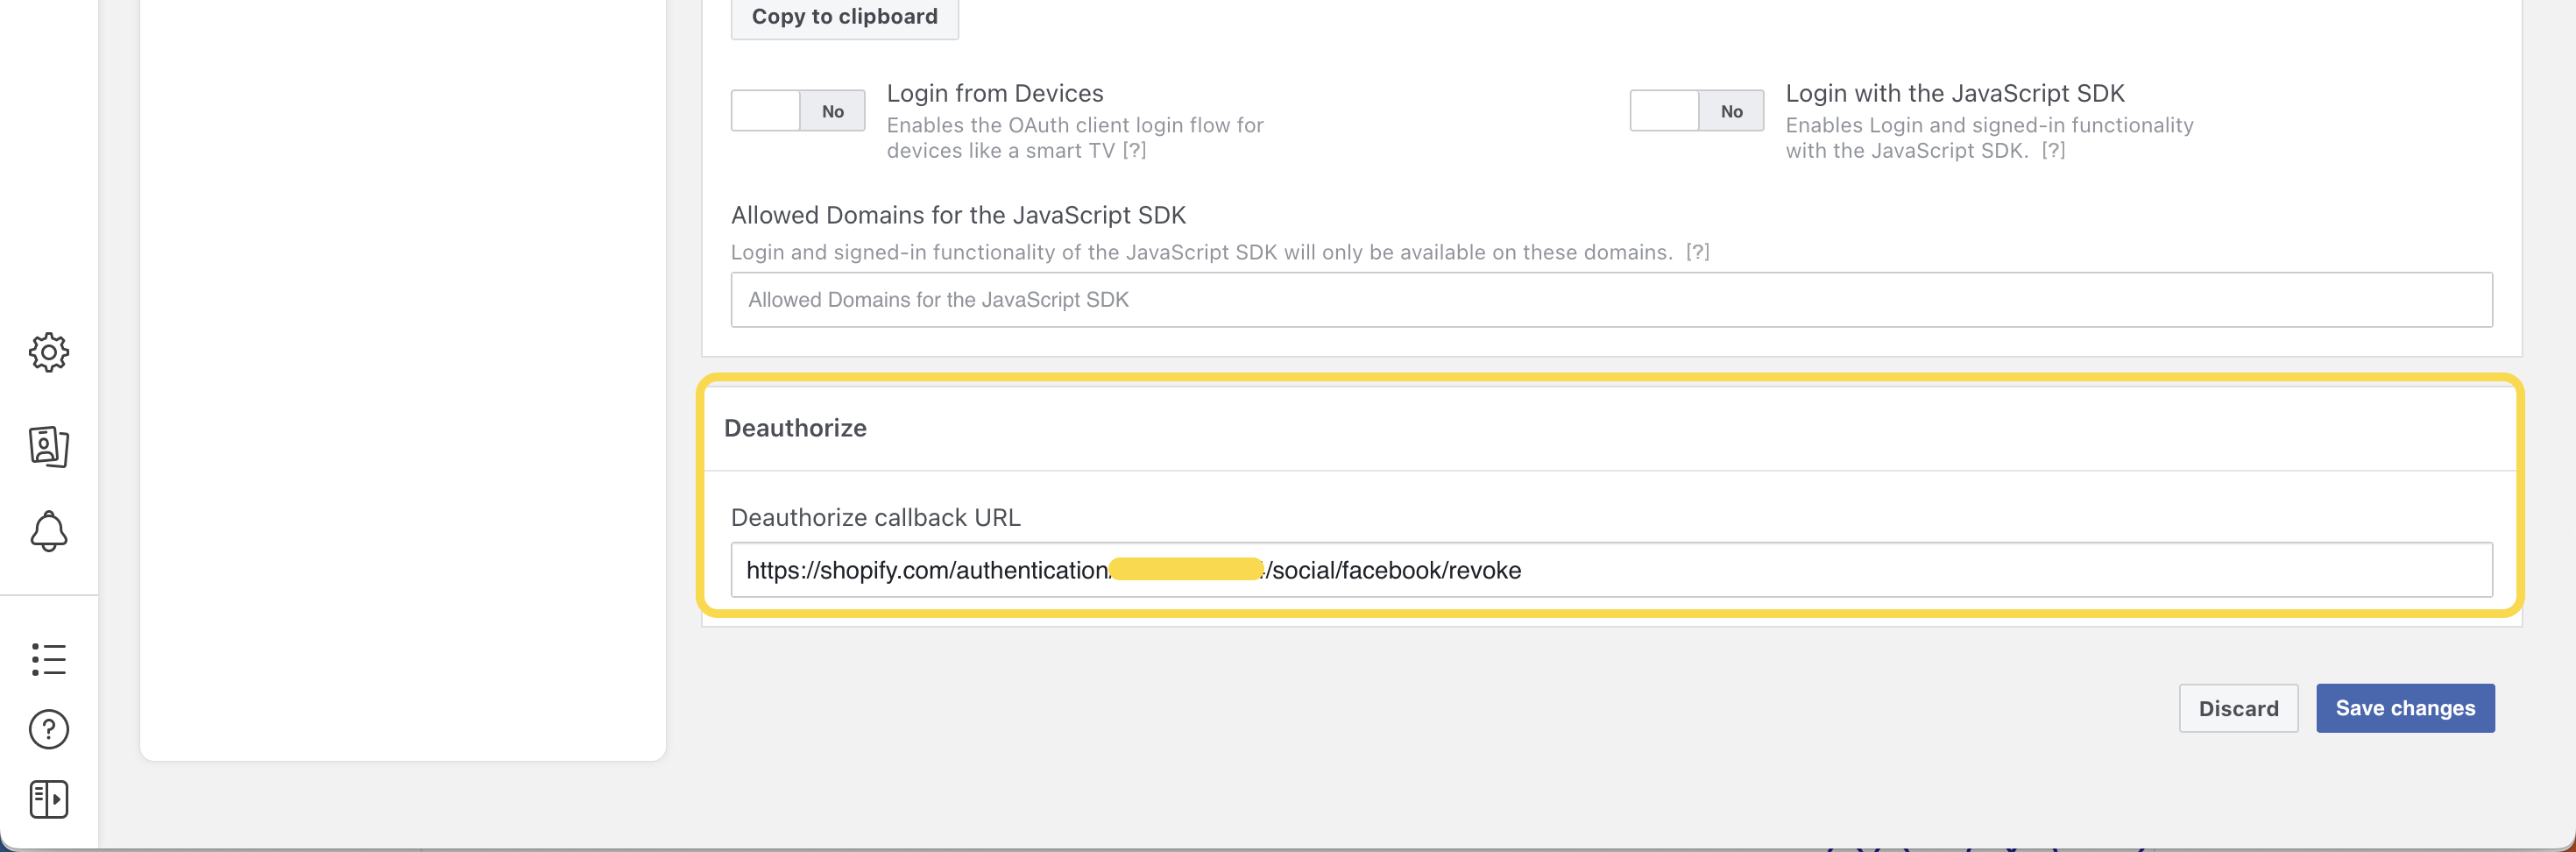
-
Then, click the blue button Save changes.
5. Finish the configuration
-
In Meta for Developers dashboard, click the Home icon, and then click App Settings → Basic.

-
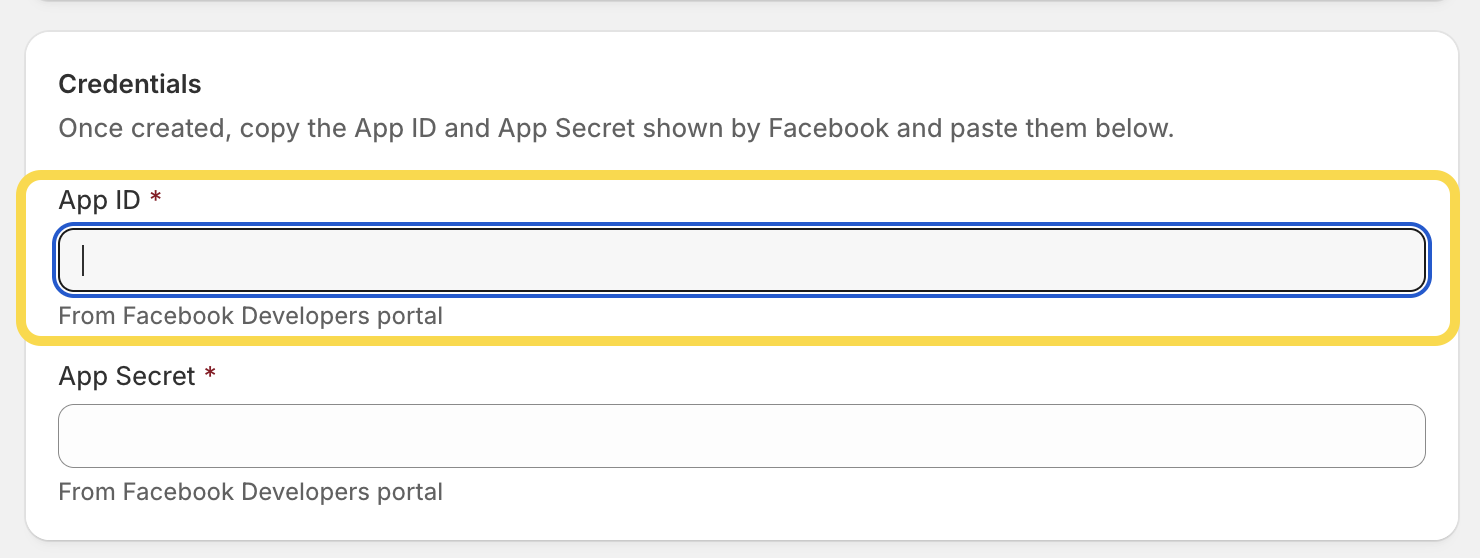
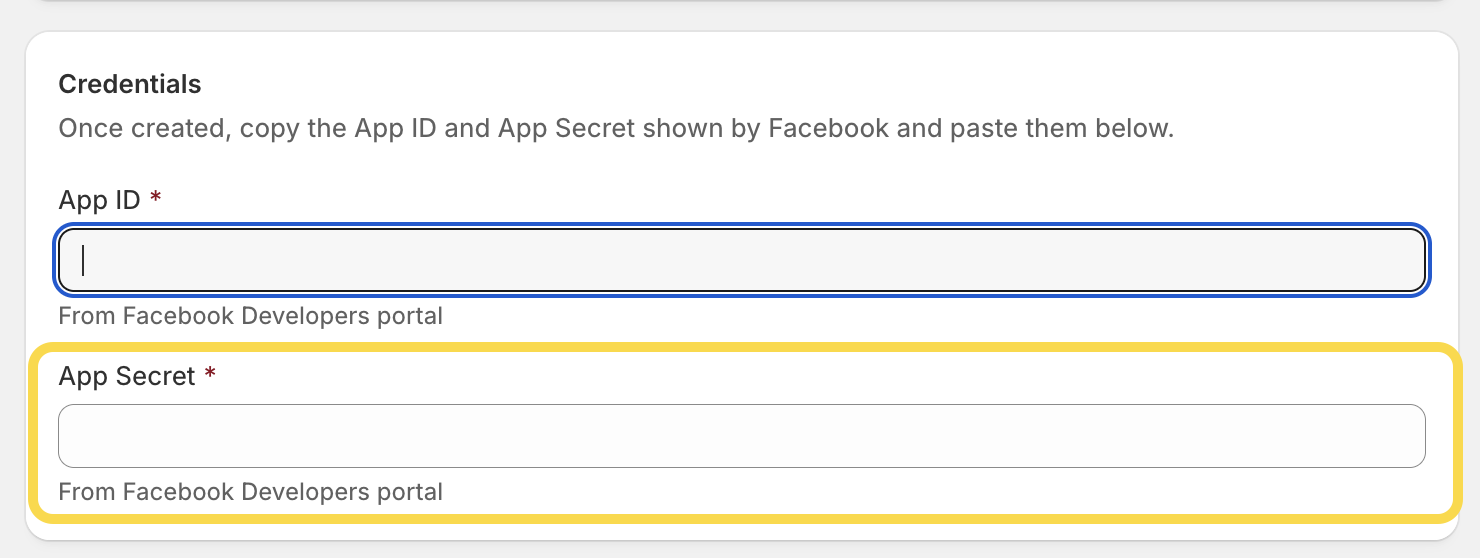
From your Meta for Developers dashboard, copy the App ID.
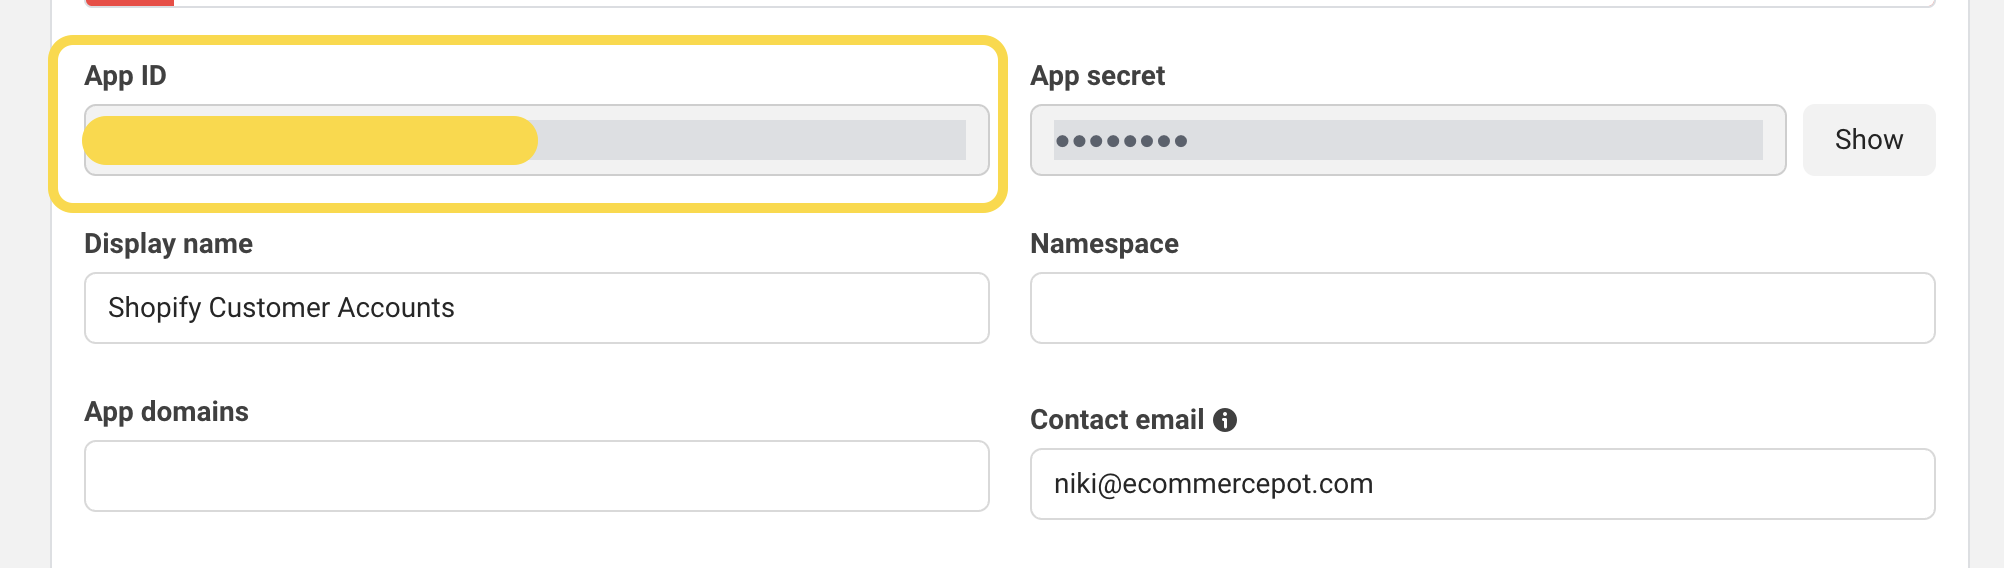
-
In your Shopify admin, on the Sign in with Facebook page, paste the copied App ID in the App ID field in the Credentials section.
-
In the Meta for Developers dashboard, click Show next to the App secret (you will need to repeat your password), and then copy the App secret.
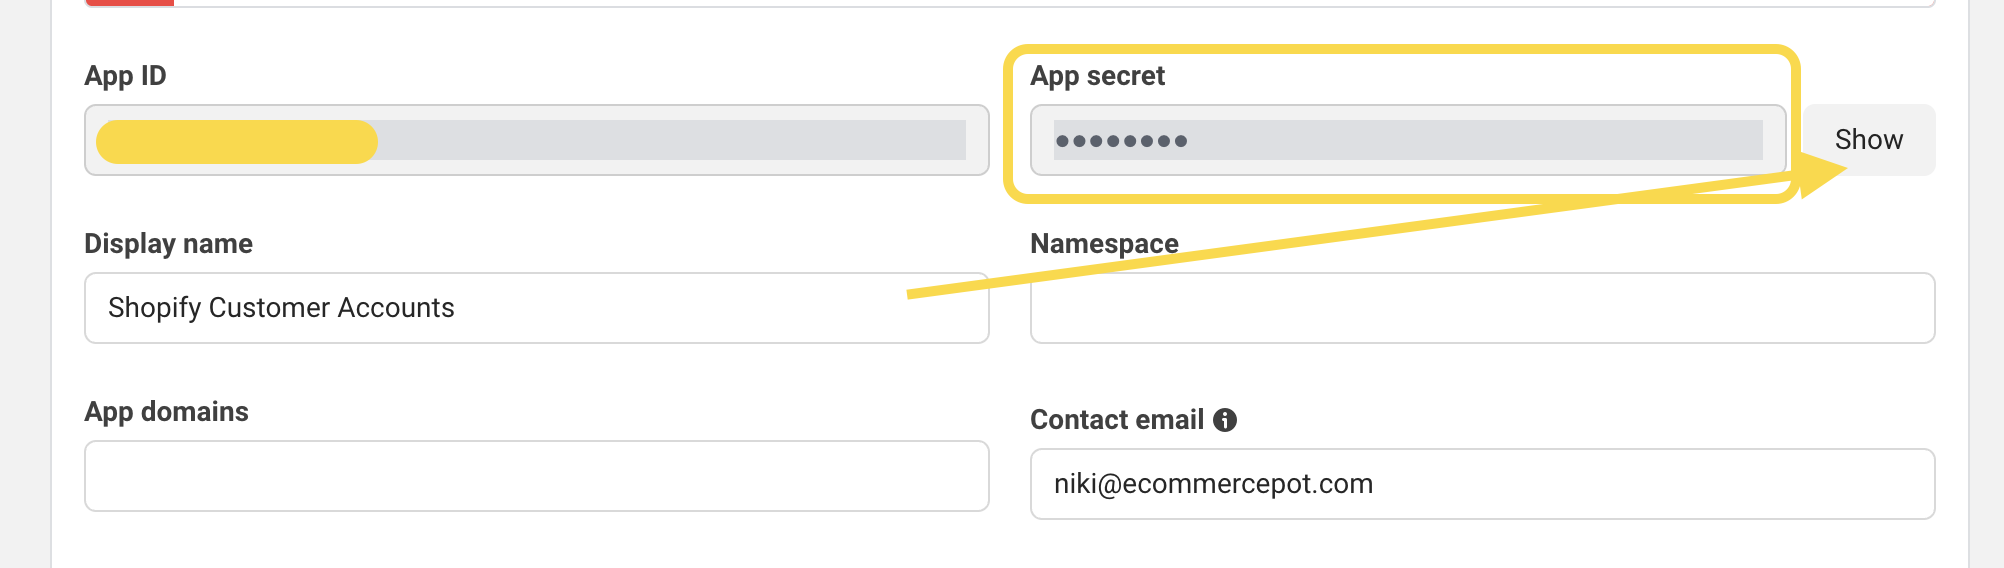
-
In your Shopify admin, on the Sign in with Facebook page, paste the App secret in the App secret field, and then click Save.
-
In your Shopify admin, click Save changes.
-
Important note! If you see a warning in your Meta app that some information is missing, please complete it. For example, you may need to upload an app icon (such as your store logo), provide a privacy policy URL, or select the correct app category.
-
In your Shopify admin, on the Sign in with Facebook page, click More actions in the upper right corner → Preview to review the Facebook authentication login.
-
If you see the Facebook sign-in option, click Turn on to activate it. After that, make sure to test it by going to your store’s customer account and signing in with your Facebook credentials.
And that’s it! If you run into any issues while setting up Facebook sign-in, just let us know. In our previous article, you can learn more on how to set up the Google sign-in option on your Shopify store.