
How to add a size chart to the Dawn Theme?
It can be a challenge for customers to find the right size when shopping online, as size variants can vary widely. Without enough information about sizing, customers may leave your store or order multiple sizes and return the ones that don’t fit well. To make things easier for your customers, a sizing chart can be a useful tool.
There are more ways, how a sizing chart can be displayed on your storefront. However, the most practical way is to show the sizing chart on the product pages. Redirecting customers from the product pages to another page may cause them to leave your store.
The Dawn Theme does not have a built-in sizing chart feature, and hence custom code is required to make this work. Here, we are sharing a basic version of this feature to show how this can be implemented (some limitations are listed in the next section).
Keep in mind that some development skills will be needed to understand the code and properly implement it. This feature was developed for Dawn theme version 7.0.0, so if you are using a different version, there may be conflicts. If you encounter any issues, please let us know, we will be happy to help.
UPDATE: The Dawn theme version 7.0.2. supports a very basic size chart feature.
Solution and its limitations
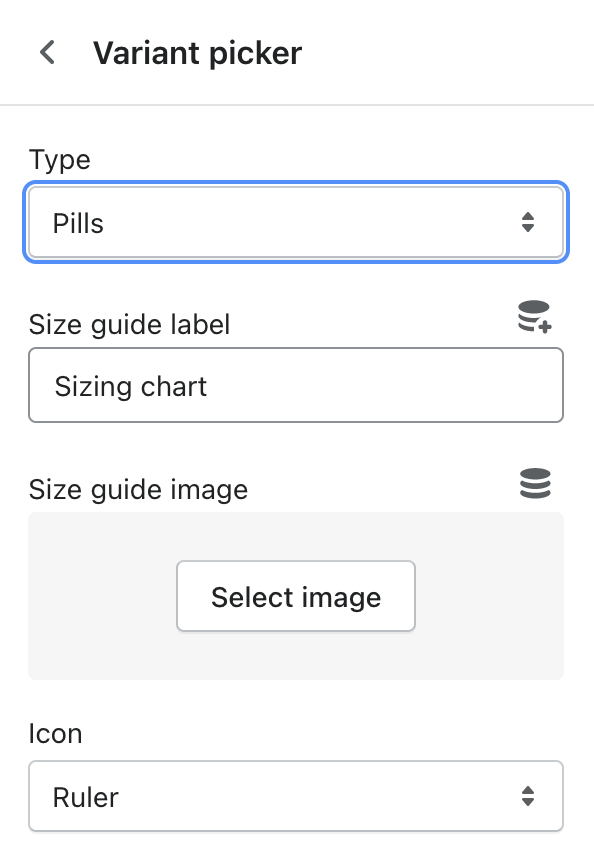
To make it as easy as possible for merchants to display the sizing chart on their product pages, we have chosen to edit the variant_picker block. With this solution, merchants will be able to:
- Upload a sizing chart image
- Set and edit the size guide label text (e.g. “Sizing chart,” “Size chart,” “See your size,” etc.)
- Choose an icon to display in front of the label text (the default is a ruler)
Please note that this solution has a few limitations:
- The variant option must be named “Size”! Otherwise, the feature will not work.
- We recommend uploading a vertically oriented rectangular image, as it looks good on both desktop and mobile screens. If you use a horizontally oriented rectangular image, it may not display well on mobile screens because horizontal scrolling is not implemented.
- Avoid using too long size guide label text, as it will not look good neither on desktop nor on mobile screens. Short labels such as “Sizing chart,” “Size chart,” or “What’s my size?” are recommended.
- If you upload one image, it will be shown on all product pages (unless you edit the code further). If you sell products in multiple categories, such as clothing and shoes, you can create a new product template and choose a different size chart image for those products.
- This basic solution is only implemented for the “Pills” variant picker type. It will not work with the dropdown variant picker.
Let’s implement the size chart feature
To get the feature to work, you will need to edit or add the following files:
- Create a new file
component-size-guide.css - Create a new file
size-guide.js - Edit
main-product.liquid file(schema section) - Edit
main-product.liquid file(liquid code)
1. Create a new file component-size-guide.css
To ensure that the sizing chart fits well with the layout of your store, you will need to add some styling. To do this, copy the following code and create a new file called component-size-guide.css in the Assets folder. Then, paste the code into the file.
2. Create a new file size-guide.js
In order to make the size chart image appear on a click and close on a click, you will need to add some JavaScript. Use the following code to do so.
3. Edit main-product.liquid file (schema)
To begin, you will need to edit the variant_picker block by adding additional settings that allow you to add a size guide label text, upload a size chart image, and choose an icon to display with the label text.
Replace the existing variant_picker block schema with the following code snippet.
4. Edit main-product.liquid file (liquid code)
First of all, you will need to link the component-size-guide.css file (you can do this at the top, together with other CSS files) and the size-guide.js file (you can do this after the product-form.js file, near the endstyle liquid tag, to keep things clean).
Then, to be able to render the size guide with the correct z-index, in the foreground over all other content including the navbar, it is necessary to place its code at the top, right after linking size-guide.js (as shown in the code snippet below).
Finally, you will need to edit the code for rendering the option names and values under the variant_picker block.
The following code snippet includes all three necessary changes.
Let’s see the result!
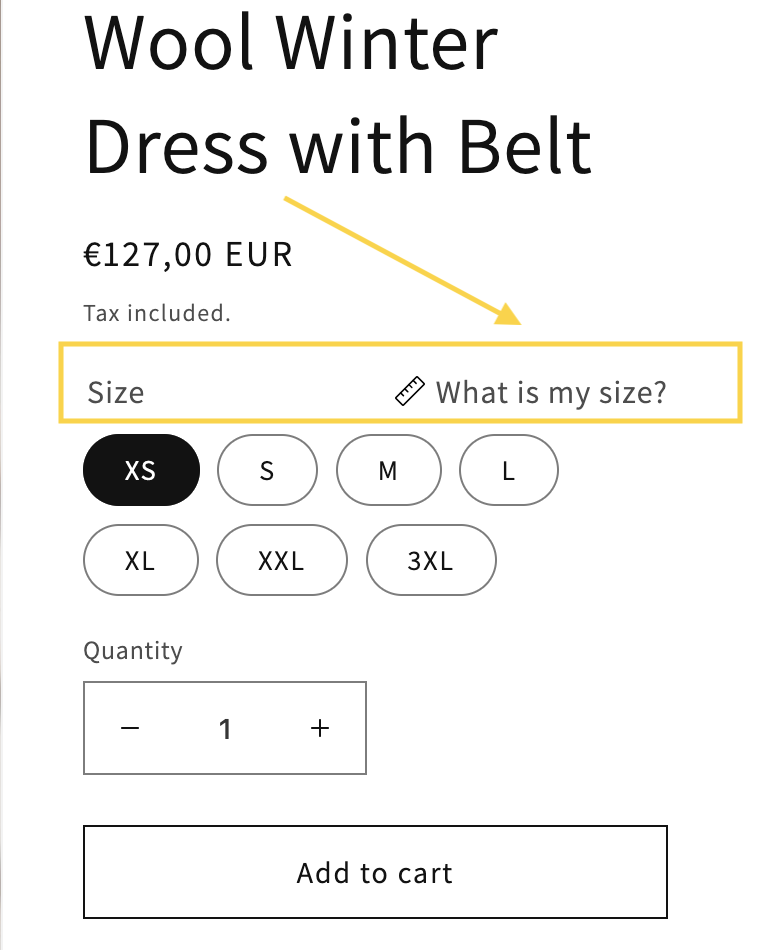
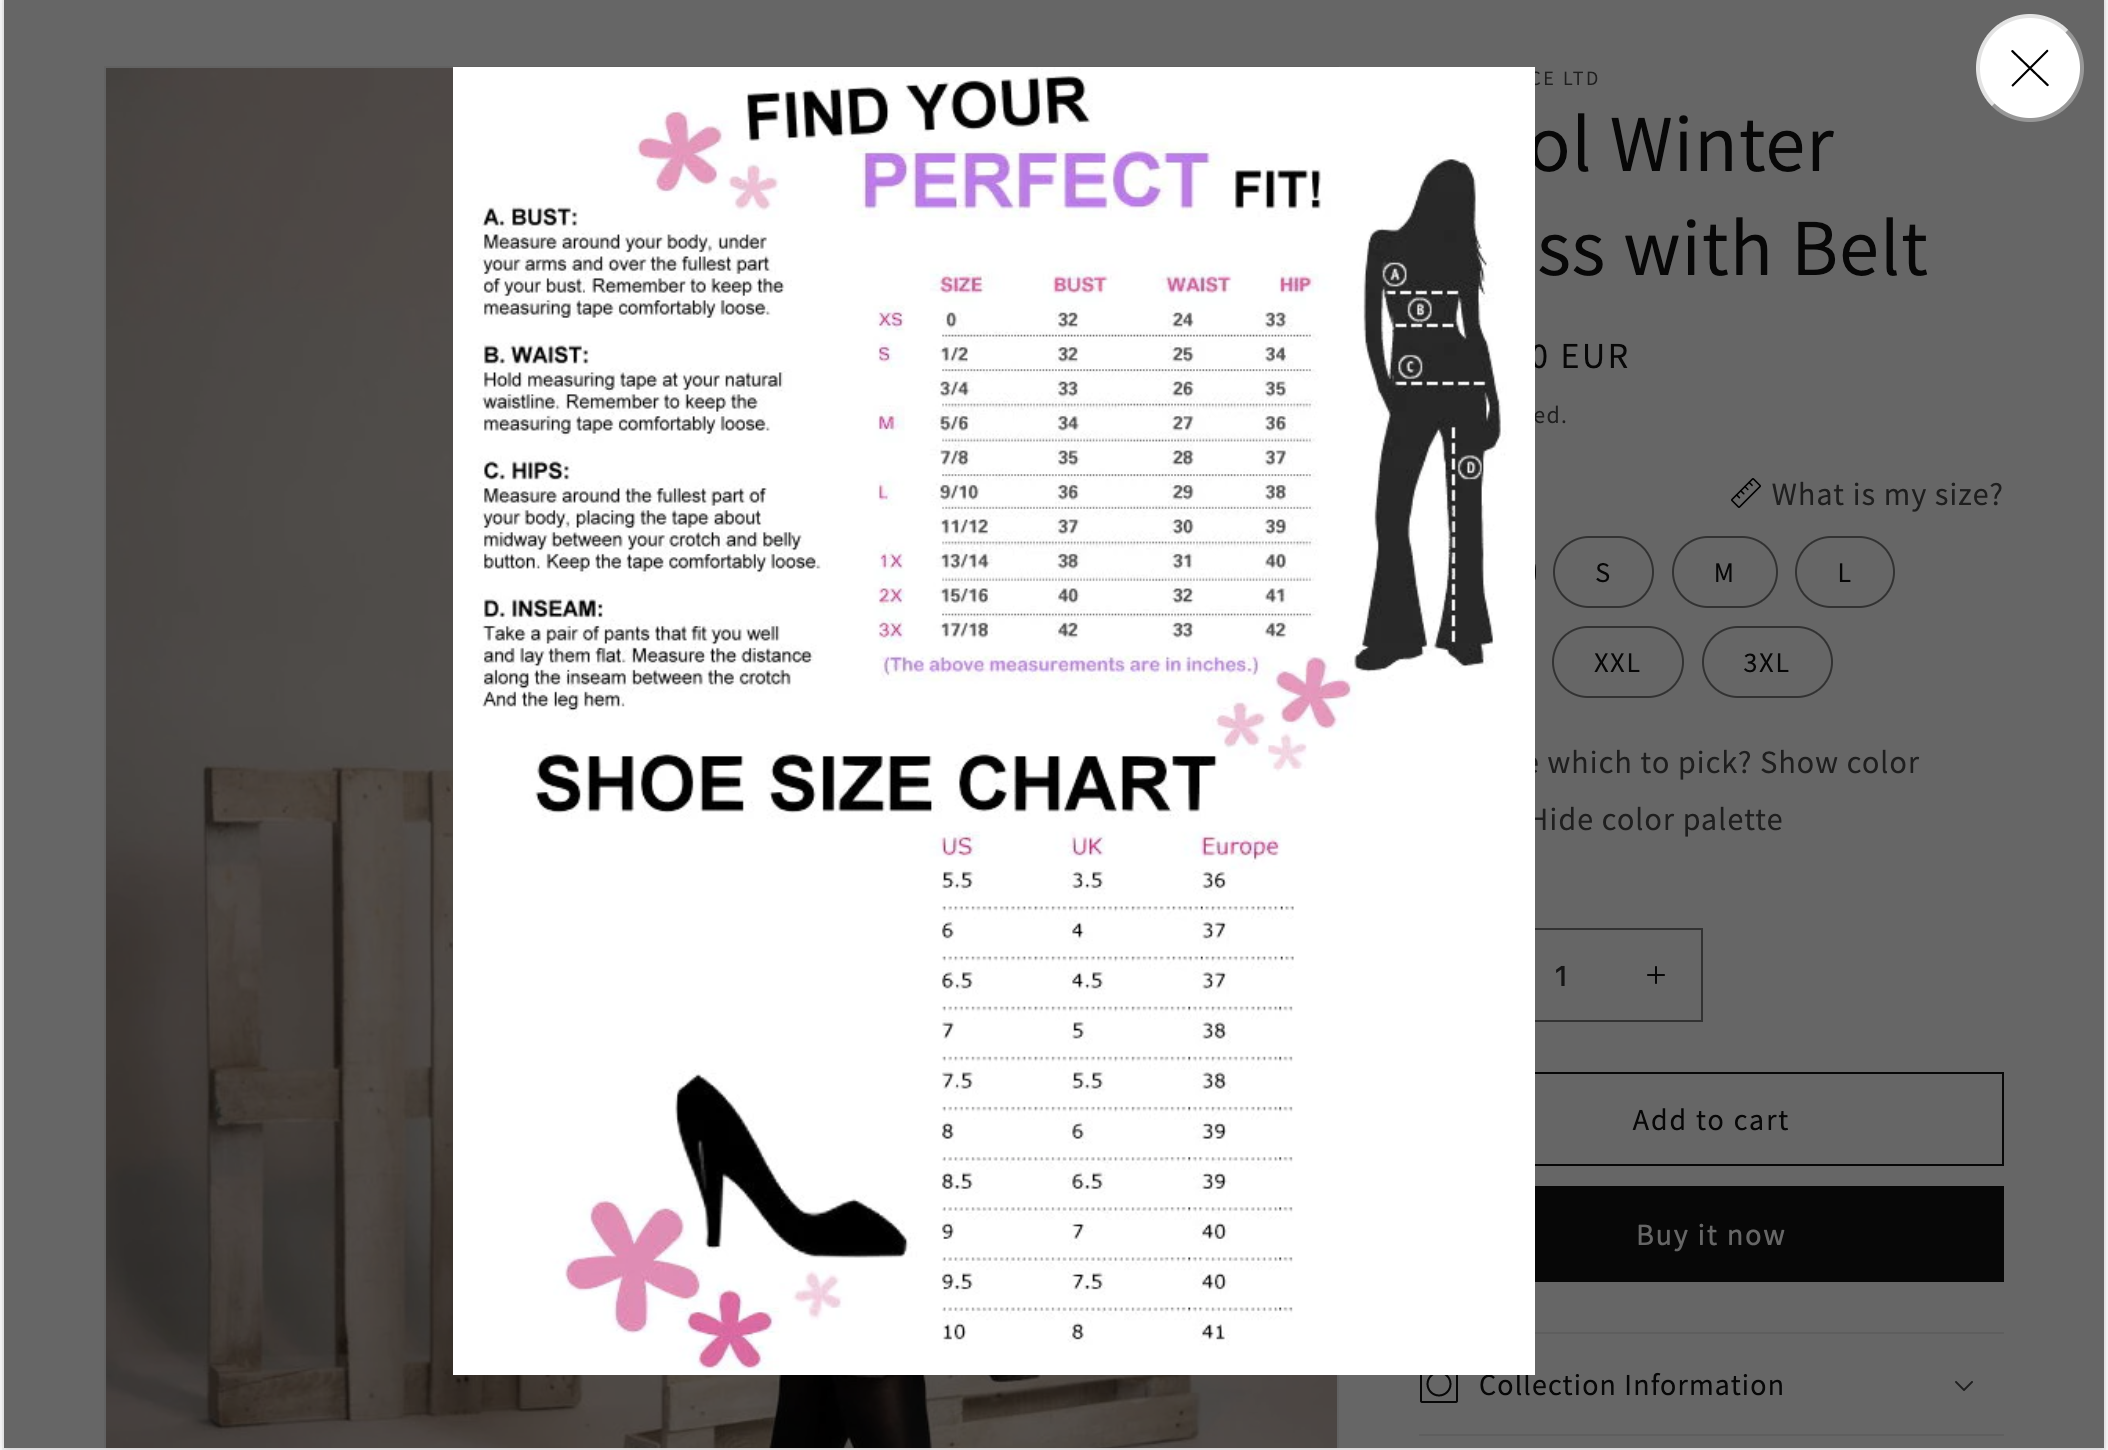
In our example, we have used the text label “What is my size?” which appears next to the “Size” option. When the text is clicked, a size chart image will appear. The modal window can be closed by clicking the close icon or by clicking on the gray background.
And that’s it! We know that this solution has a few limitations, but it provides a basic working example of how to display a size chart image by clicking on a text label on the product pages. This solution can be further customized to fit the needs of your store. If you are looking for a more tailored solution or encounter any issues, please let us know. We will be happy to help you out.
Interested in some more quick customizations to the Dawn theme?
We put together a guide on how to add a custom label (such as limited edition) to product pages, collection pages and featured collections. You might also be interested in an article on how to add a customer note on a product pages. Last but not least, if interested, there’s a guide on how to display the number of products left in stock on product pages.