
What is Shopify’s role-based access control model, and how do you create and assign roles?
Shopify has gradually introduced a role-based access control model across stores. As a result, you may no longer see the Users and Permissions section in your settings—only Users. If this applies to your store, you might have noticed that all added users (whether staff or collaborators) now have legacy access.
In this article, we’ll explore how to migrate from legacy access, how to create new roles, and any restrictions when assigning permissions.
Why role-based access control model?
Before roles were introduced, you had to manage permissions for each user individually. Imagine you have multiple content marketers working as staff on your store. If you needed to add or remove a permission for them, you had to update each user separately.
With the role-based model, you can simply update the role itself, and the changes will apply to all users assigned to that role. For larger stores with many staff members and collaborators, this makes permission management more efficient while improving security by ensuring users only have the necessary access.
How to migrate from legacy access to the role-based access control model?
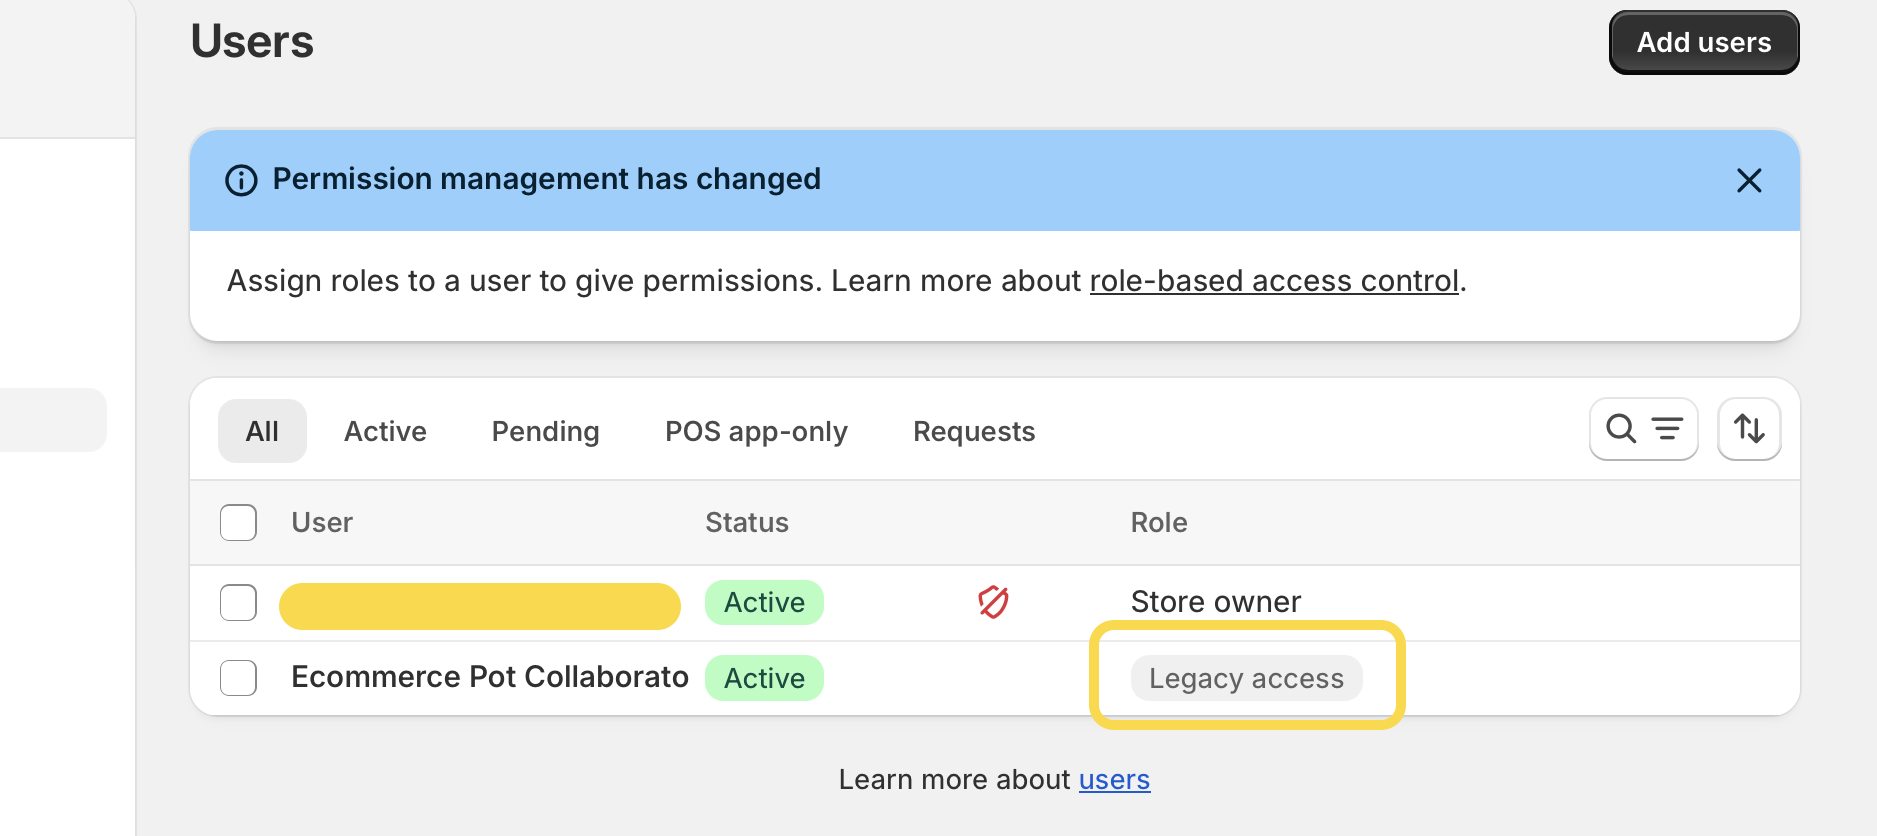
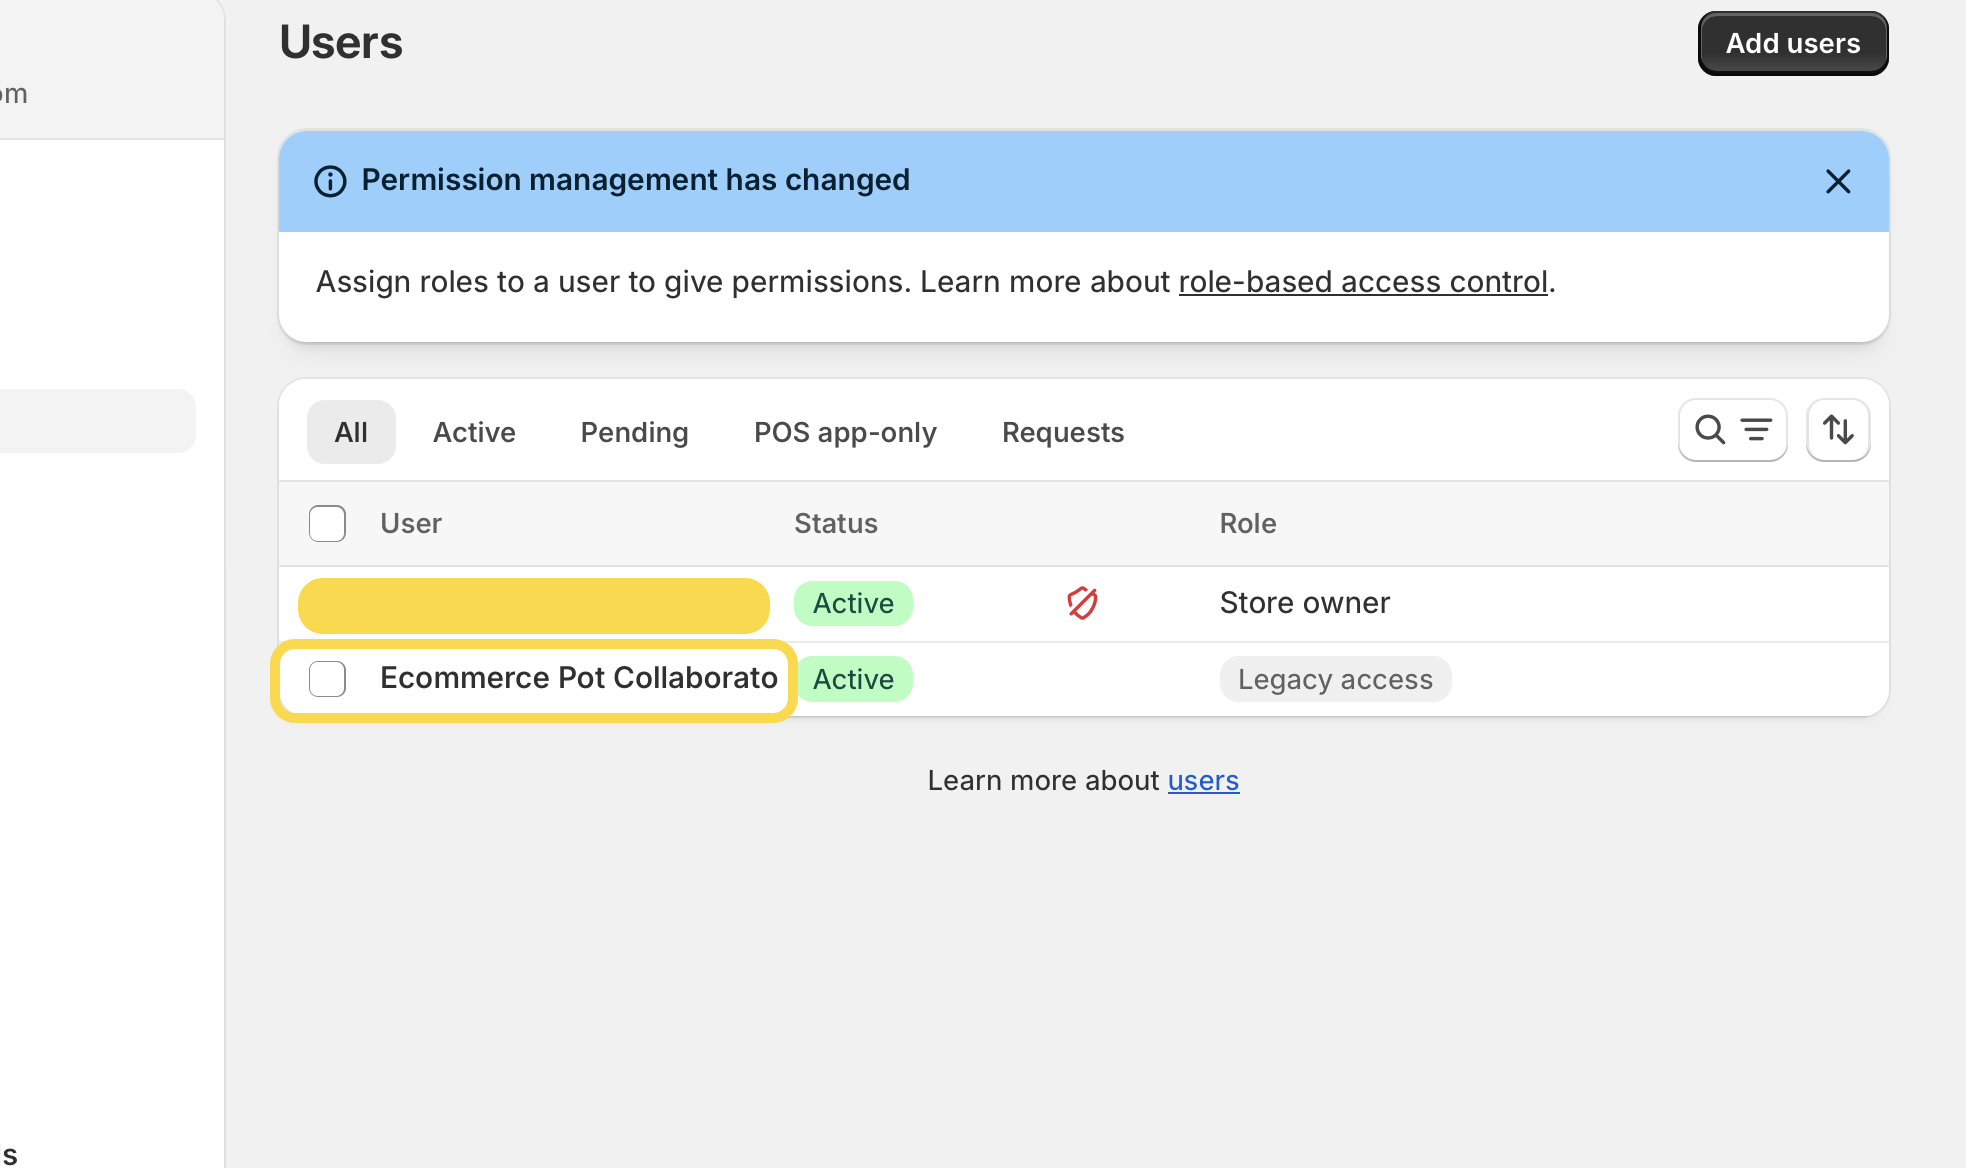
When you go to Settings → Users, you’ll notice that the user management menu looks different. You’ll see a list of users along with their assigned roles. If a user hasn’t been assigned a role yet, you’ll see a note saying Legacy access.
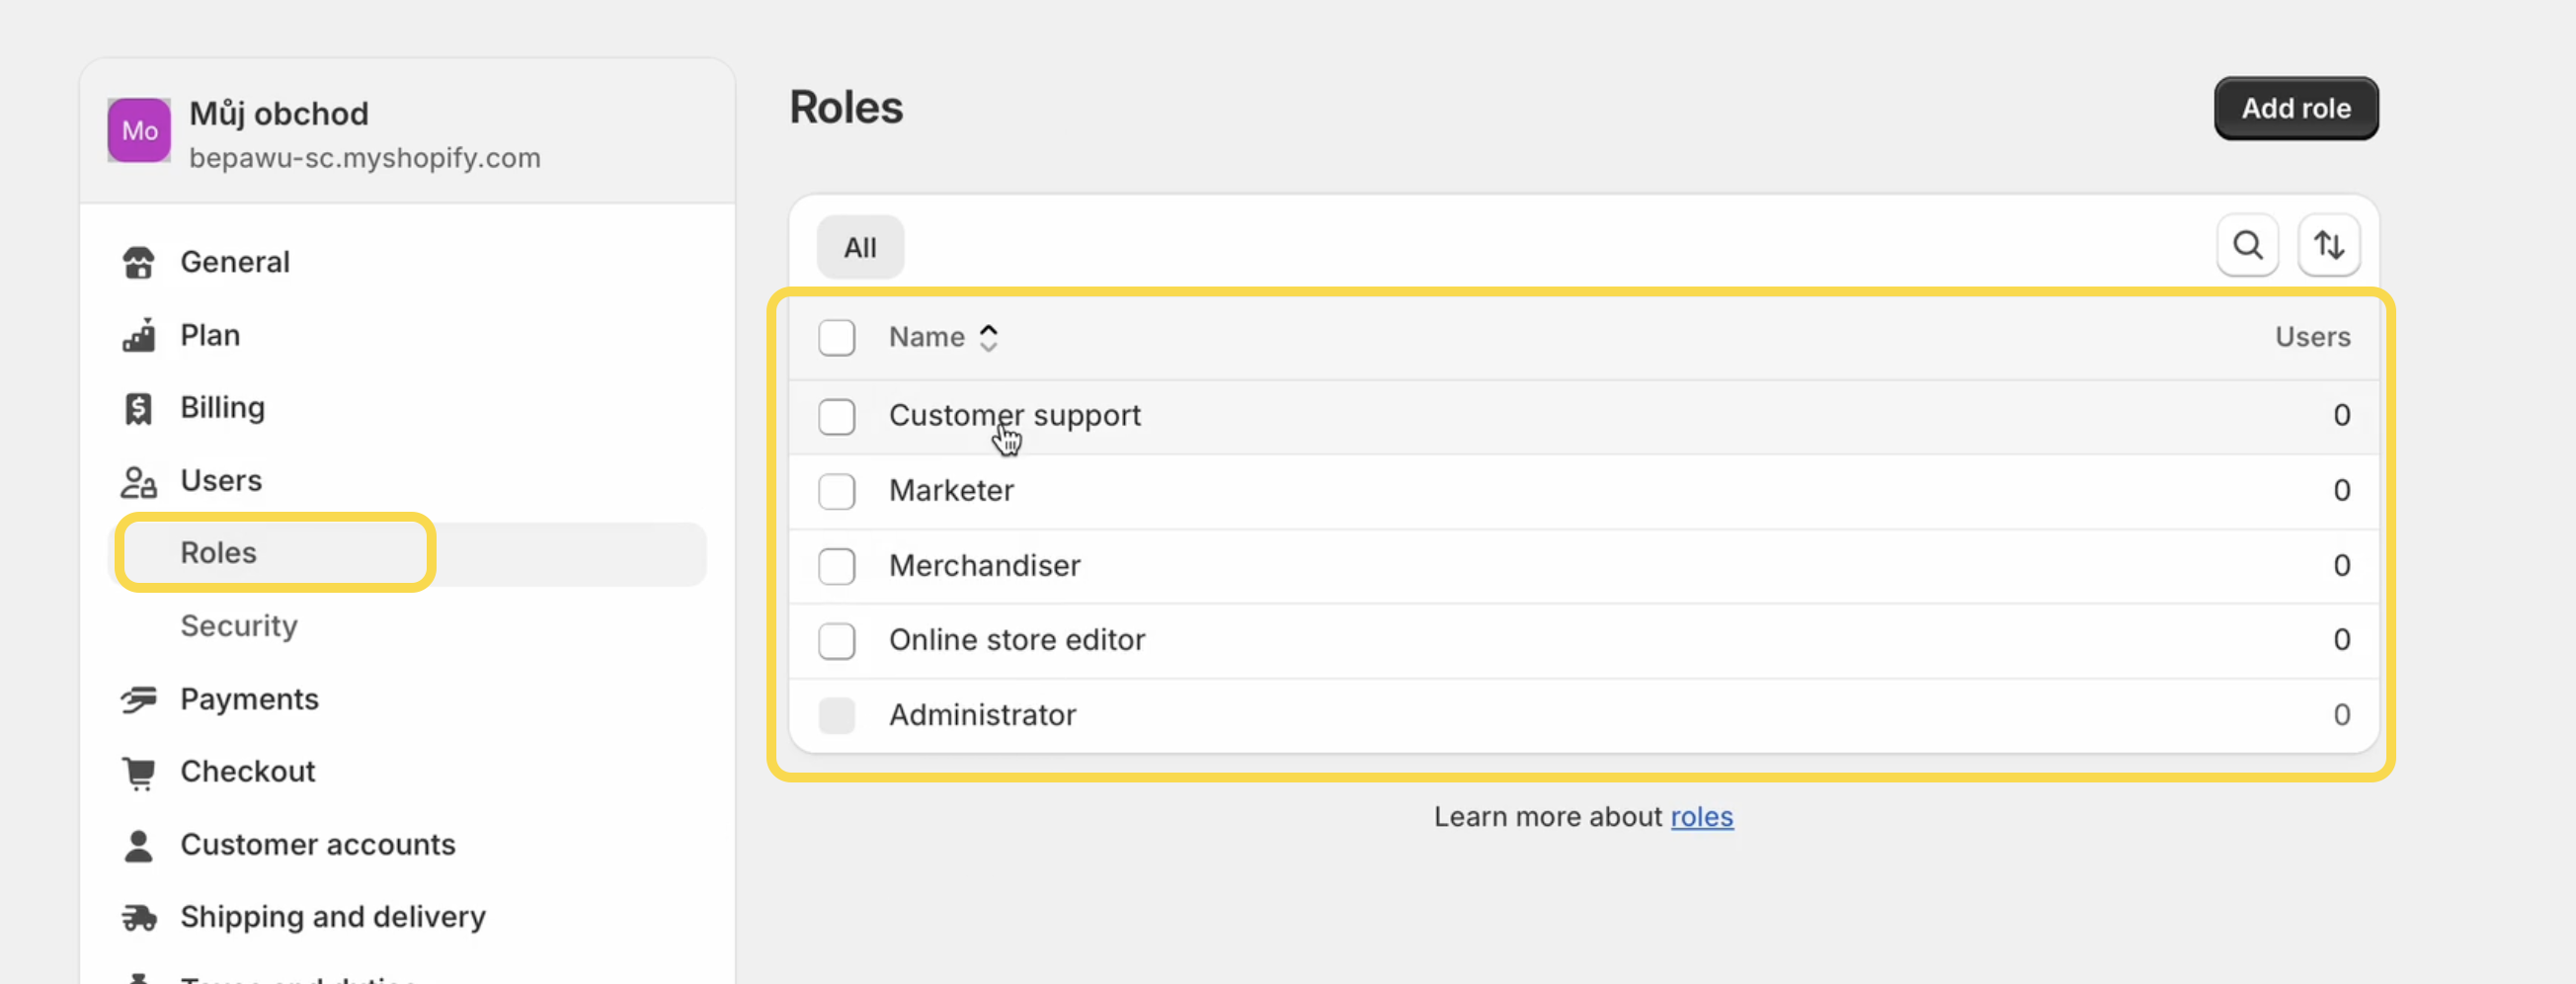
Predefined roles in Shopify
To make role management easier, Shopify provides five predefined roles with set permissions that can be quickly assigned to users. These roles are:
- Administrator: A high-trust role with full access to all features and resources, including user management. (This role cannot be assigned to collaborators.)
- Customer support: Can fulfill orders, edit order line items, and process payments and returns.
- Marketer: Can create, edit, and launch marketing campaigns.
- Merchandiser: Can create, edit, and publish products, including modifying prices and costs.
- Online store editor: Can edit and publish themes for the online store, including modifying theme code.
Migrating from legacy access
When migrating from legacy access, you have three options:
- Assign a predefined role: Choose one of the predefined roles mentioned above and keep the default permissions.
- Customize a predefined role: Select a predefined role and adjust its permissions as needed.
- Create a new role: Set up a completely new role with custom permissions.
Let’s take a closer look at each option.
1. Assign a predefined role
Here’s how to assign a predefined role to your store members:
- Go to Settings -> Users.
-
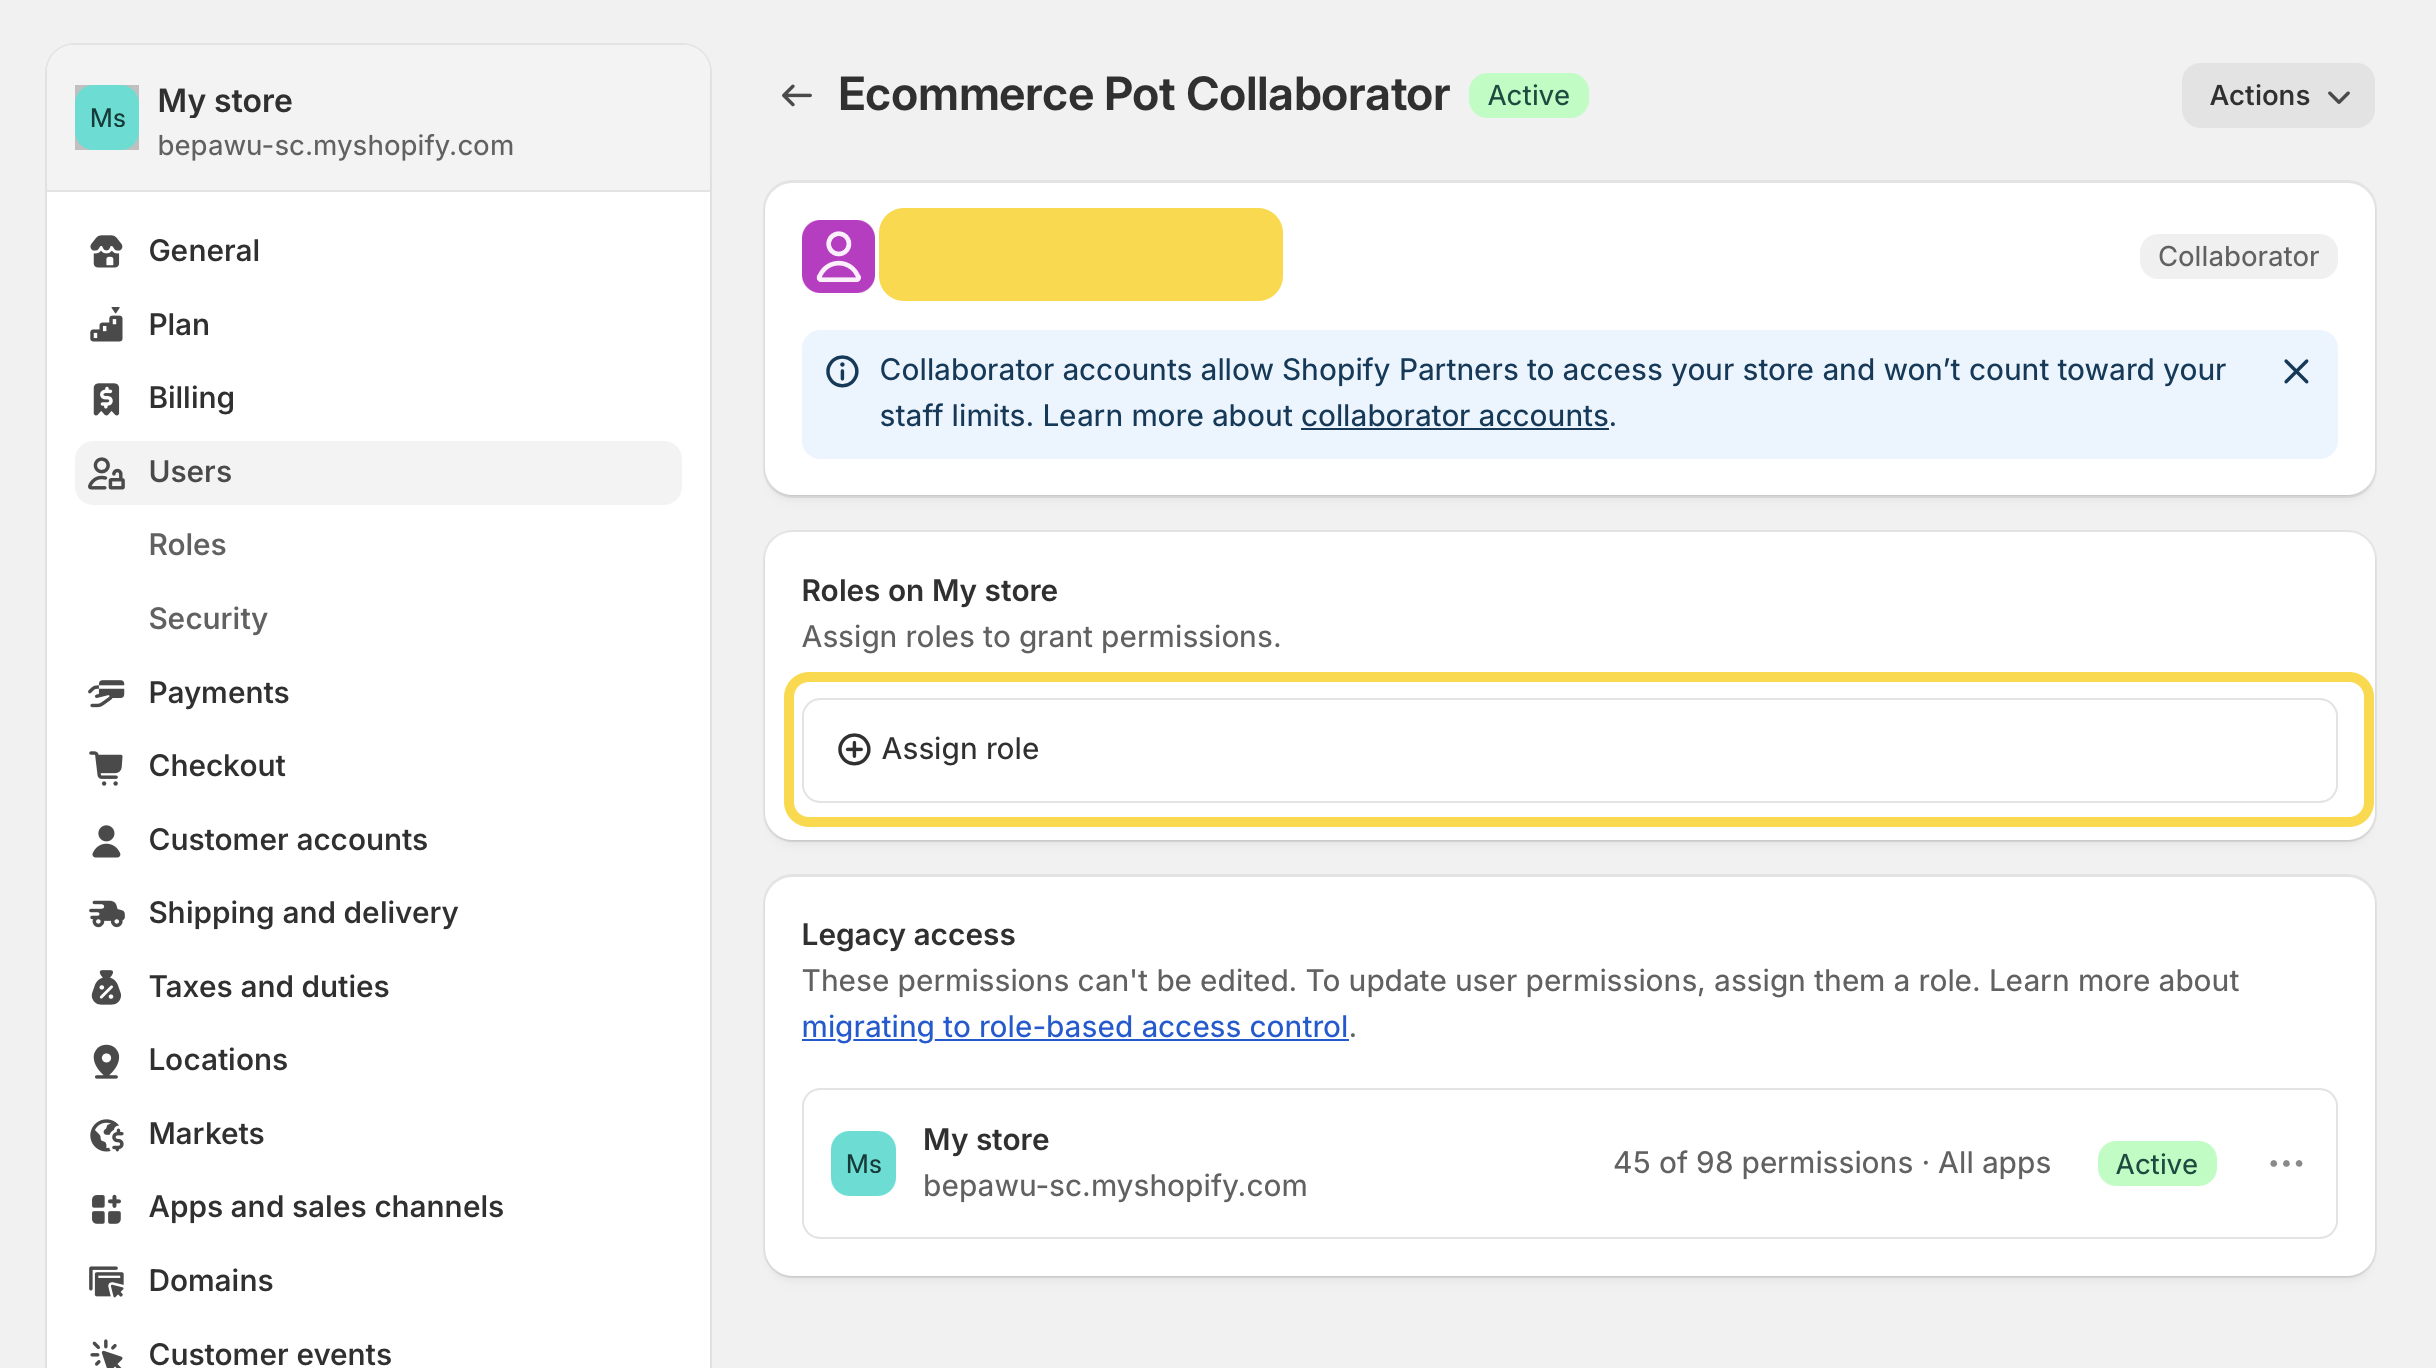
Click on the user you want to assign a role to.
-
Click the Assign role.
-
A dropdown menu will appear with the predefined roles, as shown in the screenshot below.
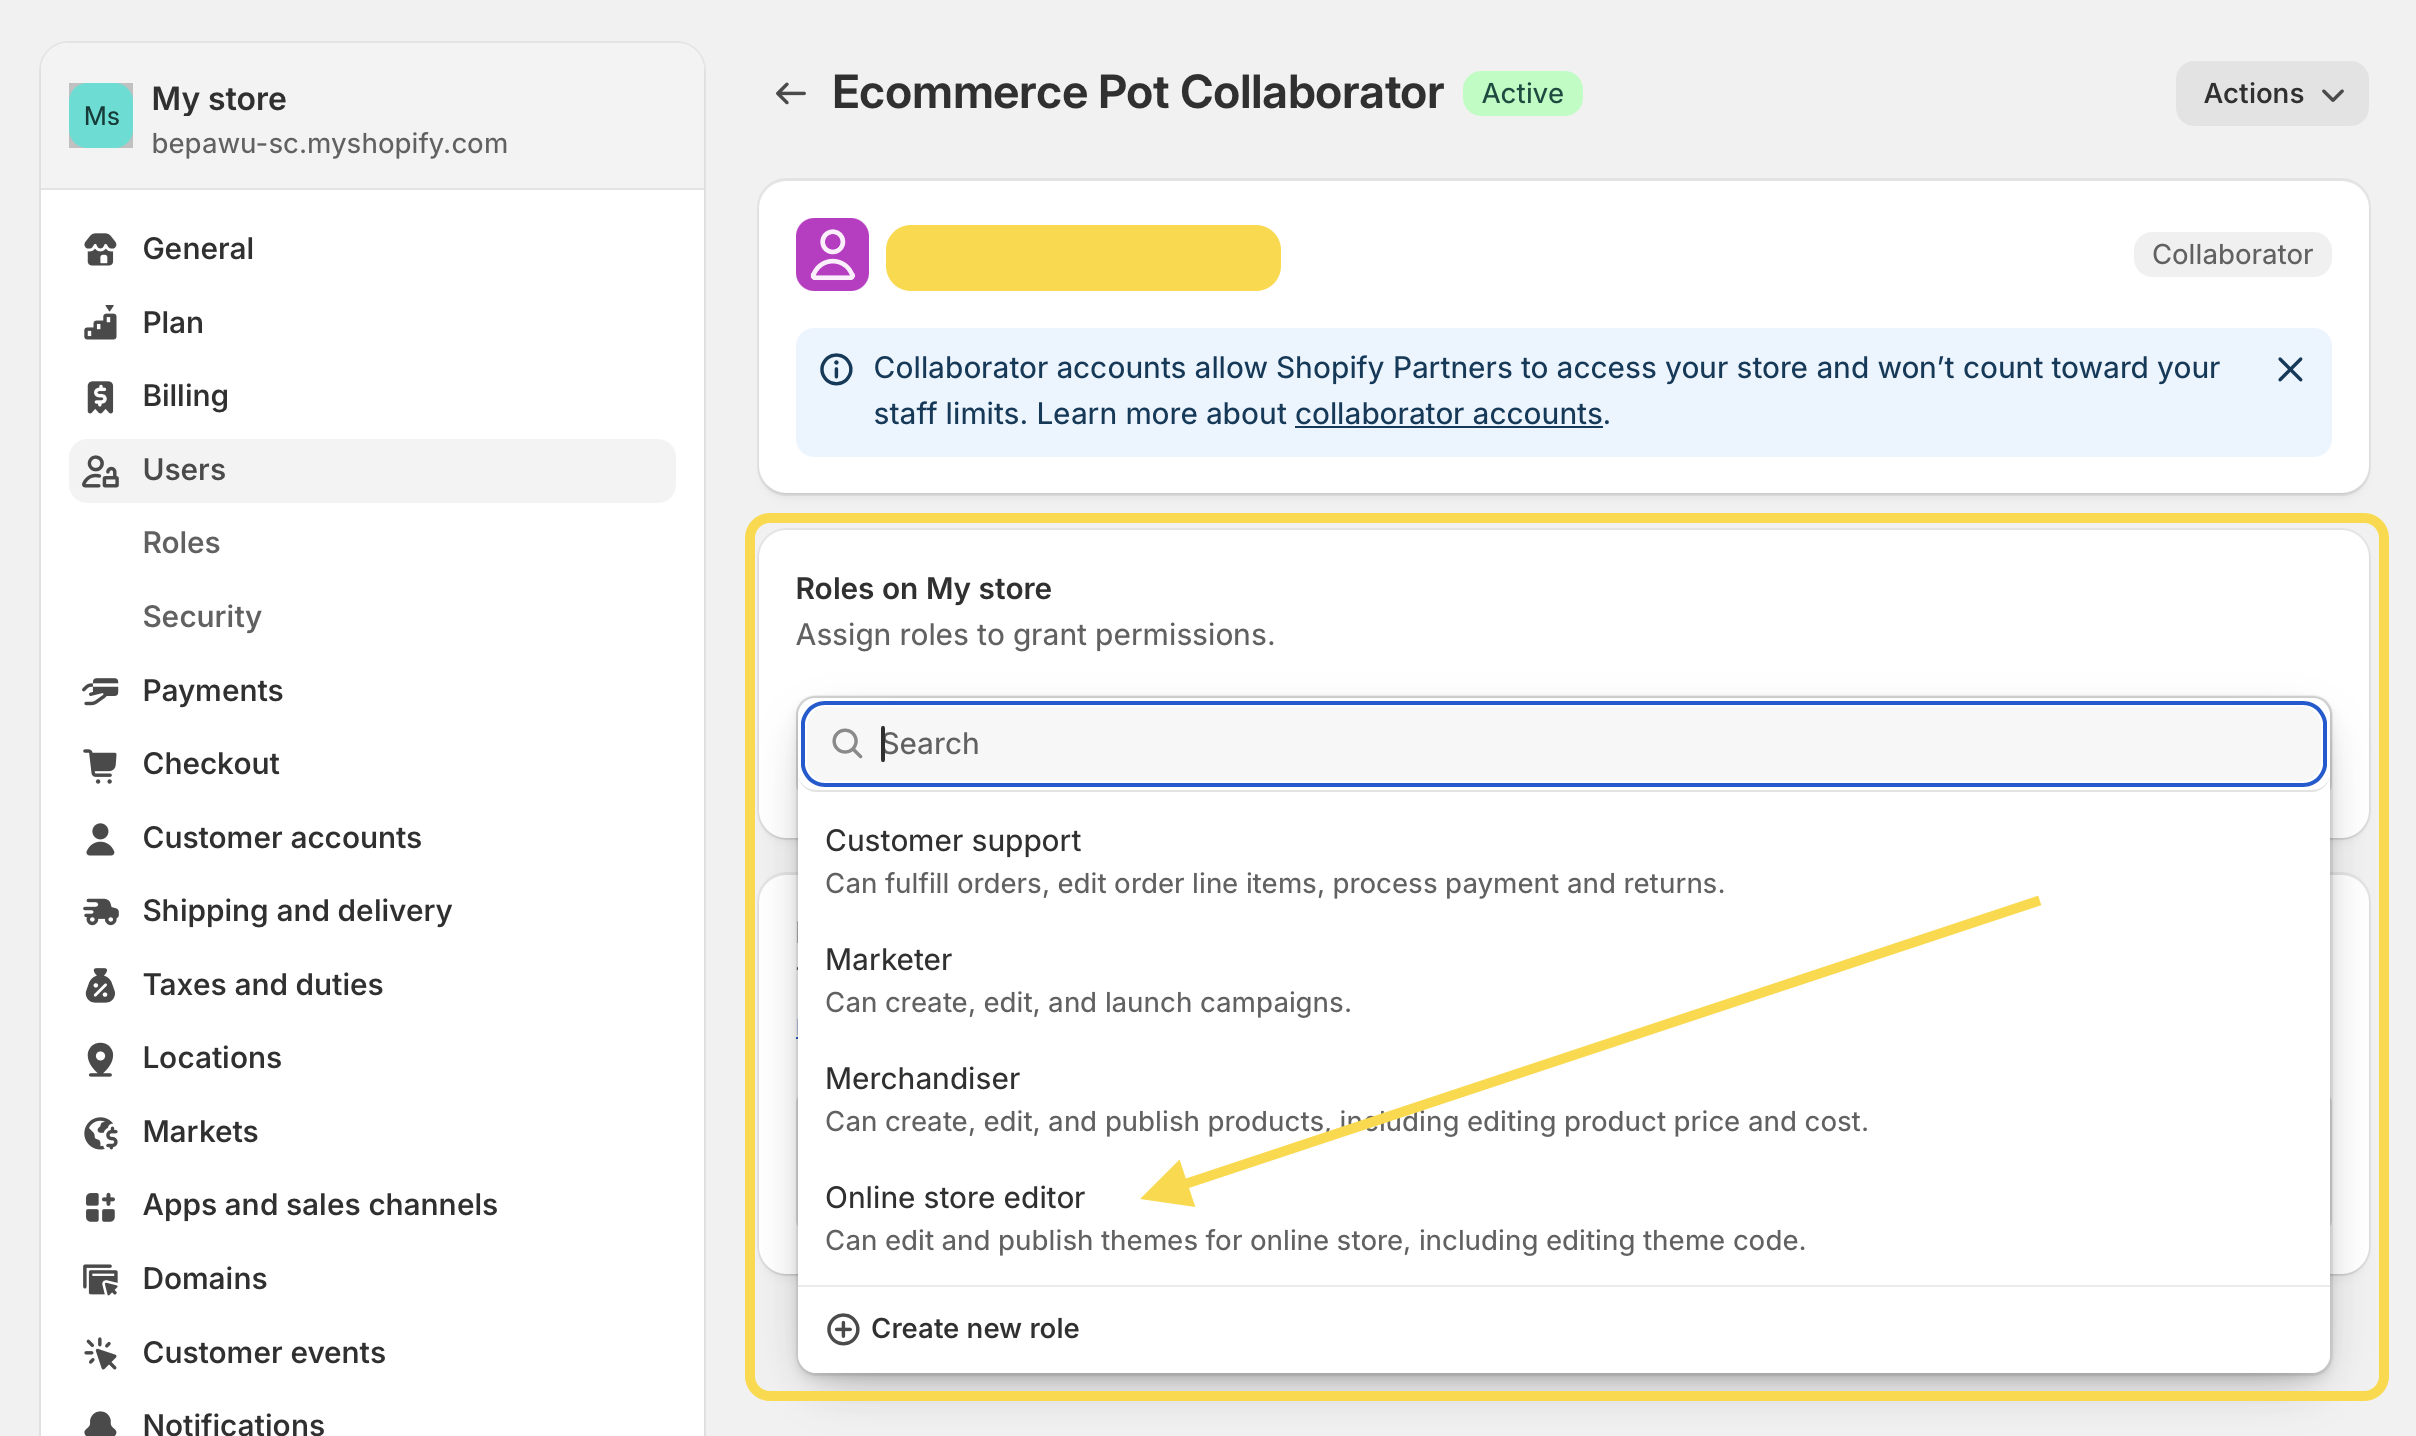
- Select the role you want to assign and save your changes. That’s it!
2. Customize a predefined role
If you want to slightly modify the permissions of a predefined role before assigning it to store members, follow these steps:
- Go to Settings -> Users -> Roles.
-
Click on one of the predefined roles. (Note: The Administrator role cannot be modified!)
-
Check or uncheck the permissions you want to add or remove. Keep in mind that any changes you make will immediately apply to all users assigned to this role.

- Once you’re done, save your changes. You can update the permissions at any time later.
3. Create a new role
If the predefined roles don’t fully meet your store’s needs, you can create a custom role, which is ideal for collaborators such as agencies or freelancers. Here’s how:
- Go to Settings -> Users.
-
Click on the user you want to assign a role to.
-
Click the three dots (as shown in the screenshot) and select Create role.
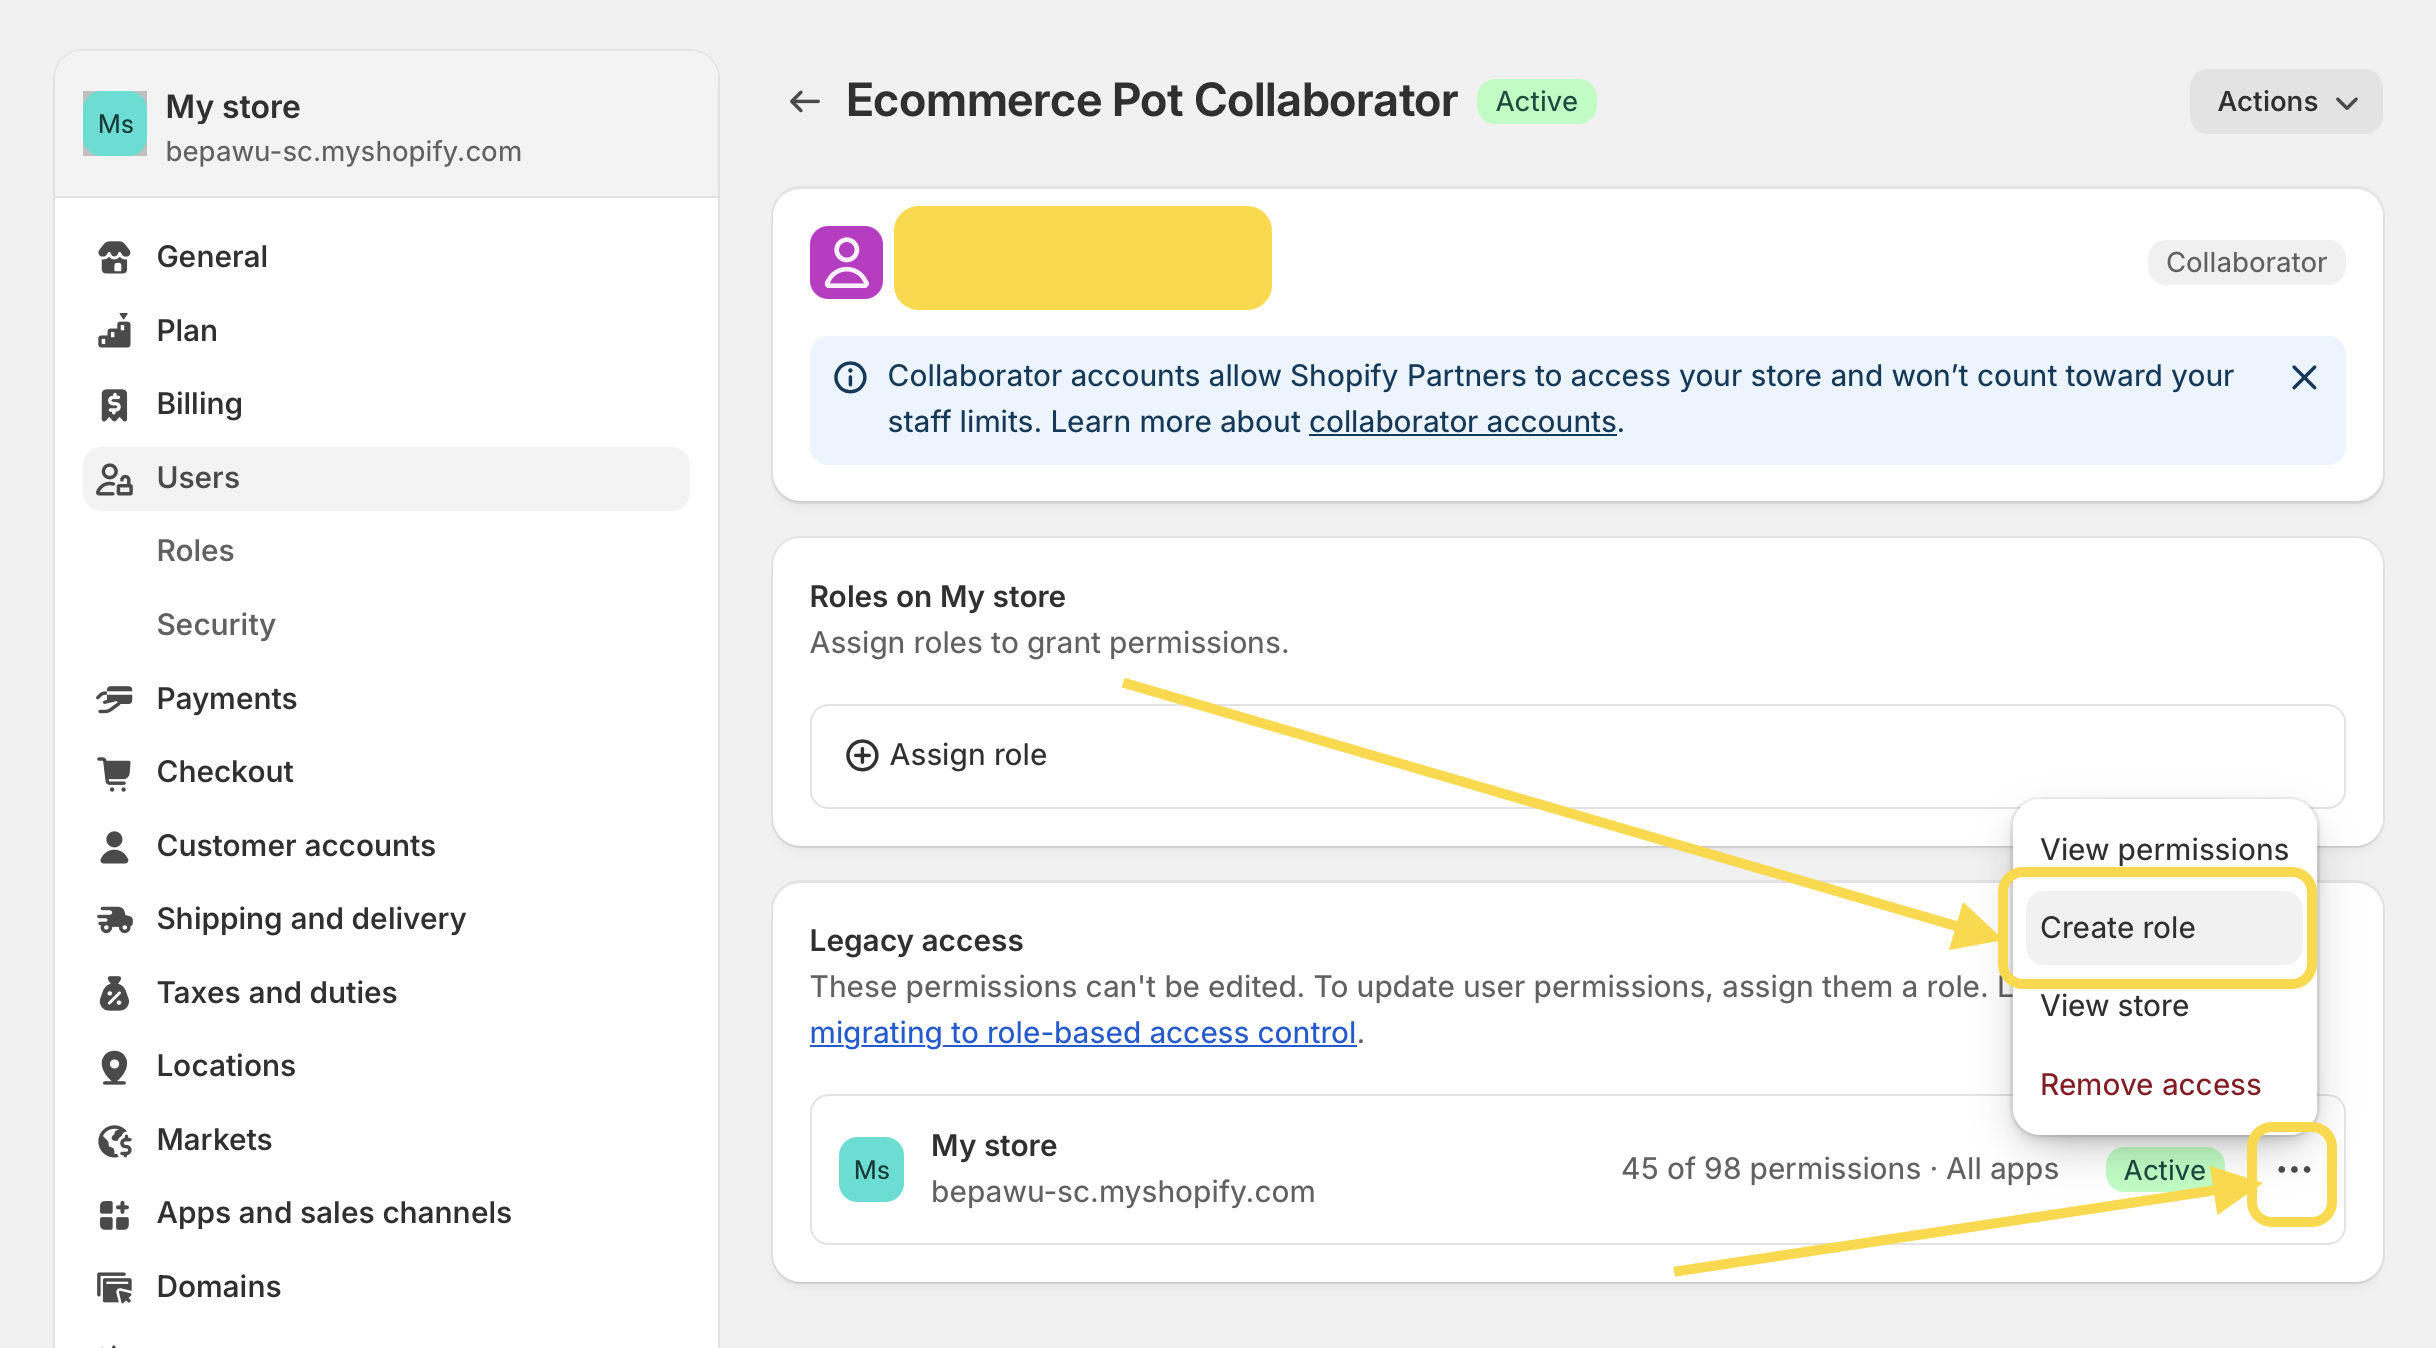
- A modal window will appear, prefilled with the permissions this user currently has under legacy access.
-
Enter a name for the new role and add an optional description. You can also add or remove permissions as needed—this can be modified later.
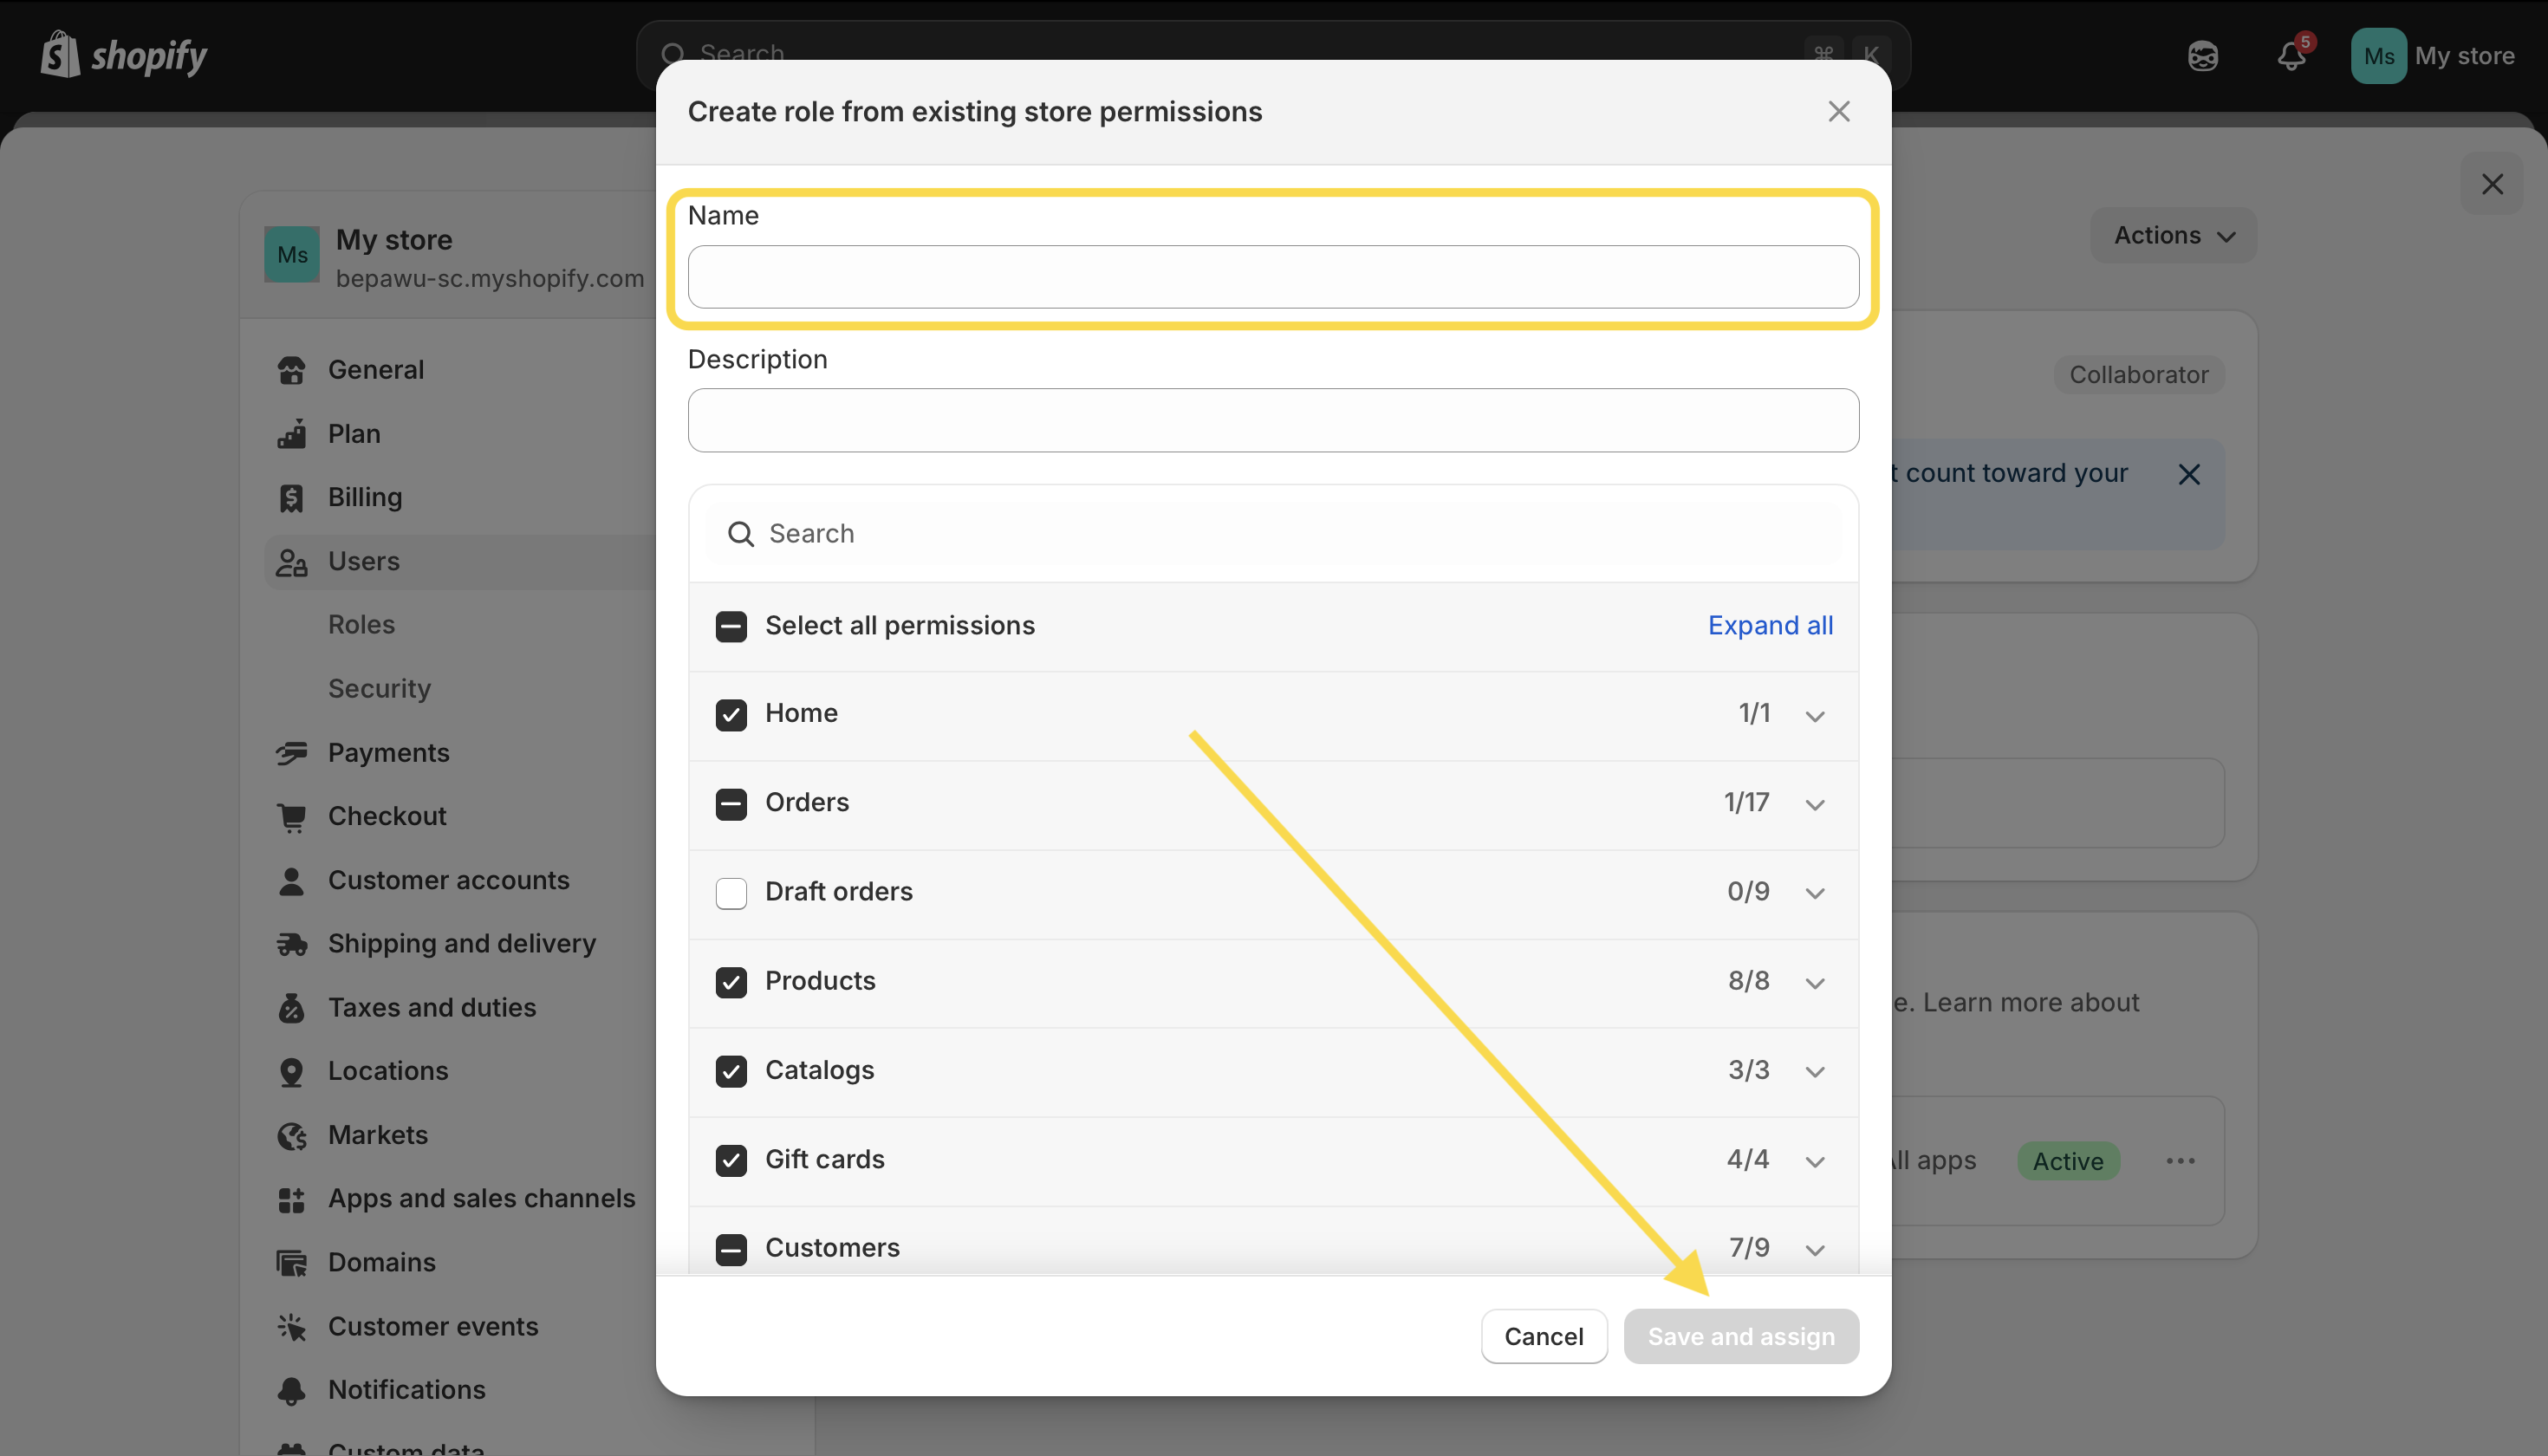
- Review the permissions and save your changes.
Note: You can also create a role first under Users → Roles and assign it to users afterward. Both methods work.
Are there any limitations or changes to legacy access?
Yes, there are some key differences in the role-based access model:
- Collaborators cannot be assigned the Administrator role, meaning they cannot manage users (e.g., approving store access for an app developer). This restriction is primarily for security reasons but may make access management less efficient for collaborators.
- If you’re a collaborator and frequently need to manage user permissions, you can ask the store owner to add you as a staff member with a different email address and assign you the Administrator role. This way, you can approve access when needed. However, keep in mind that Shopify limits the number of staff accounts (e.g., the Shopify plan allows a maximum of 5 users).
- The Administrator role cannot be modified. It must be used as is. If you need a role with similar permissions, you’ll have to create a new custom role.
When will legacy access be removed?
After May 1, 2025, all users with legacy access will be automatically assigned a single role per store. This could create many auto-generated roles, making it harder to manage user permissions.
To avoid this, we recommend migrating before this date. This will give you more control over role assignments and help keep your user management simple.
To sum up, setting up roles the right way will make your team’s work easier and more organized. If you have any issues, just let us know—we’re happy to help!