
How to set up a discount for multiple products (compare at price vs price)
If you are planning to put your products on sale, you need to correctly set up the Compare at Price and Price fields for each product (and variant). In a nutshell, you need to put the product’s original price in the Compare at Price field and the sale price (the discount price) in the Price field. This sounds like an easy task, and it is, however, if you have a dozens of products you would like to set up the discount for, now the funs starts.
Even though setting up the discount prices doesn’t call for any technical skills, it takes up a lot of time when setting it up even for 10 products. In this short guide, I’ll show you how to set up the product sale for unlimited number of products using a spreadsheat (e.g. Google Sheet).
Compare at price vs price – What is the difference?
When you upload a new product to your Shopify store, you set the price for it in the Price field. There’s also another field called Compare at Price. This field comes in handy when you want to set up a product-based discount (a discount which applies to a product). To set up the discount, you need to put the original price into the Compare at Price field. The discounted price (the new price) needs to be placed in the Price field. When you set this up and preview the product, you should see the original price crossed out (the design may vary according to the theme you use). Some themes might add a sale badge if the product-based discount is applied.
Remember:
Compare at Price = Original price (e.g. 150 EUR)
Price = Discount price (e.g. 120 EUR)
How to edit an exported CSV file?
- First of all, export all of the products from Shopify you would like to set up the discount for (use filters to filter out products in a specific collection or products which have a specific tag assigned).
- Export the products as plain CSV file.
-
Open Google Spreadsheet and import the data. As a separator type, choose Comma. This is a very important step! If you choose another separator type, you might encounter an issue when importing the file back to Shopify: Illegal quoting in line 2 and missing headers: Title. How to solve this Shopify CSV file import error?

-
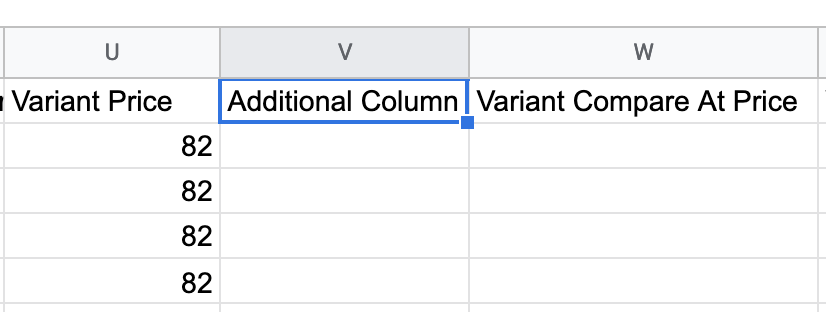
Add a new column between the Variant Price and Variant Compare at Price columns.
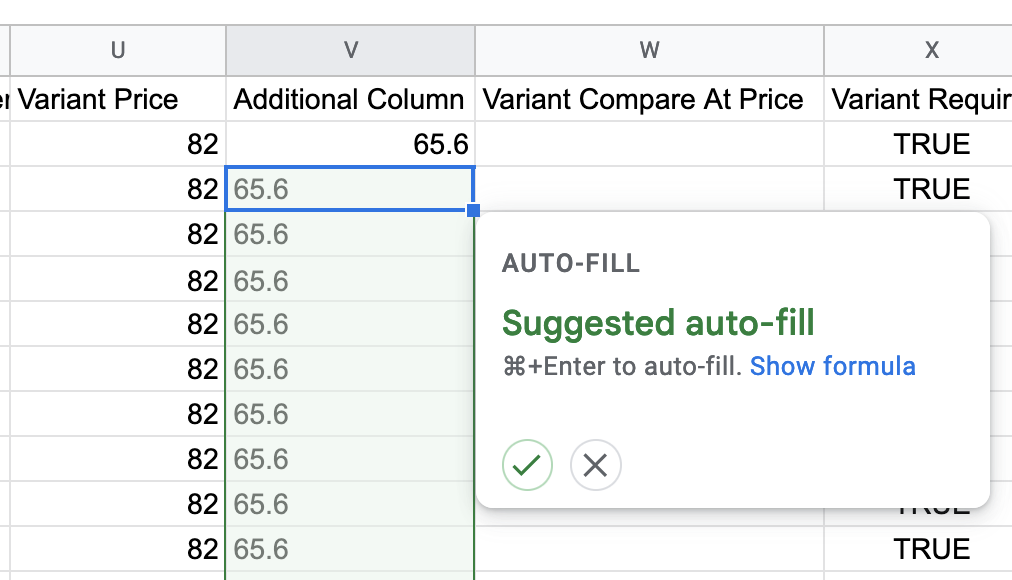
- Let’s say, we want to set up 20% off for the products. Let’s do some basic math here: Click in first (not the header) cell of the additional column and type this formula: 0.8 × first variant price cell. Press enter.
-
Google Sheets will probably ask you if you would like to apply the formula to all cells in the column. Click yes.
- Select all cells in the Variant Price column (apart from the header). A small hack: Select the first cell (not the header) in the Variant price column, press Shift+Command+down arrow – this shortcut will select all cells in the column.
- Copy the cells and insert them in the Variant Compare At Price column.
- Select all cells (apart from the header cell) in the Variant Price column and delete the values (not the column!).
- Copy the values from the additional column and paste them as values in the Variant price column.
- Delete the additional column.
- Download the file as CSV file.
- Import the file back to Shopify. Don’t forget to check off “Overwrite any current products that have the same handle”.
- When the import is finished, view one of the products with the product-based discount. The following screenshot shows how the sale is displayed on Dawn theme.

Note: When the sale is finished, you can just copy the Compare at Price column and its values and paste them to the Price column. Then, delete the values in the Compare at Price column. There is no need to add any additional columns. Or, you can just import the same CSV file you downloaded before making the discount changes back to Shopify. However, bear in mind that the inventory quantity may differ after the sales.
I hope this guide will help you set up the product-based discounts for many products without using any app. If you have any questions, feel free to reach out to me. I’ll be happy to help you.