How to display the number of products left in stock on product pages?
Adding a message on the product page saying that the stock of a certain product is low might trigger your customers’ attention and, in the end, nudge them purchase your product. This is commonly used urgency technique practised by many eshops today. If you’d like to set it up on your Shopify store as well, follow the steps below.
Here, we show a simplistic solution that doesn’t take in consideration edge cases and does not allow many customizations through Shopify Admin. As usual, we used the Dawn theme. If you are looking for a tailored, more advanced solution, please contact us.
UPDATE: Apologies for the oversight! I missed an important JS code in one of the GitHub gists. If you previously tried the code and it didn’t work, I have now corrected the issue and made the necessary updates. Please try again, and thank you for your understanding!
What you will need to set up
- Enable inventory tracking for your products.
- Add a new block to the product page (main-product.liquid file).
- Render the block on the product page (main-product.liquid file).
- Add a script that changes the inventory notice text based on the number of products left in stock (multiple files).
Enable inventory tracking
This option is selected by default when uploading a new product to Shopify. In the inventory section, you should see a checkbox “Track inventory”, which should be checked. However, make sure that inventory tracking is enabled for all products that you would like to display the quantities for. Otherwise, the inventory notice feature won’t be working.
![]()
Add a new block
To show the inventory notice on the product pages, it is necessary to create a block. As mentioned above, our solution is very simple and does not allow any customizations from the Shopify admin. However, if you want, you can of course add some settings such as a threshold when the inventory notice should show up, the inventory notice text, and else.
Render the block
We will render the inventory notice block on the product pages using the when statement. After you add the block and render it on the product page, go to Customize → Product page and add a new block. You should see “Inventory notice” block in the available block options.
Add a script
If you followed the previous steps, you can already see that the inventory notice is being rendered on the product pages. However, if your products have more variants, you’ll see that the inventory notice does not refresh when you switch product variant. That’s because the page does not reload when you choose another product variant and therefore the inventory notice remains the same! Therefore, we need to add a bit of JavaScript to this working—see the code below. (You’ll need to make changes to two files: theme.liquid and global.js.)
The result
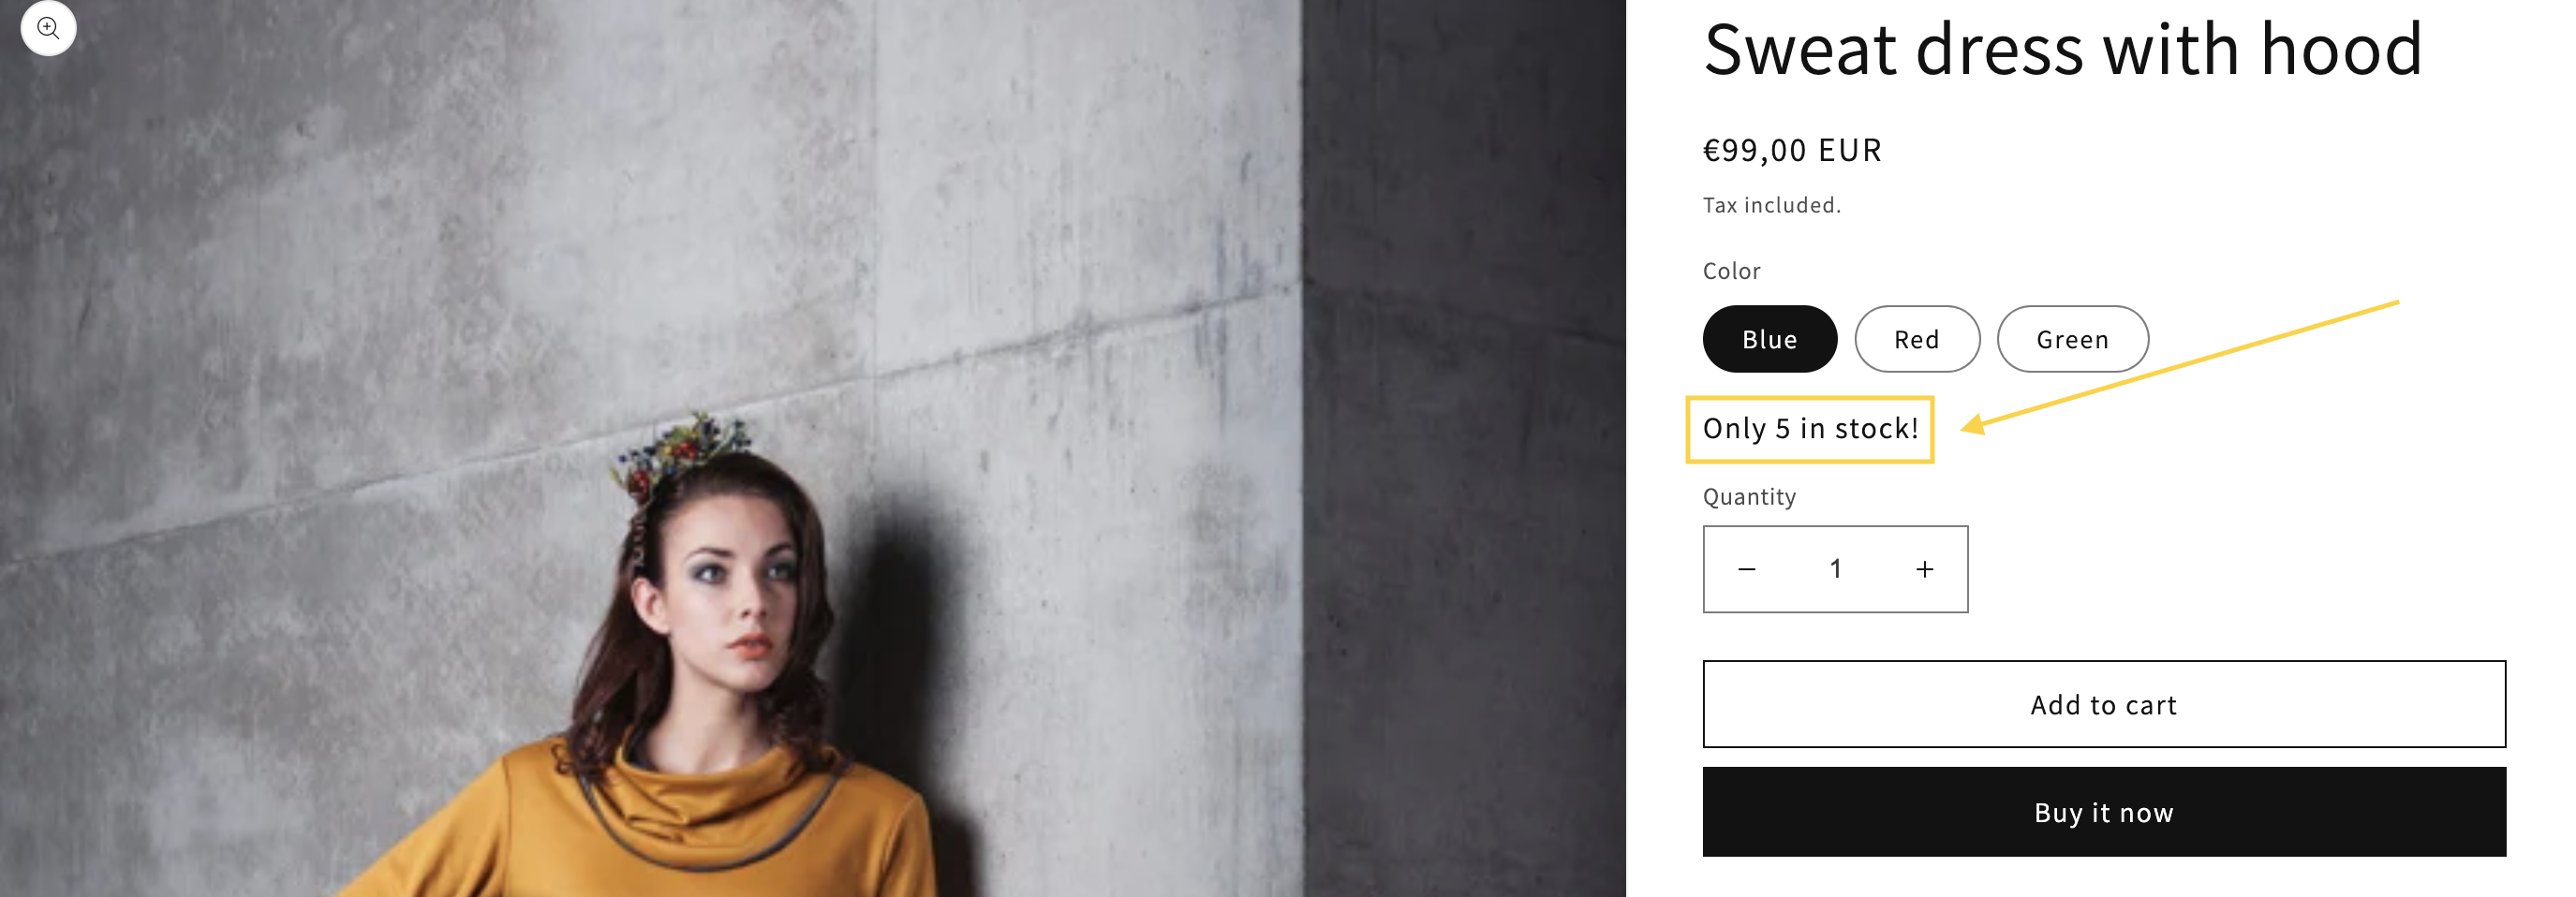
The screenshot below shows how the solution looks on product pages. Since we created it as a block, you can move the inventory notice up and down on the product page and place it where you like it. We haven’t added any custom CSS classes, just used one CSS theme class. You can customize the feature further to get a tailored solution for your store.

Great job! I hope this simple guide helped you set up the inventory notice on your Shopify store. Even though this is a rather simplistic approach which does not work for all edge cases, we hope it can serve a good start for you. If you are struggling with anything, let us know! We’ll be happy to help you out.
Interested in more quick customizations to Dawn theme?
We put together a guide on how to add a custom label (such as limited edition) to product pages, collection pages and featured collections. You might also be interested in an article on how to add a customer note on a product pages. We’re planning to write more guides (e.g. adding a size chart), so come back soon and see what’s new!
