
How to change tax settings for a specific customer?
In Shopify, you can easily adjust tax settings for individual customers — a helpful feature, especially for merchants selling within the EU. In this short guide, we’ll walk you through how to edit tax settings for a specific customer in your Shopify store.
Register the customer or let them register themselves
The key requirement for applying custom tax settings is that the customer must exist in your customer database.
You have two options:
- Let the customer create an account through your storefront by signing in with their email (new customer account) — no special registration process is required.
- Or manually create the customer in your Shopify admin.
Note: If the customer has already placed an order, they’re already in your database — no need to create them again!
How to adjust tax settings for a specific customer
Follow these steps to change a customer’s tax status:
- In your Shopify admin, go to Customers and search for the customer you want to edit. Open the customer.
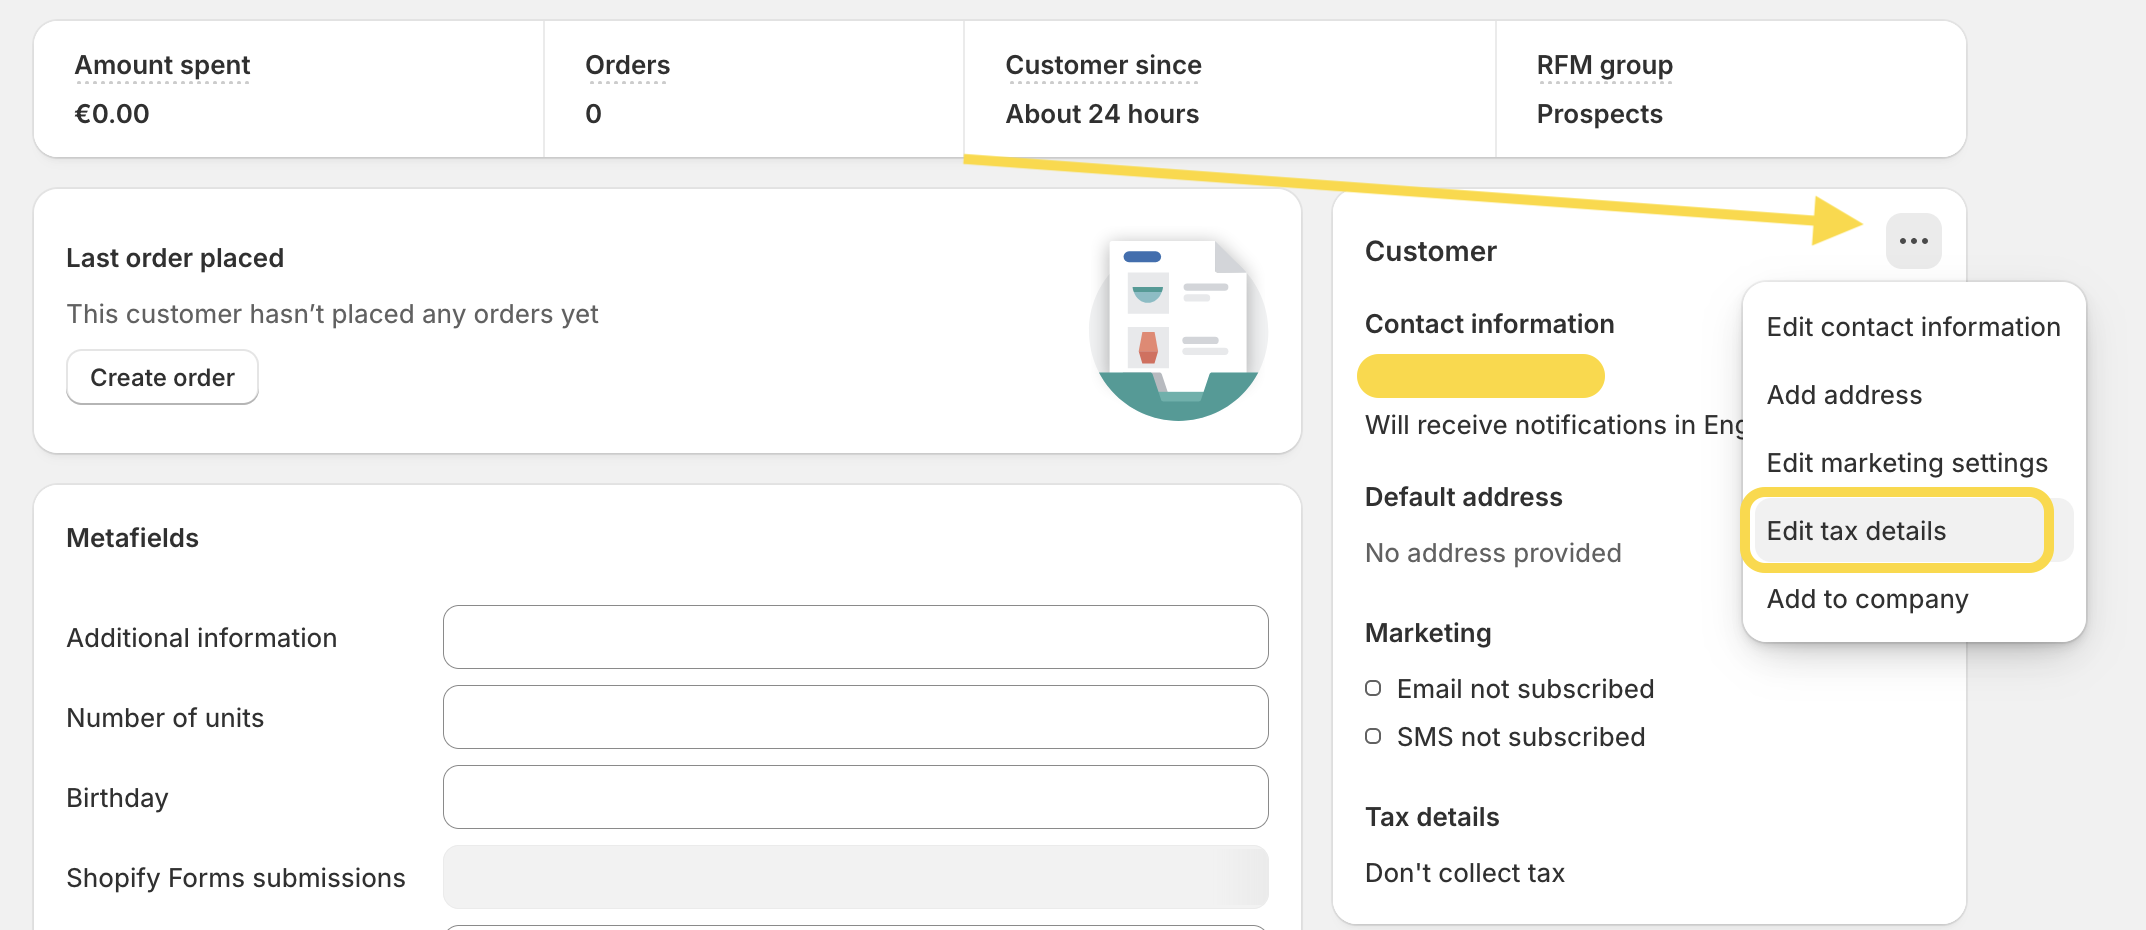
- Click the three dots on the left (as shown in the screenshot).
-
Select Edit tax details.
- A modal window will appear with a tax settings dropdown menu.
- By default, Collect tax is selected. Click the dropdown to choose another option:
- Collect tax unless exemptions apply
- Don’t collect tax
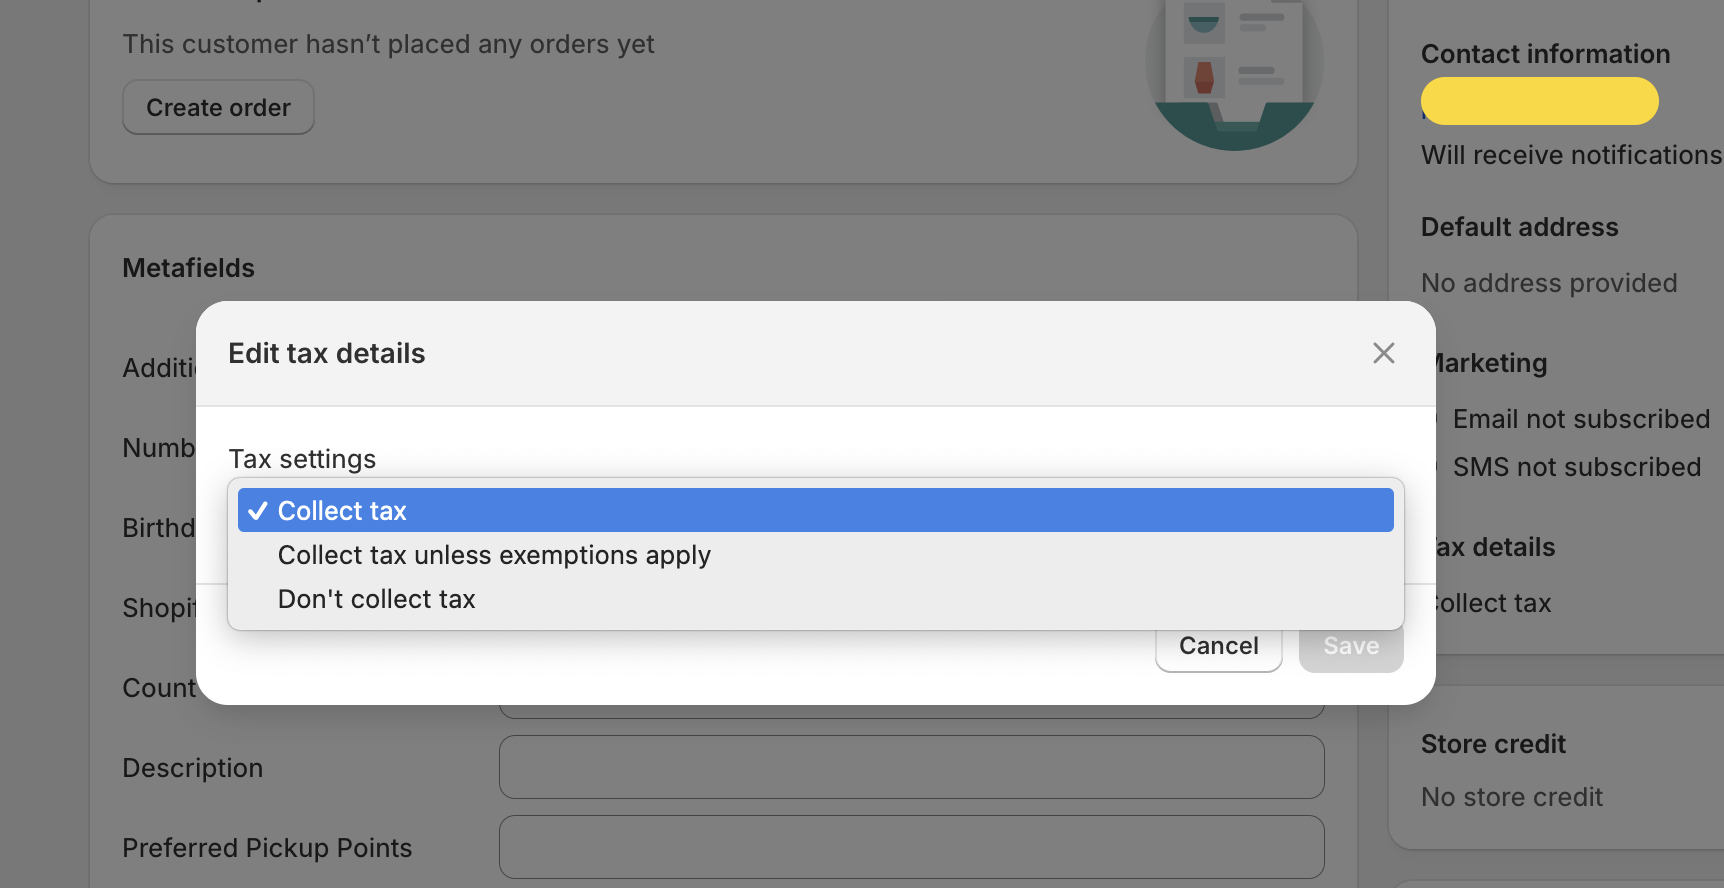
- If you don’t want to collect taxes for this customer, select Don’t collect tax.
How is this change reflected at checkout?
If you choose not to collect taxes for a specific customer, you’ll see a change in how taxes are displayed at checkout. The exact appearance may vary depending on your overall tax settings, including those for specific markets.

Please note: The customer must be logged into the store using their registered email address to see the tax set to zero. If they’re not logged in, taxes will still be displayed at checkout.