
How to add custom CSS classes to your Shopify store?
You may need to modify the design of your store by adding custom CSS classes in order to change font size, weight, margin and padding, background and text colors, and more. To do so, adding custom CSS classes is in many cases inevitable. Let’s have a look on a couple of options how to add custom CSS classes to your Shopify store.
Add custom CSS twithout editing any theme files! – NEW Winter 2023
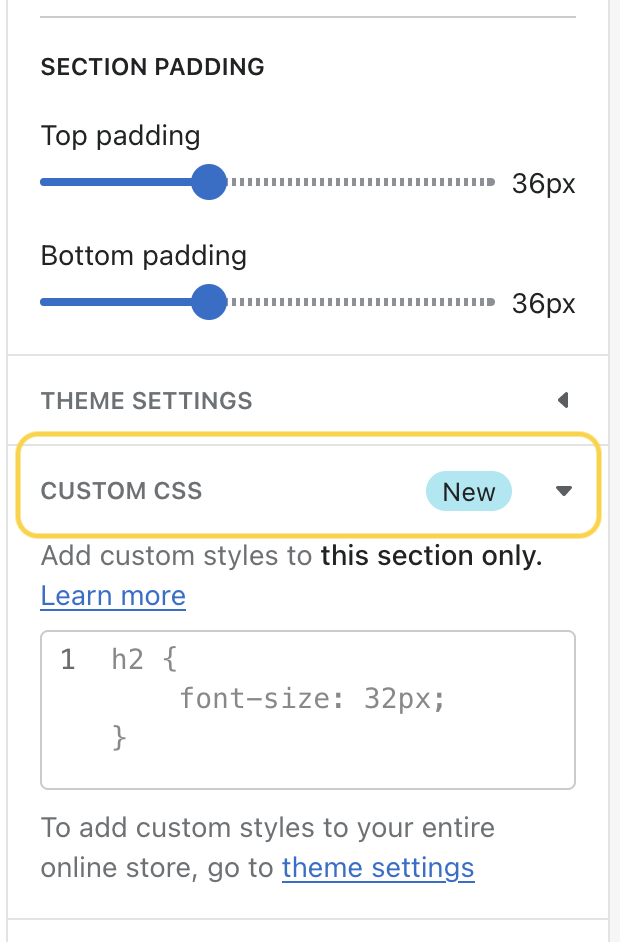
Shopify has recently introduced a new feature that allows you to add custom CSS to sections without having to edit any theme files. This feature is available through the “Customize” theme option. Here are the steps to add custom CSS to a section:
- Go to Online Store -> Themes in your Shopify dashboard.
- Find the theme you want to edit and click Customize.
- Select the section you want to edit and scroll down to the “Custom CSS” part in the section settings.
- Write your custom CSS rules that will only apply to this section and save the changes.
Edit Theme Settings (no code solution)
In some cases, especially when only slightly adjusting the design such as changing colors or typography, you don’t need to add any custom CSS classes. Depending on the theme, you may be able to make certain design changes directly from the Theme settings section. Check the settings of your theme to see what changes are possible.
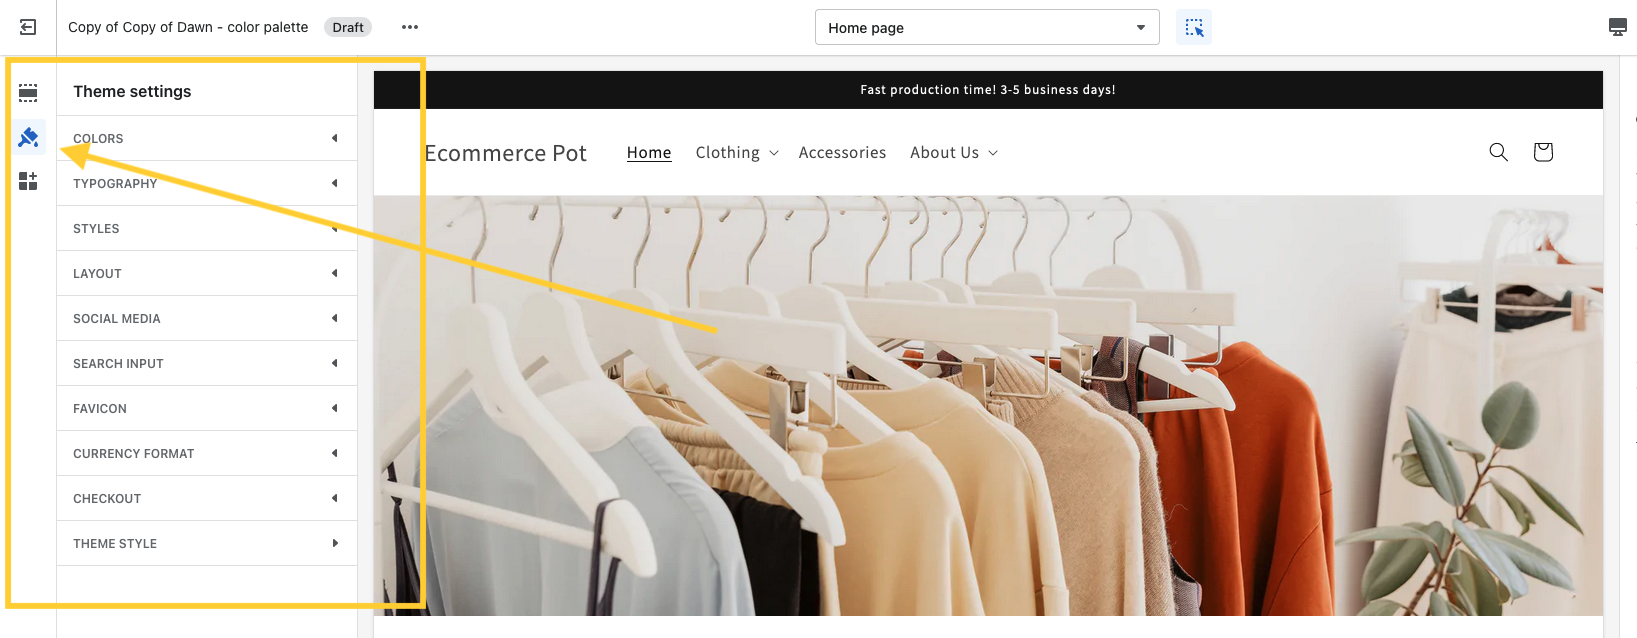
- From your Shopify admin, go to Online Store -> Themes.
- Find the theme that you want to edit, and then click Customize.
- Click Theme settings.
- In this section, what theme customizations you can do (e.g. background, text and accent colors, typography, badges style, and else).
Add custom CSS code in existing CSS files
If the theme settings don’t support the changes you need to do, you can add custom CSS classes to already existing CSS files. Some themes have several CSS files, some themes only one general CSS file (usually old theme versions).
We recommend adding custom CSS classes to existing files only if it’s a small design tweak. If your theme has multiple CSS files, it is best practice to add custom CSS classes to the most relevant file and place them at the end of the file under the ‘Custom CSS’ comment.
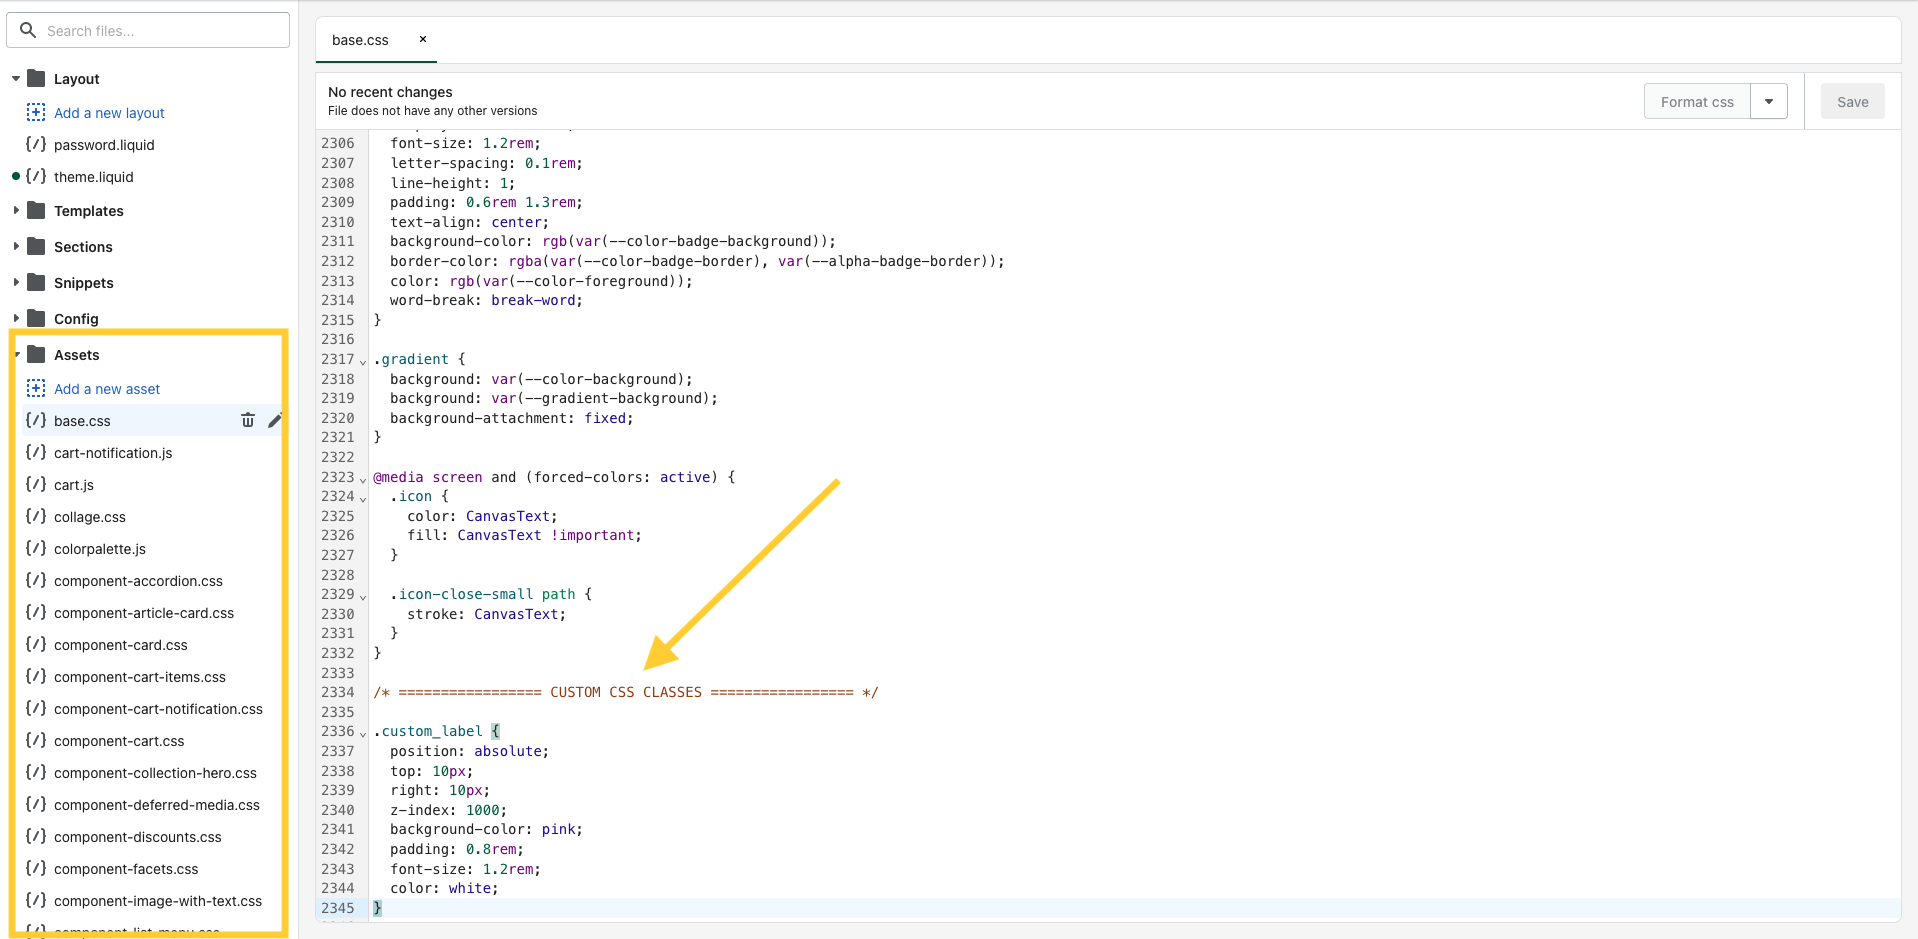
- From your Shopify admin, go to Online Store -> Themes.
- Click Actions (three dots) -> Edit code.
- Find the relevant CSS file in Assets folder.
- Click the CSS file and scroll to the bottom of the file.
- Add the custom CSS classes under the “Custom CSS classes” comment (you may need to add the comment).
- Save the file and check the changes.
Note: If you plan to add several CSS classes and make larger changes, I highly recommend using Shopify CLI and Shopify GitHub integration. Making changes in the online editor works fine but it’s less efficient and there’s a higher chance of making some unwanted mistakes. Plus, you can use your localhost to see the changes on a development theme version before pushing them to the production.
Create a new CSS file
If you plan to add a new section or make significant layout changes, it is recommended to create a separate CSS file and link it to the relevant liquid file (you will probably create a new liquid file as well) or the main theme.liquid file. Don’t forget to import the newly created CSS file in the relevant liquid file or with the main theme.liquid file.
- From your Shopify admin, go to Online Store -> Themes.
- Click Actions (three dots) -> Edit code.
- In Assets folder, click “Add a new asset”.
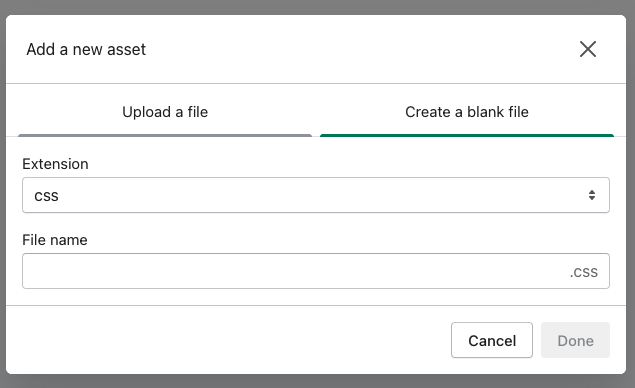
- Create a blank file, use the CSS extension and name the file (e.g. inventory-notice.css)
- Add the custom CSS classes in this file.
-
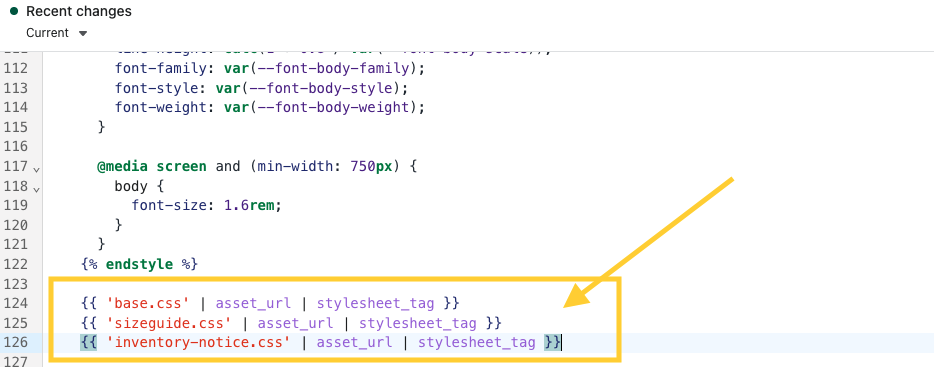
Go to the corresponding liquid file (or the main theme.liquid file) and import the CSS file as follows. Copy the following piece of code, change the CSS file name and paste in the corresponding liquid file (see the screenshot below).
{{ 'inventory-notice.css' | asset_url | stylesheet_tag }}
Use third-party apps
The last option on how to add custom CSS code to your Shopify store is to install an app, which can do that. In many cases the apps don’t modify the code in the backend. In other words, you can update the current theme as you wish but the CSS classes added through the app will prevail.
Although there are several apps that can help you add custom CSS code, it is generally not recommended to use them because they can slow down the speed of your store. Additionally, when making larger design changes, it is better to use Shopify CLI and Shopify GitHub integration to keep track of versions and make it easier to revert back to previous versions if necessary.
Adding custom CSS code to your store enables you to tweak the design and layout. Be careful how you add and use the custom code so that you don’t break existing code that works. If you struggle with adding custom CSS, let us know. We’ll be happy to help you out.