
7 tips on customizing the checkout page on Shopify
In general, if you’re not on Shopify Plus, customizing the checkout page has some limitations due to security reasons. You are allowed to edit the style such as changing the color of the form fields, uploading a background image, adding a logo, changing the font, and similarly.
However, no further changes (as in case of e.g. product pages – such as adding a custom block), aren’t possible. On the other hand, even these small style changes can make a magic and turn your store’s checkout page into a nicer and smoother checkout experience matching your business style and spirit.
Less is more. Don’t overcomplicate the design.
It’s very tempting to upload a background image, add a logo and make a couple of style (font, typography) changes. However, keep in mind that it’s best to keep the design of this page simple. Your customers are about to order your products and therefore we don’t recommend to distract their attention by an overcomplicated page layout. Keep it simple so that they can concentrate on the most important things: entering shipping and payment information.
What can you customize?
We put together a list of things you can tweak on your checkout page with a short description on how to do it.
1. Add your business Logo
By default, Shopify displays the business name on the checkout page. However, you can display your business logo instead, which we highly recommend. It looks more professional and trustworthy.
- Go to Settings -> Checkout and Accounts.
- In the Style section, click Customize checkout to open the theme editor.
- In the Logo section, click Upload image (or select an image that you have already uploaded to your library).
- Select a position for the logo (left, right, center) and a size for the logo.
- Save your changes.
![]()
2. Upload a background image to the banner
If using a background image for the banner, it’s recommended to use 1000 x 400px image. Make sure the background image looks good on both mobile and desktop screens!
- Go to Checkout style settings.
- In the Banner section, click upload image.
- Choose an image and save your changes.
3. Add a background image or color to the main content area
Be very careful when using a background image or color in the main content area. If you use strong color or eye-catching pictures, your customers will be distracted and might not complete the checkout! The white background is very simple and we recommend using it. However, if you want to use some colors in the main content area, we recommend light colors or subtle images.
- Go to Checkout style settings.
- In the Main content area section (background image), click upload image or choose a color using the color picker.
- Review your changes and save them.
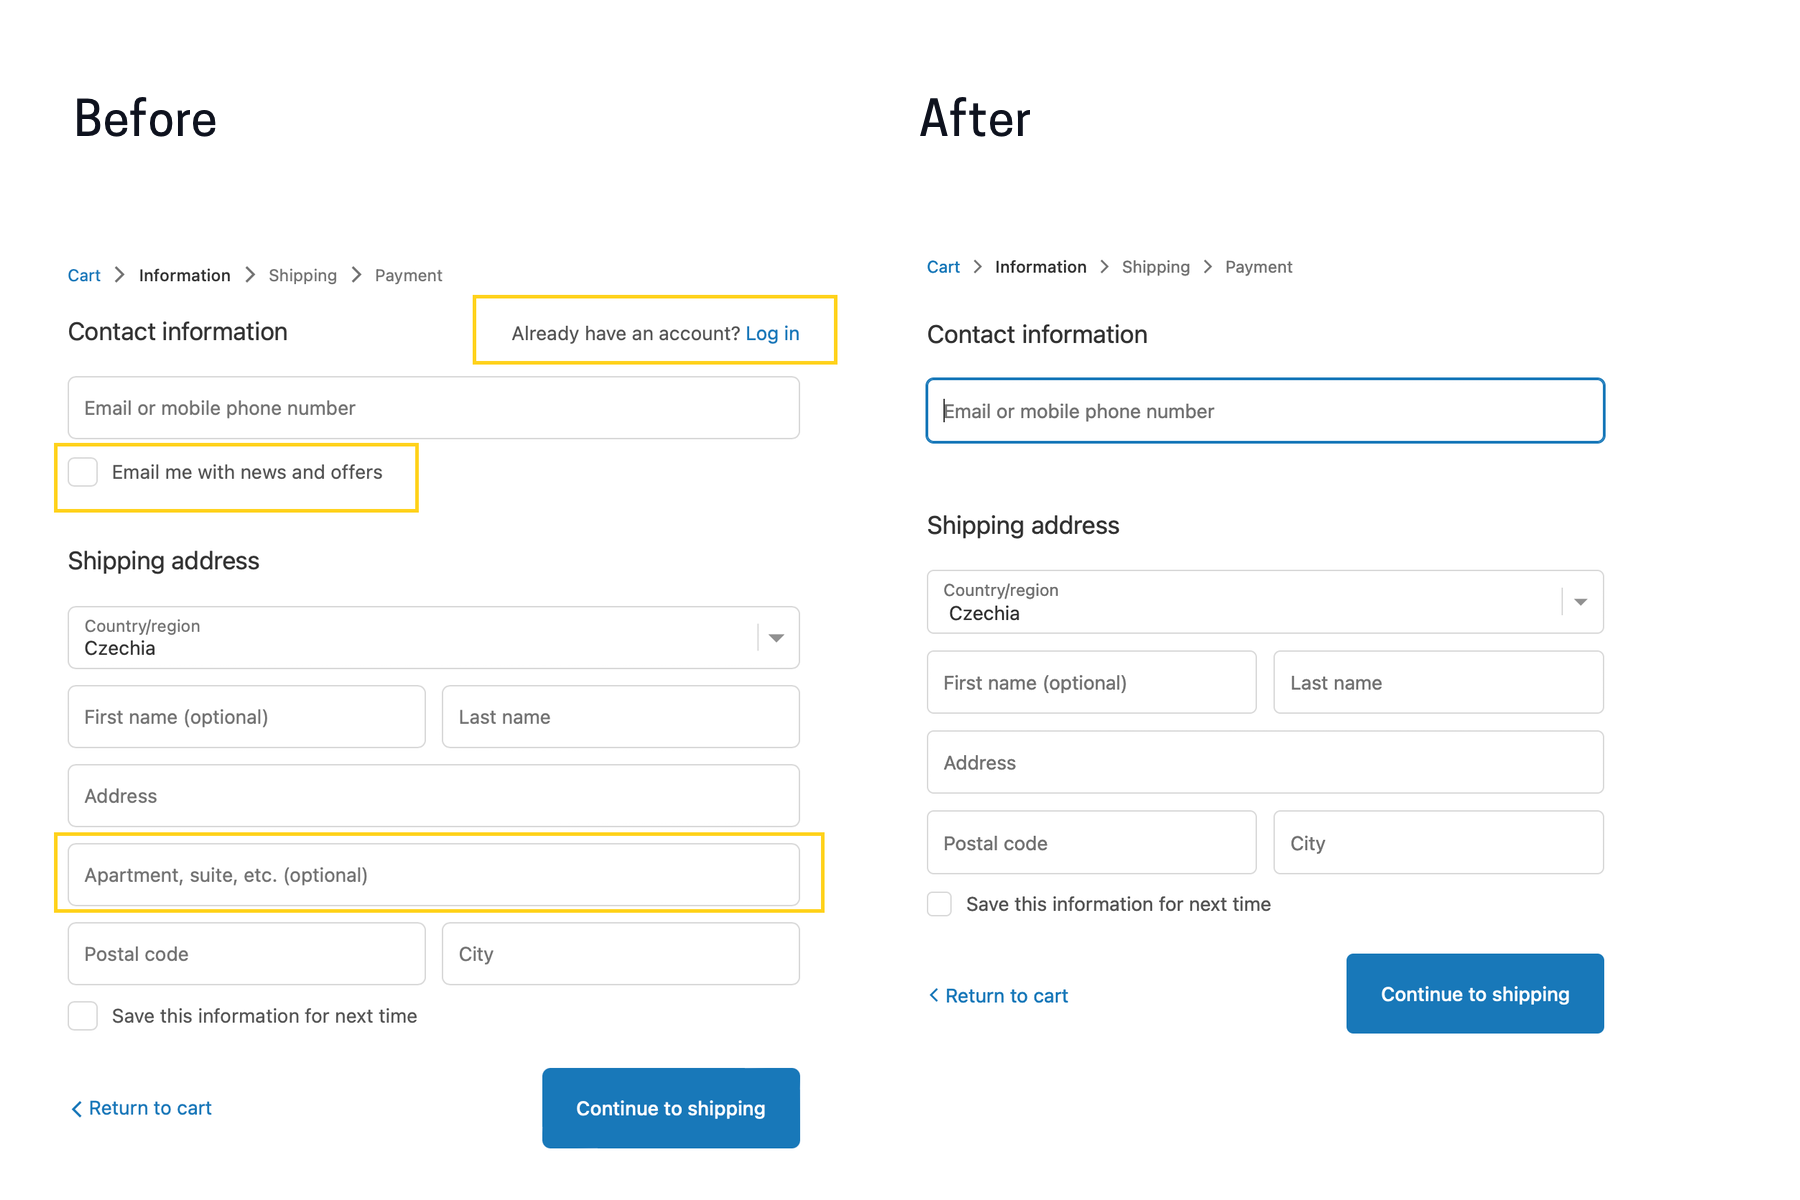
4. Reduce the number of fields (and information on the checkout page)
Simplifying the checkout form (and page) will make it easier for your customers to complete the order. We recommend removing the following fields (if not 100% needed).
- Second address line
- Checkbox for subscribing to news
- Asking your customers to log in (if they don’t have an account)
- Making the first name optional (not required)
- Go to Settings -> Checkout and Accounts.
- In the specific areas (such as Customer account settings or Customer information), change the options and save them.
- Review the checkout page and make further changes, if needed.
Note: By removing these fields and information, the checkout page height gets smaller. This means that the checkout page button gets higher on the page, which becomes more visible for your customers!
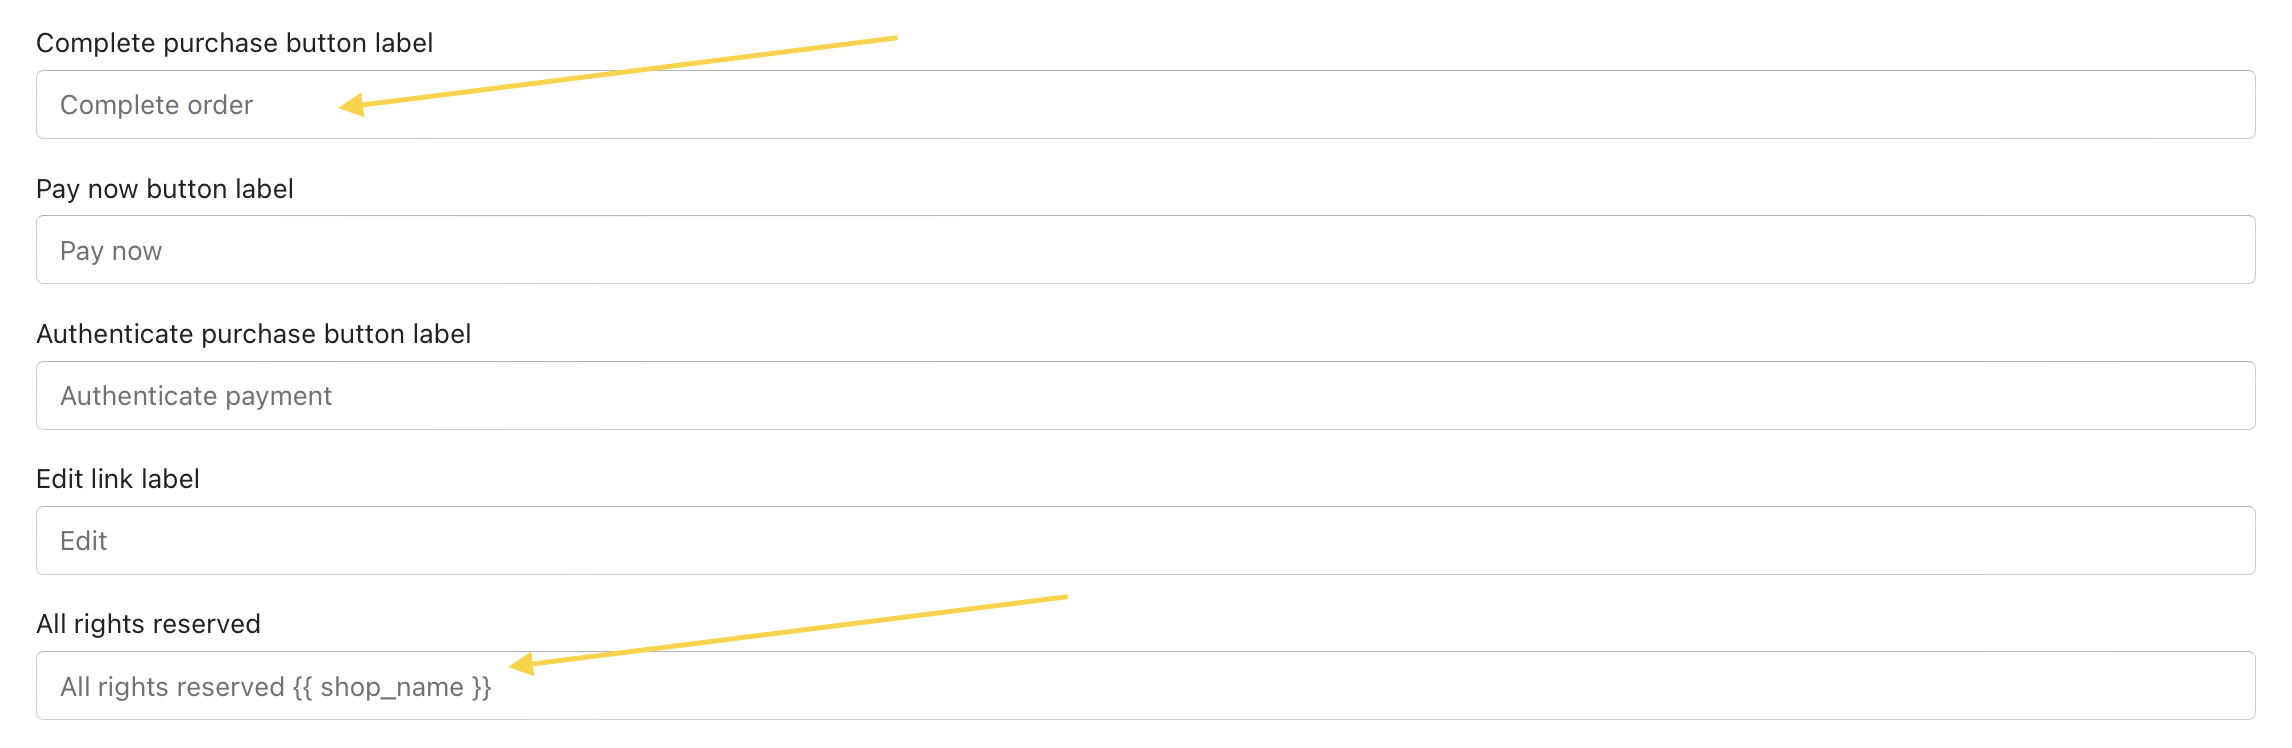
5. Customize content on the checkout page
You can change some content, e.g. button CTAs, so that they match your brand voice. Don’t forget to keep the text simple and actionable.
- Go to Online Store -> Themes.
- Click the dropdown menu Actions (three dots) and select Edit languages.
- In the top navigation, choose Checkout & system.
- A list of fields, which you can customize will show up.
- Fill in your content and save the changes.
6. Change the colors and typography
You can update the typography (headings font and body font) as well as colors for accents, buttons and errors. If you want to do so, be careful with using other colors than the recommended ones. To give you an example, red color evokes errors and prompt website users to cancel something, so don’t use this color for the checkout button.
- To make these changes, go to Checkout style settings.
- Scroll down and in the Typography and Colors sections, make your changes.
- Review the changes and save them.
7. Add more features by installing apps
You can further customize the checkout page by installing apps to your store. E.g. you can offer carbon neutral shipping or upsells and cross-sales. Additionally, you can of course offer free shipping, which can work as an incentive for your customers to complete the order.
We hope that these small tweaks will help you enhance your checkout page! If there is anything else you would like to change on your checkout page, let us know. We’ll be happy to help you out.